How to Scramble Mount Jimmy Simpson in Banff National Park

I’d been eyeing Mount Jimmy Simpson for a while now, so after a failed attempt at parking at Moraine Lake to summit Mount Temple, we decided to drive up the Icefields Parkway towards Bow Lake. Equipped with our hiking gear and scrambling gloves, we figured it was finally time to conquer Jimmy Simpson.
It’s not a well-trafficked objective, but I feel like if more people knew what the views would be like, it definitely would be. Here’s all you need to know about scrambling up Mount Jimmy Simpson on the Icefields Parkway, one of the best scrambles in Banff National Park.

Scrambling Mount Jimmy Simpson
Mount Jimmy Simpson Key Stats
- Length: 16.2 km
- Duration: 5 – 9 hours
- Elevation Gain: 1125 meters
- Difficulty: Hard because of length and elevation. Easy scrambling
- Scrambling Involved? A few easy scrambling sections. Helmet is not necessary unless there are other parties above you.
- Best Time To Go: July – September.
- Parking: The Lodge at Bow Lake
Mount Jimmy Simpson GPX Tracks

Mount Jimmy Simpson Route

We checked out Kane’s book and were surprised to see Jimmy Simpson not listed. But after reading a bit on Bob Spirko, plus a few AllTrails reviews we were confident it was an easy/moderate scramble.
There’s little information on Mount Jimmy Simpson, so I was fairly certain we wouldn’t see many others on the trail. On a beautiful Friday afternoon in August, we only saw three other people. The summit register suggests Jimmy Simpson only sees a few ascents (if that) a day.


Start at the Lodge at Bow Lake and make your round around Bow Lake towards Bow Glacier Falls. Once you lay eyes on the Falls continue on, around the 4 km mark you’ll break off from the well-beaten path and hang to your right towards the headwall. If you keep your eye open, you’ll see a few cairns marking the way. Follow those through the treeline. At about 4.4 km, look up and see what you have to climb. A steep dirt path lay ahead of you – follow this skirting the ledge. The route goes above the trees and keeps you on the ridge for some time.
If you’re on the right path, you’ll be walking a fairly narrow ridge (but not too narrow), there are a few steps you’ll have to take and use your hands, though I was actually surprised by how little scrambling there was along this ridge. We noticed there were some tracks below us in the trees, which meant previous parties may have gotten off track. If you want to abandon all scrambling, going through the trees is a possibility, though you’ll be trading out easy scrambling for bushwacking, which I would not recommend.


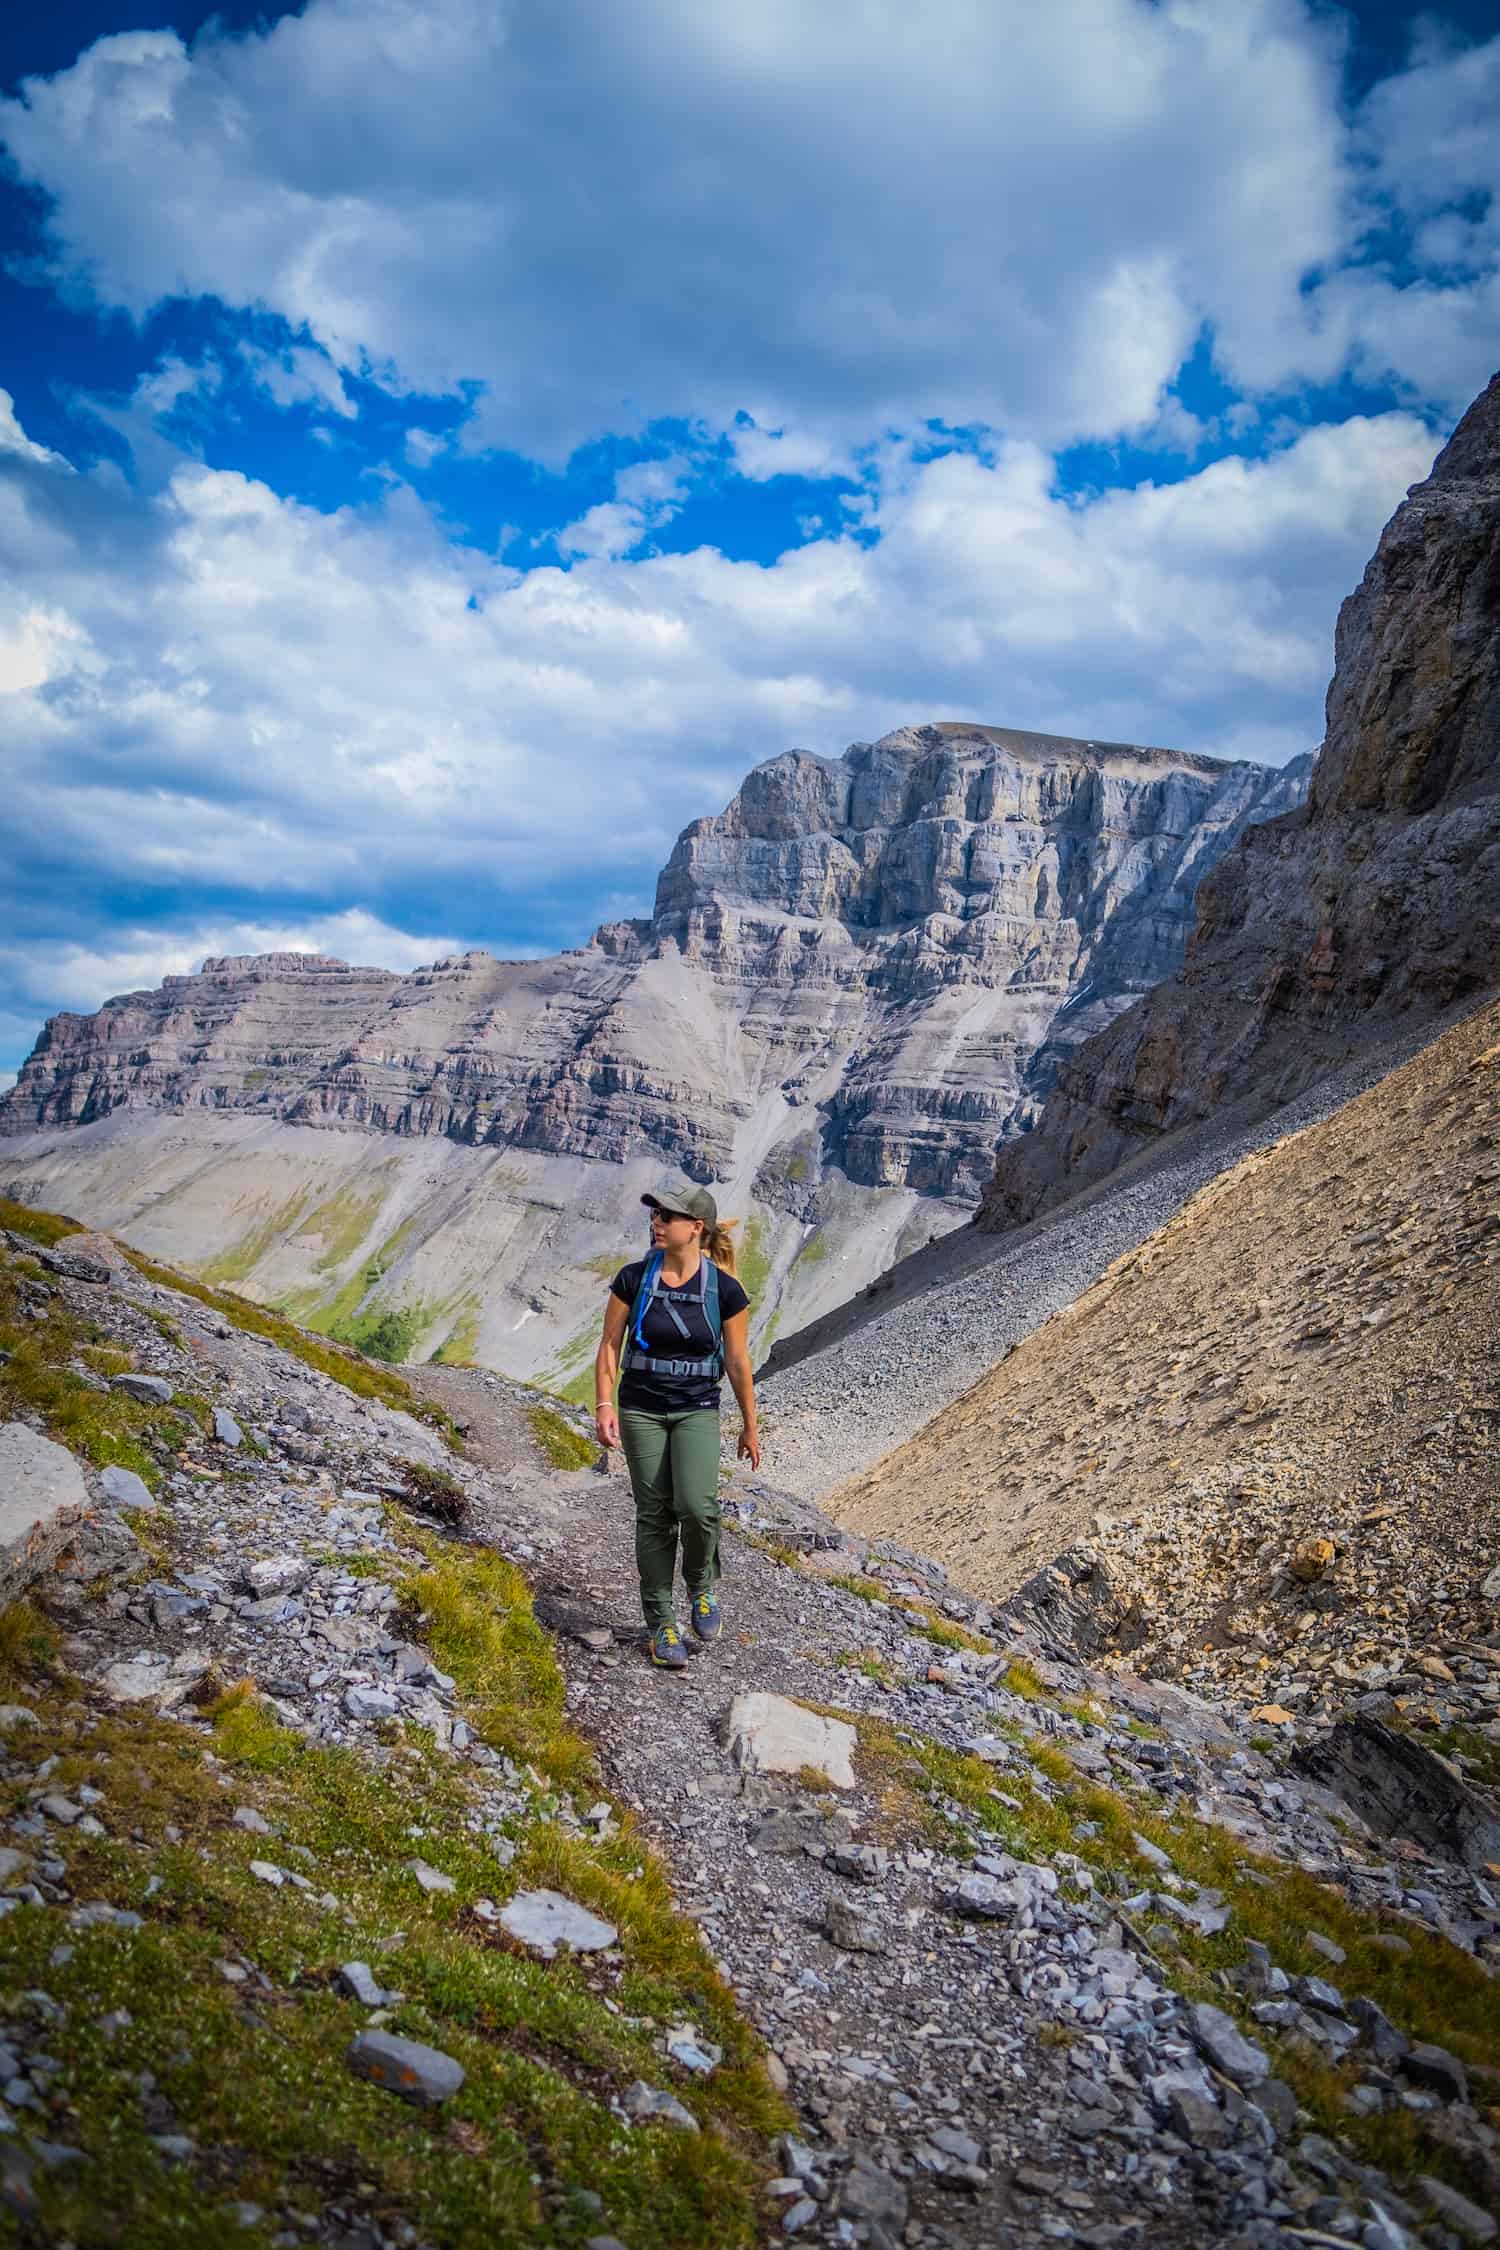
At about 5.3 km, the ridge takes you into a nice rock valley. Views of Bow Lake are great and you’ll start to get a better view of your objective, though you won’t get any clear views of the true summit of Jimmy Simpson until you are about 15 minutes away. Follow the cairns and keep your eyes peeled for a few orange ribbons attached to tree branches. There are a few ways to the start of col ascent from here. This is a route finding and choose-your-own-adventure type of ascent.

Once you get views of the col, you can either take the large rock field to the left, or kick step up the snow. I would have preferred to kick step up the snow, but in trail runners and with hard conditions there was no way we were going to get up without slipping back. So we took the rock field to the left, which was slow-moving, but a good alternative to the snow.


After the snow you’ll see that you’ll have to get up the steep col. There are few worn paths that others have taken, but these were slippery so we tried to stick to the larger scree to make it up. The scree was miserable, but thankfully only lasted for 15 minutes or so. Once you reach the top of the col don’t forget to look behind you to see amazing views of Iceberg Lake, Portal Lake, and a small unnamed lake. As well as views over the Wapta Icefield.


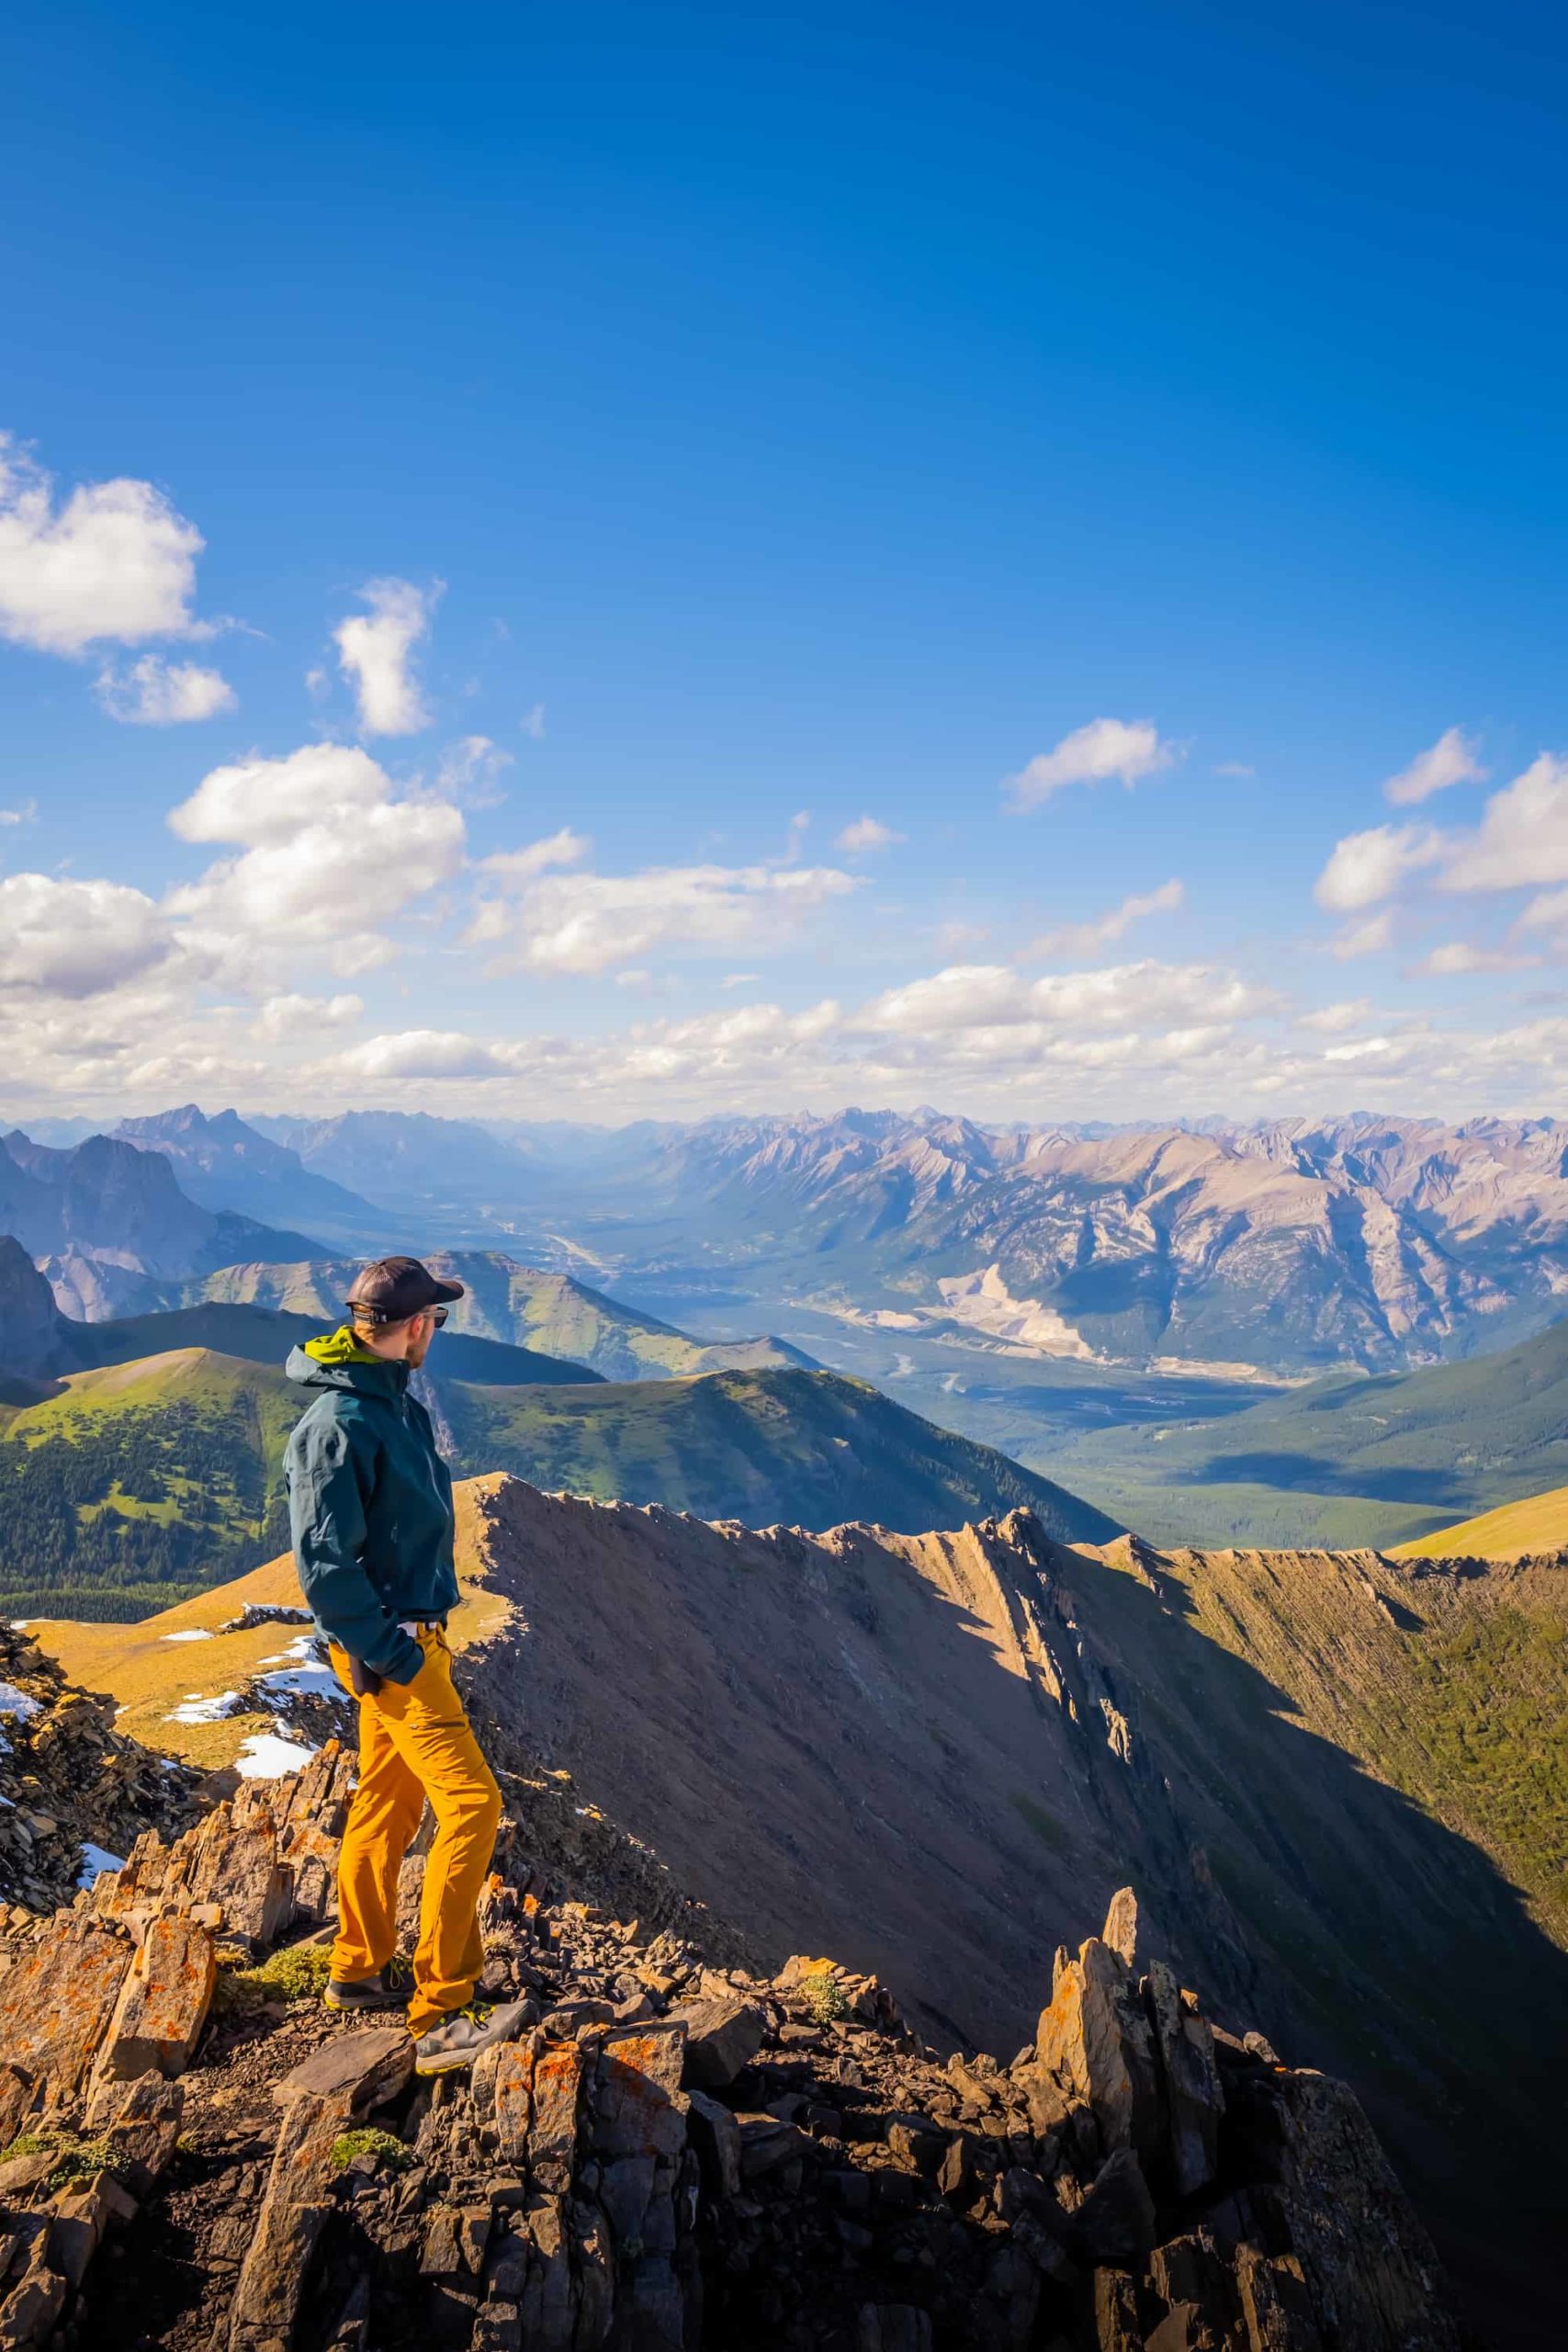
Once you reach the top of the col, you may have thought it was over, but unfortunately, you have a long slog to the true summit. Thankfully, as you work your way to the summit, you’ll have amazing views the whole time. To the left is Caldron Lake, to the right is Bow Lake, and behind you is the entire Wapta Ice field.
Once you reach the summit you’ll get glimpses of Peyto Lake and it’s surrounding peaks. Having done The Onion only weeks earlier it was amazing to see how much higher we were than the Bow Hut, The Onion, and even St Nicolas Peak. After you’ve signed the summit register and taken in the views of Bow Lake return the same way you came.

Thankfully this part is much quicker than the way up, with the only part that slowed me down being the boulder field. Though we noticed a few butt slides and descents down the snow, which would have made the descent at least 30 minutes faster.

How Hard is the Jimmy Simpson Scramble?

Summiting Jimmy Simpson is a long day with over 1000 meters of elevation gain. While there are only a few easy scrambling sections on this route, there isn’t much information on it and it’s easy to get off route. Once off route you may have to bushwhack or find yourself in a not ideal situation. Route-finding skills and a sense of adventure are required for this one. There are sections where summiting feels like a straight-up endeavor. That being said it’s off the well-beaten path of Banff hikes and provides absolutely amazing views
Jimmy Simpson Duration

It took us a little over 3 hours to summit from the car park and 2.5 hours to descend. I wore trail runners with the intention to run some of this trail and move faster but the reality was it was a very slow-moving trail with plenty of rocks and steep scree to navigate. Going around Bow Lake proves a long, but beautiful approach. I would estimate 7-8 hours to complete this scramble, and you’ll definitely want to hang out at the summit for a bit.
When Can You Scramble Jimmy Simpson?

Jimmy Simpson should be good to go by mid-July!
Should Dogs & Kids Take to the Trail?
Only dogs and kids with scramble experience should attempt Jimmy Simpson. It’s over 15km and 1000 meter gain, so make sure they have prior experience with these types of days. Another great trail that I found a bit easier nearby is The Onion.
Advice on Hikes in the Canadian Rockies
If this is your first time hiking in the Rockies take a conservative approach. Pick an adequate hike for your fitness, plan for plenty of time, pack water and food, and don’t be afraid to turn around. Here is a great post on tips for new hikers.
For long hikes, set a turnaround time at the departure. Any time we set out for an objective I determine a time at which we need to turn around in order to arrive at the parking lot or campsite by dark. I would recommend not hiking in the dark as it’s easy to get lost and it’s not fun in bear country.
On that note, always carry bear spray if you plan to hike in the park. We carry ours in the neighborhood and bears have been known to stroll through town and busy parking lots. Always practice wildlife awareness when you’re on a trail, and please give animals space.
In regards to times keep in mind your mountain fitness — different than the gym. The low end of the times in this post is a constant fast pace uphill with little to no breaks and a brisk pace downhill. Most hikers should plan for a middle of the road time with the estimated duration.
It’s also super important to know that there are limitations and to come prepared. These are very serious mountains and it easy to get in well over your head with life-threatening consequences.
Lastly, a GPS tracker could save your life as there is no service around Bow Lake – it’s one of those backpacking essentials I like to have on me just in case I need to hit SOS. Alltrails is our favorite app to have on a hike. It shows the correct trail way, elevation, and other hiker reviews. We paid the subscription fee so that we could download all the data we need to our phones. Best $3 (per month) ever spent!
What to Wear On a Hike?
The most basic principle of what to wear hiking is layering. Anyone who has spent time in the wilderness or mountains can attest that one’s temperature can fluctuate a lot on a hike. One can easily start off cool at the base of the mountain and get hot as soon as one begins moving.
The goal of hiking clothing is to help regulate your body temperature, element protection, and moisture management. Temperature management is best done through a layering system if you want to learn more about what to pack for a day hike or what to wear on a hike, you can see our full post!


Wow , you went there before the Bow glacier falls accident , I wonder now if the way to Jimmy Simpson is still opened .
Yes, we were there in 2020. The route up Mount Jimmy Simpson is still open, just the area around Bow Glacier Falls is closed.