How To Climb Mount Athabasca With a Mountaineering Course

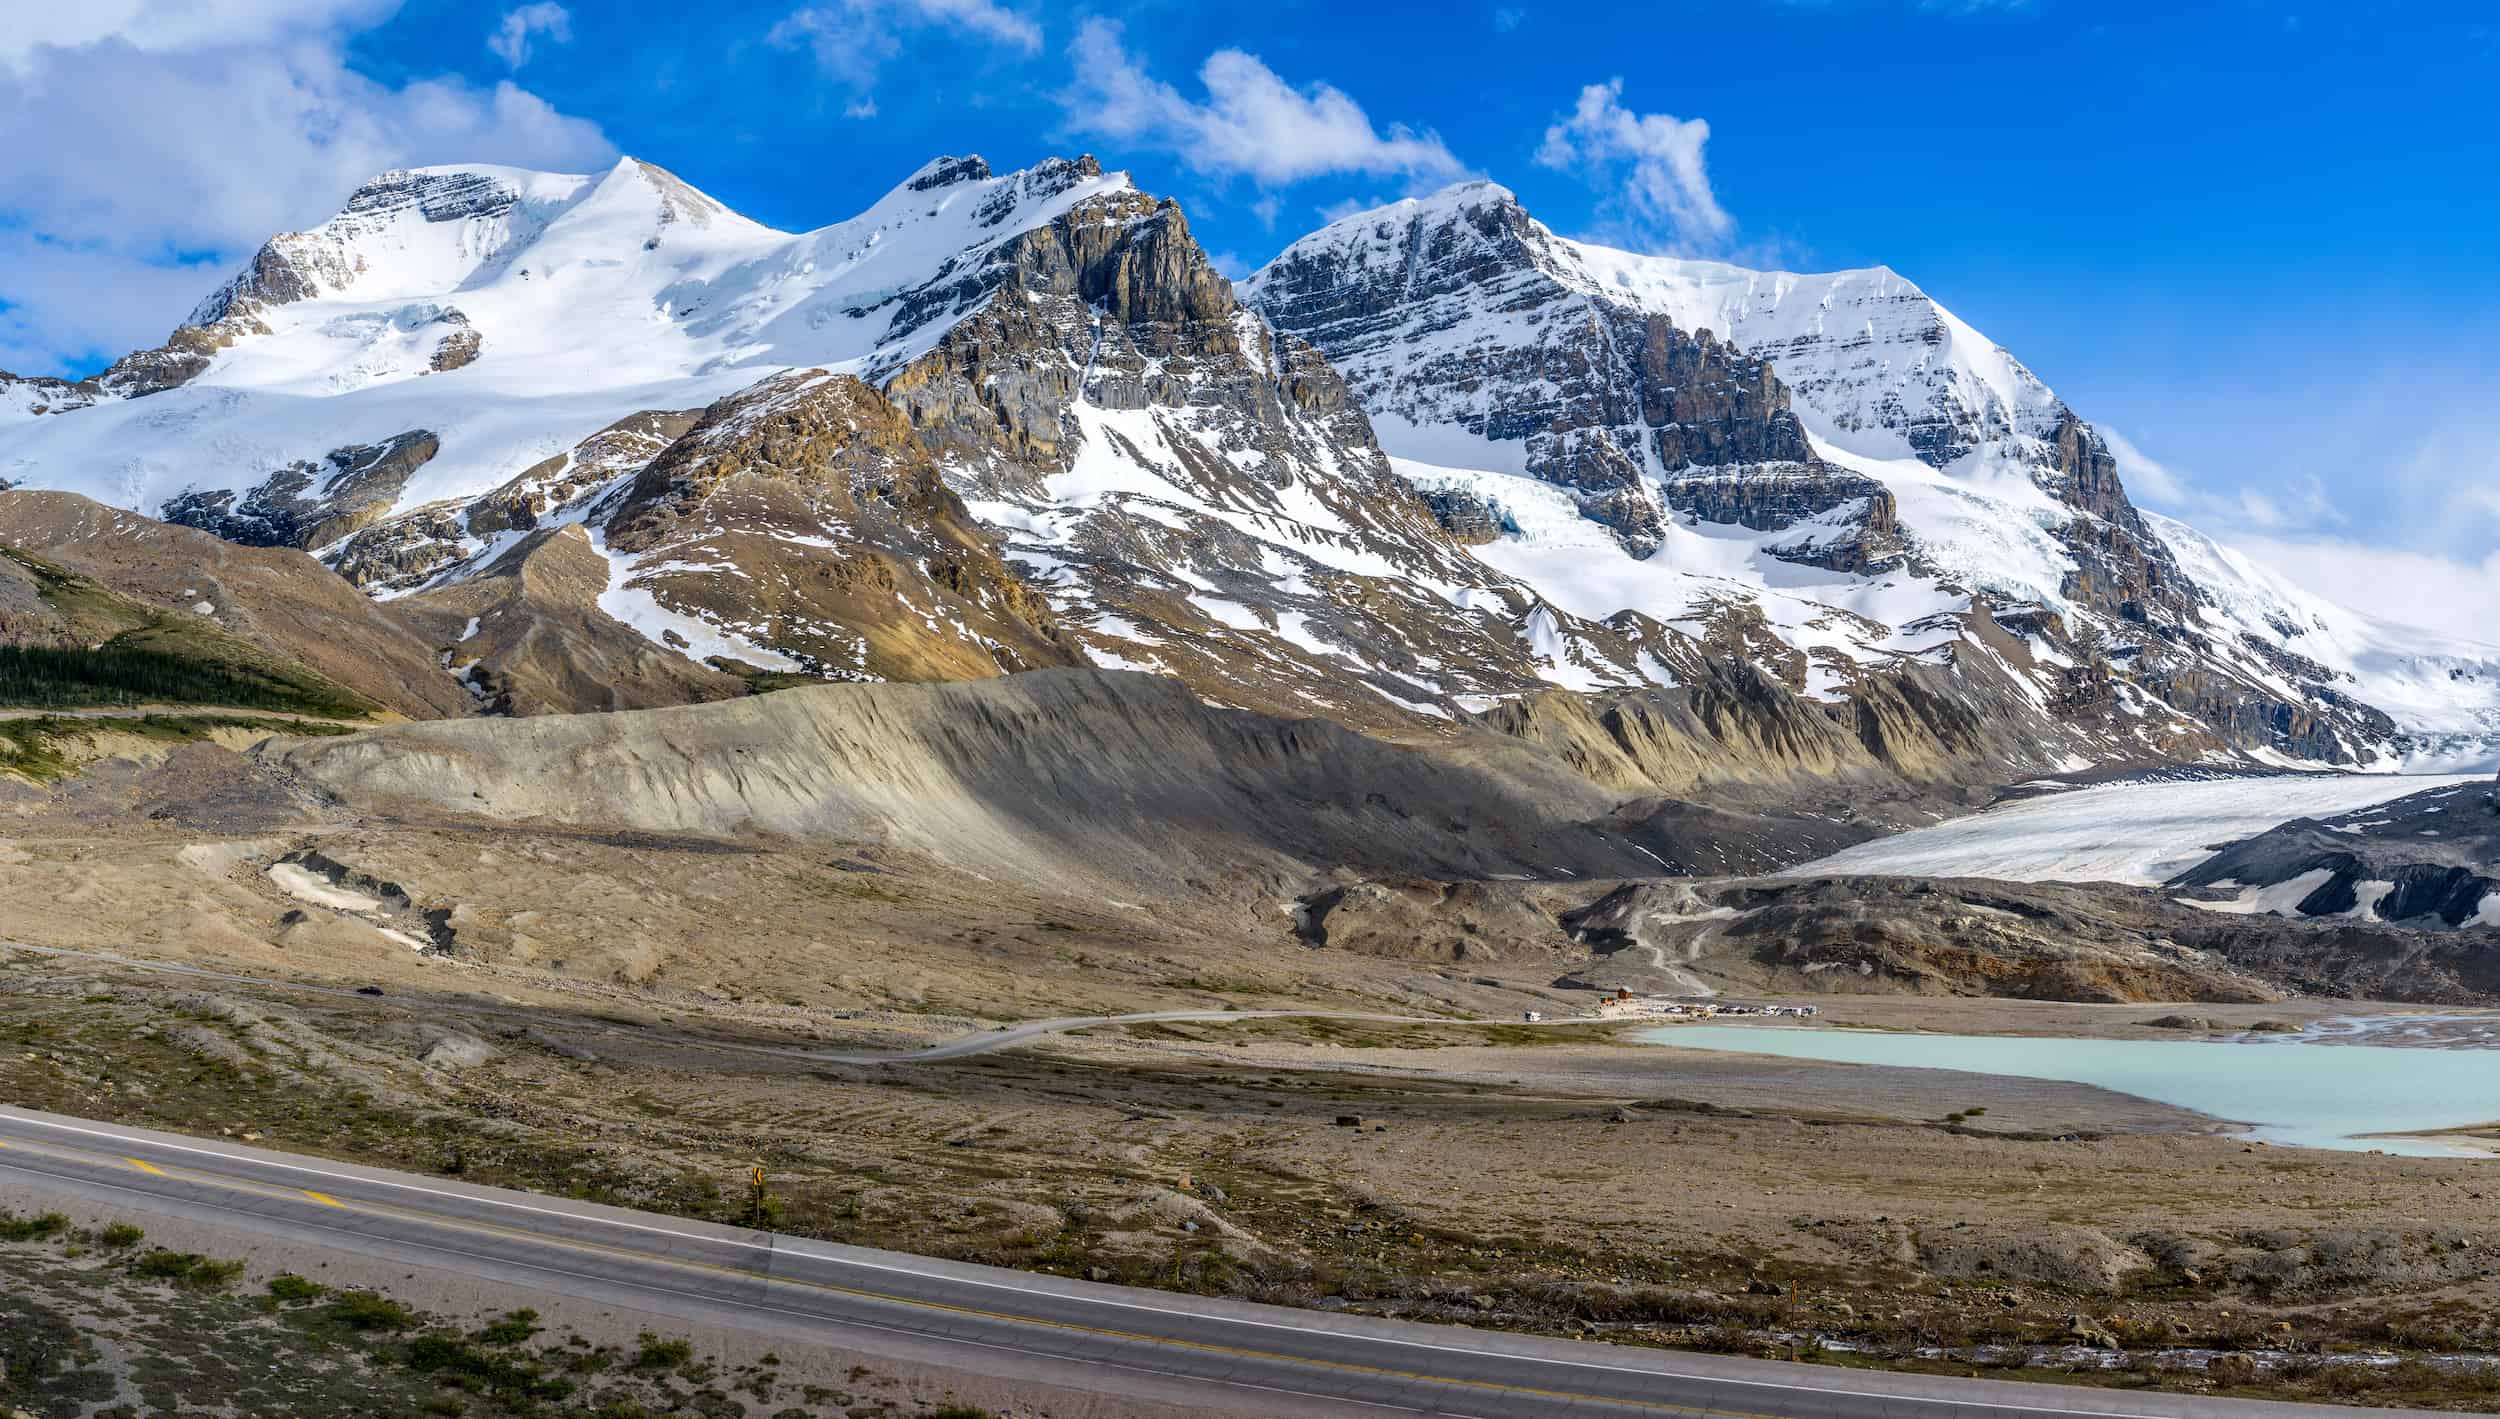
Mount Athabasca looms over one of the most popular attractions on the famed Icefields Parkway, but only a few get to see the view from the top. To reach the summit requires a long hike to a technical glacier crossing and then up an exposed face or couloir. The views are breathtaking in more ways than one. You can spot countless glaciers, icefields, and many of Alberta’s highest peaks from the top.
The peak is one of many in the Canadian Rockies, famous for reaching 11,000 feet. Many climbers in the Rockies have the lifetime goal of summiting all 54 (58) of the peaks, and they are considered classic mountaineering objectives. At 11,453 feet in elevation with a massive glacier and convenient location, Athabasca proves to be a tremendous first “11,000er.” With no experience, we needed some trusted guide to reach the peak; Yamnuska Mountain Adventures was there to get us to the top.

Mountaineering Course: Snow & Ice Long Weekend
Everyone has to start somewhere, and we are not from the mountains and have no prior experience until moving to Canmore. Any sport, especially a sport such as mountaineering with high risks, requires training and experience. We turned to the experienced guides of Yamnuska Mountain Adventures, who have been guiding clients in the Canadian Mountains for 40 years, to learn more about travel in the mountains.
The Snow and Ice Long Weekend is a short intro course meant to lay the foundation for the sport of mountaineering. It takes place along the Icefields Parkway around the popular Athabasca Glacier. On the final day, you make a summit attempt on one of the nearby 11,000 foot mountains, the most common is the classic Mount Athabasca. It’s one of the most famous mountains in Banff National Park and photographed by thousands of tourists every day.
What Mountaineering Skills Do You Learn?

The course takes place over three days, and it is by no means meant to teach you everything about mountaineering. Its purpose is to set a foundation we arrived with no prior experience other than hiking. While we were not in the best shape of our lives, we are young and fit.
That being said, the course would be appropriate for a wide range of people. One of our group members was 58, and he summited Mount Athabasca. Altogether, the curriculum felt well-rounded and provided an excellent introduction to the sport without getting lost in too many details.
Equipment
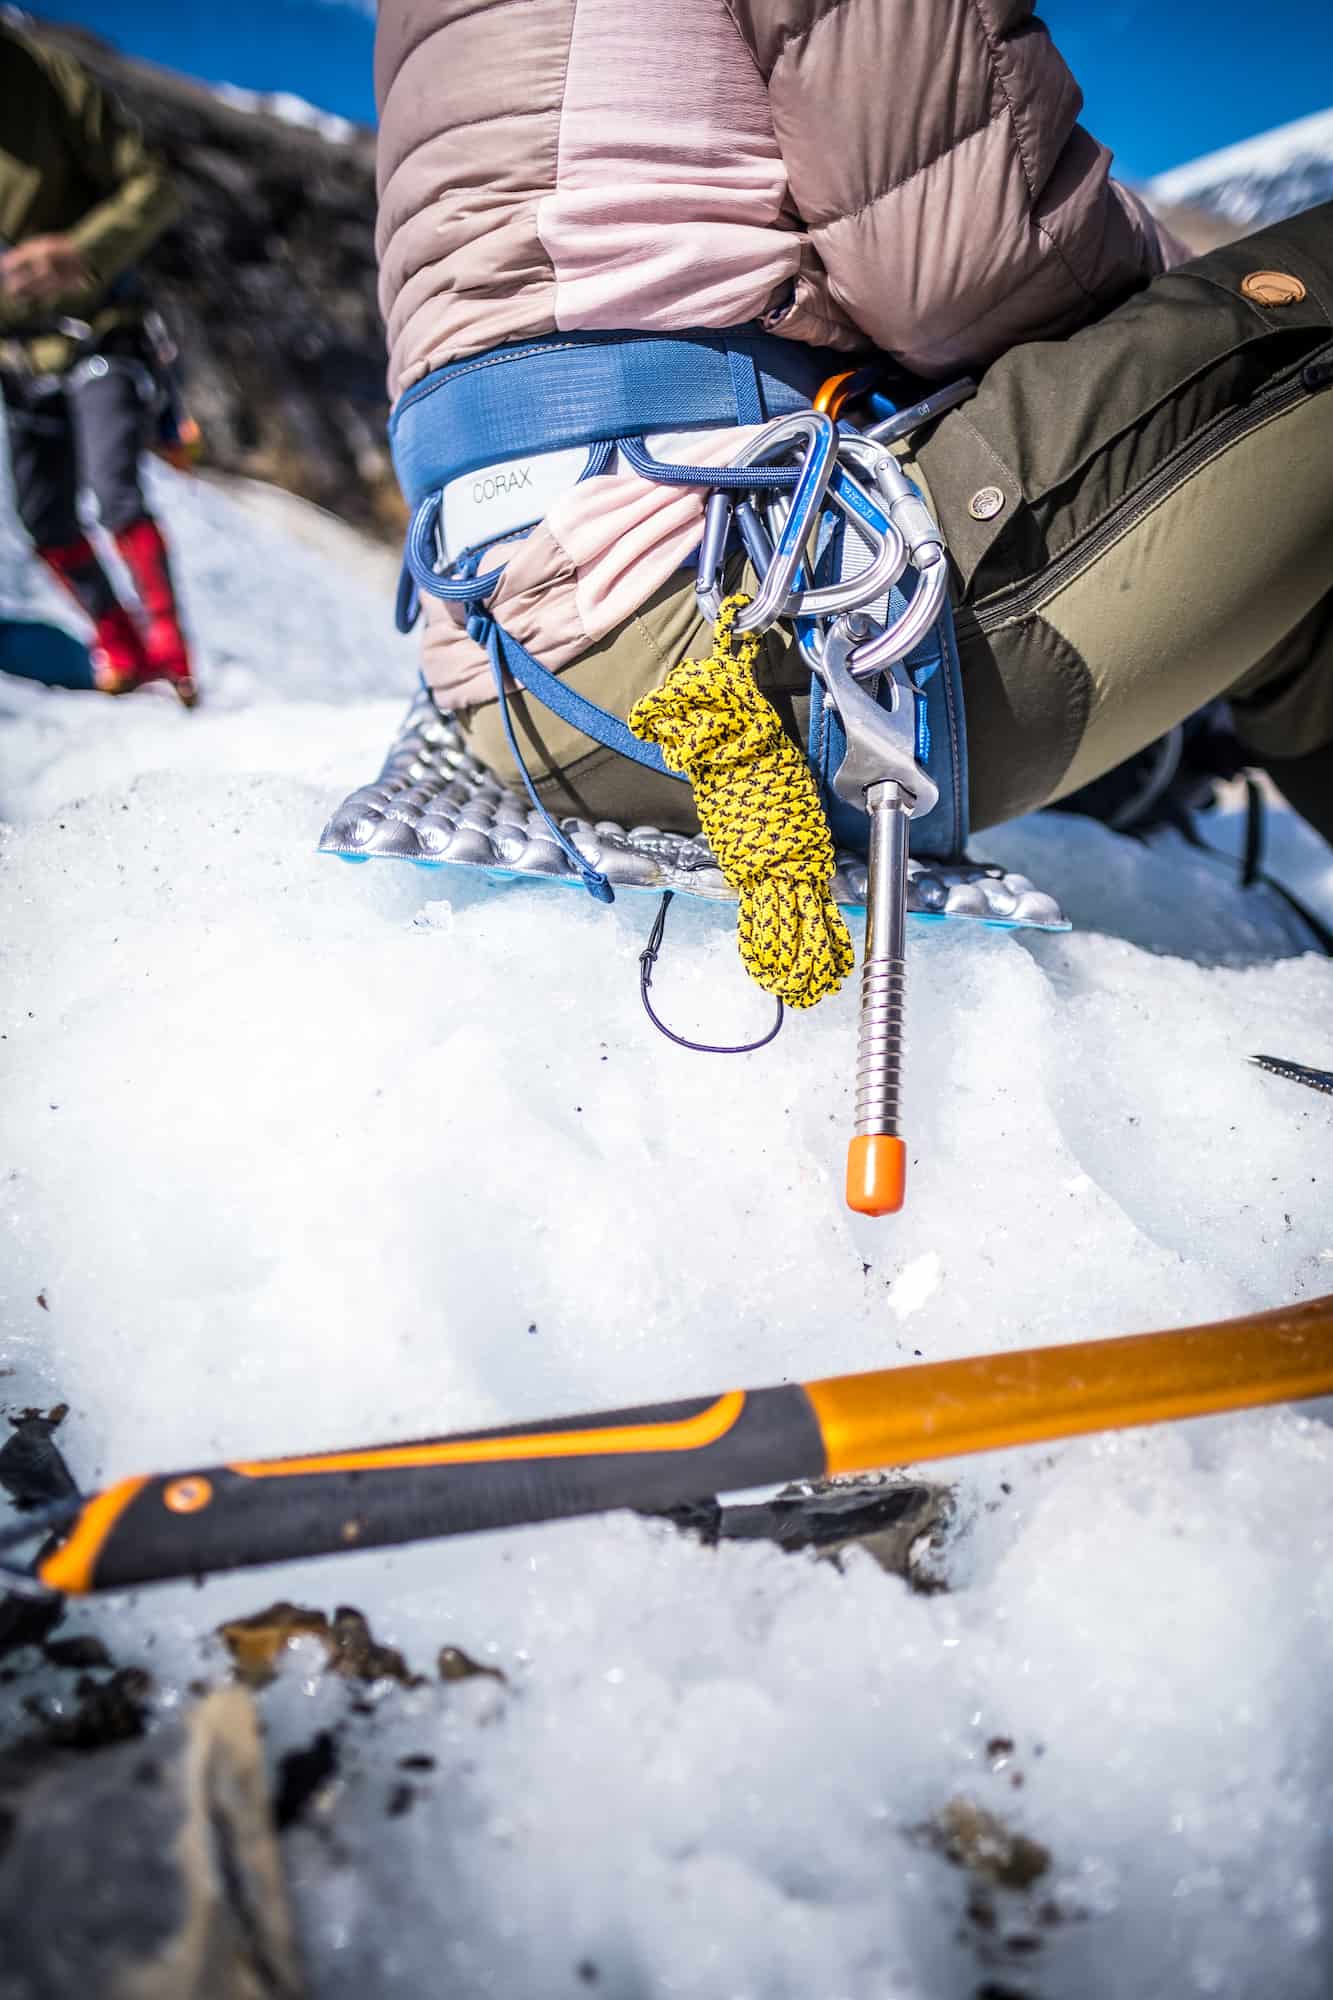
You go over a basic overview of mountaineering equipment used in the course. Ropes, harnesses, ice axe, crampons, helmets, cordelettes, and carabiners.
Knots

With no prior climbing experience, we were able to learn several critical knots and life-saving knots. Knots we learned are the prusik hitch, figure eight, overhand, and an alpine coil. Figure eight is classic mountaineering and rock climbing knot known for its stronghold and reliability. Then the prusik hitch is advantageous knowledge to have outside of glacier travel.
Movement on Snow

Walking up a hill seems straightforward, but it requires some skill when it’s covered in snow, and the hill is over a thousand meters. The course covers different footwork, techniques used to conserve energy, and travel in a group.
Ice Axe Use
A new tool to use and one that is important for mountain travel in the Canadian Rockies. We learned proper handhold techniques, using the ice axe, and properly using the ice axe. Long story short, I went out and bought an ice axe after the course.
Self Arresting

This could be a lifesaver, literally. While we learned there should be very rare circumstances in which you need to self-arrest. The skill is essential to learn and practice. Above all, it’s fun as you sling yourself down a snow-covered hill and practice coming to a stop from various angles. (It’s not done one-handed like in the movies…)
Snow Anchor

One of my personal favorites from the course is learning how to make a snow anchor. It’s a great skill to have, especially as I could see great use should we ever have a problem when snowboarding in the mountains.
Crampon Use
We learned how to properly walk in crampons and practiced various walking techniques on hard ice of varying degrees of steepness.
Glacier Travel

Almost every person has seen the iconic image of climbers roped together as they walk across a snowy plain. In the course, we covered the basics of glacier travel and how to operate as a team traversing glaciers with the potential for crevasses.
Ice Anchors
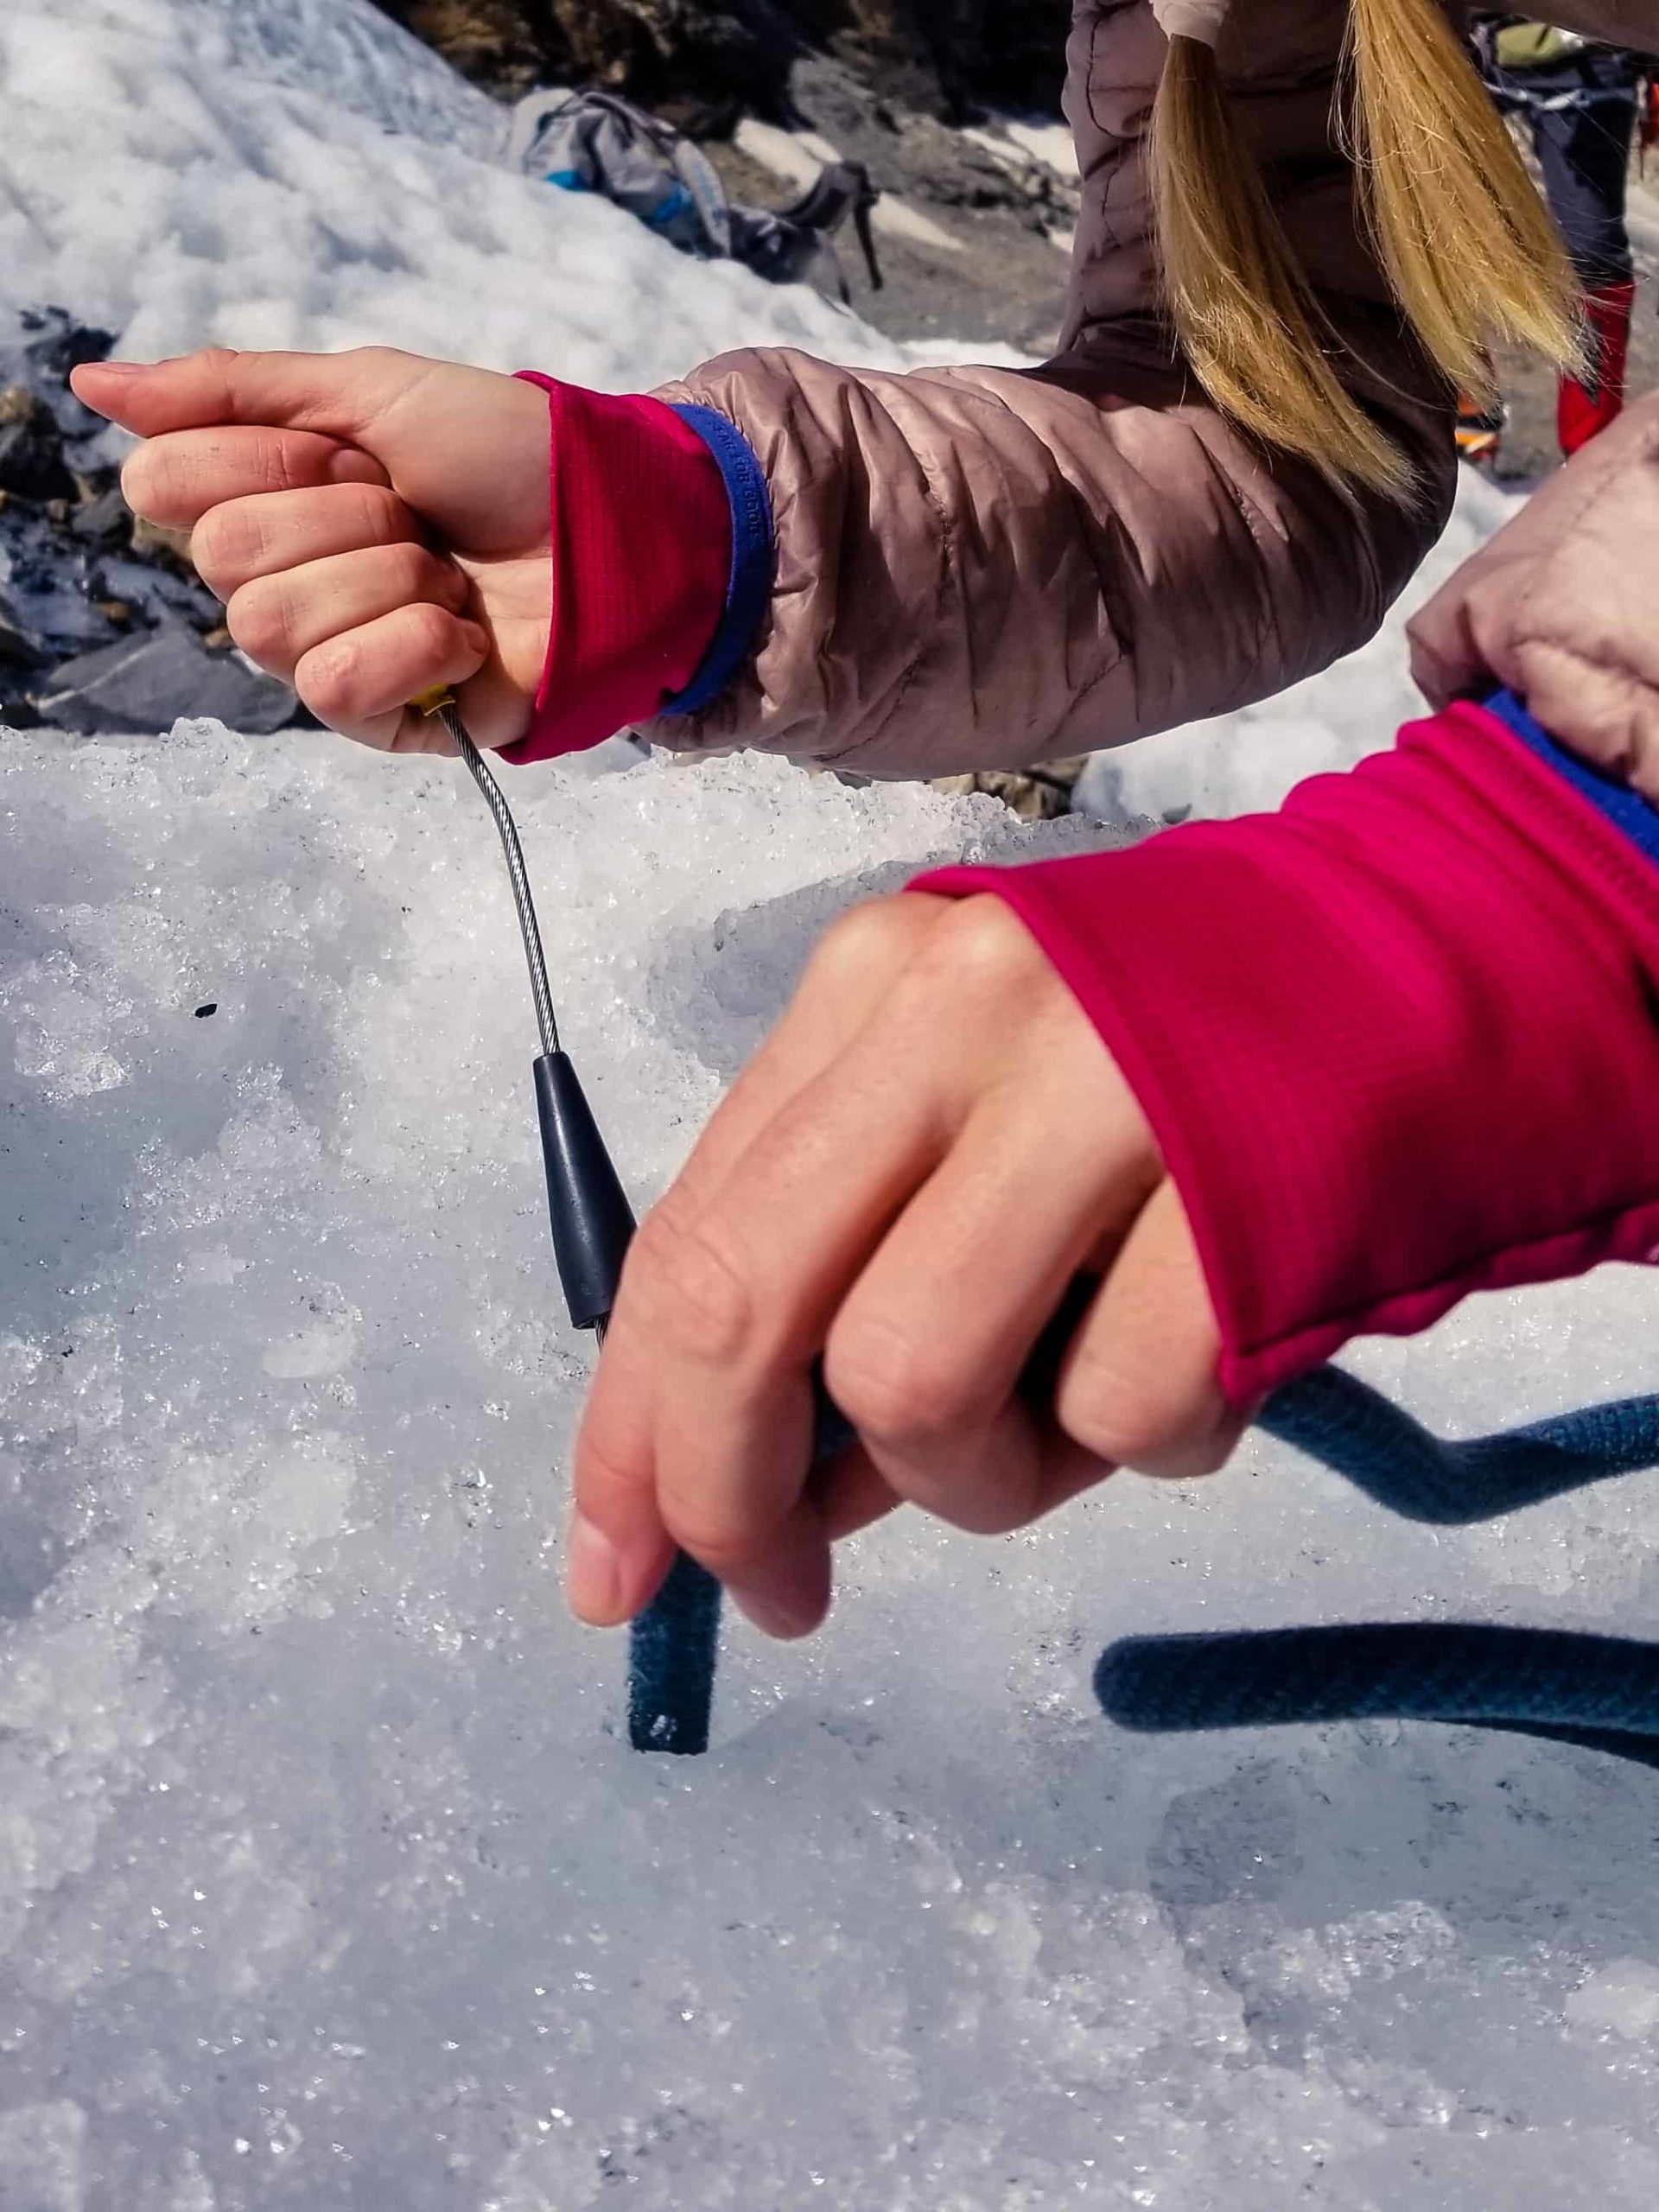
Should there be an emergency on ice, you’ll need to be able to rescue your partner or off an icy face. We learned how to properly place an ice screw and set a v anchor in the ice.
Glacier Rescue
We covered the most difficult skill, but learning how to operate as a team when a party member falls into a glacier is a life-saving skill. The move involves teamwork, knots, ice anchors, ropework, and smart movement to safely rescue from a glacier.
Route Planning
This skill we touched on and discussed, but route planning takes much more time to learn and accomplish. Our guide explained the reasons for our route selection which was the AA Couloir route up Mount Athabasca.
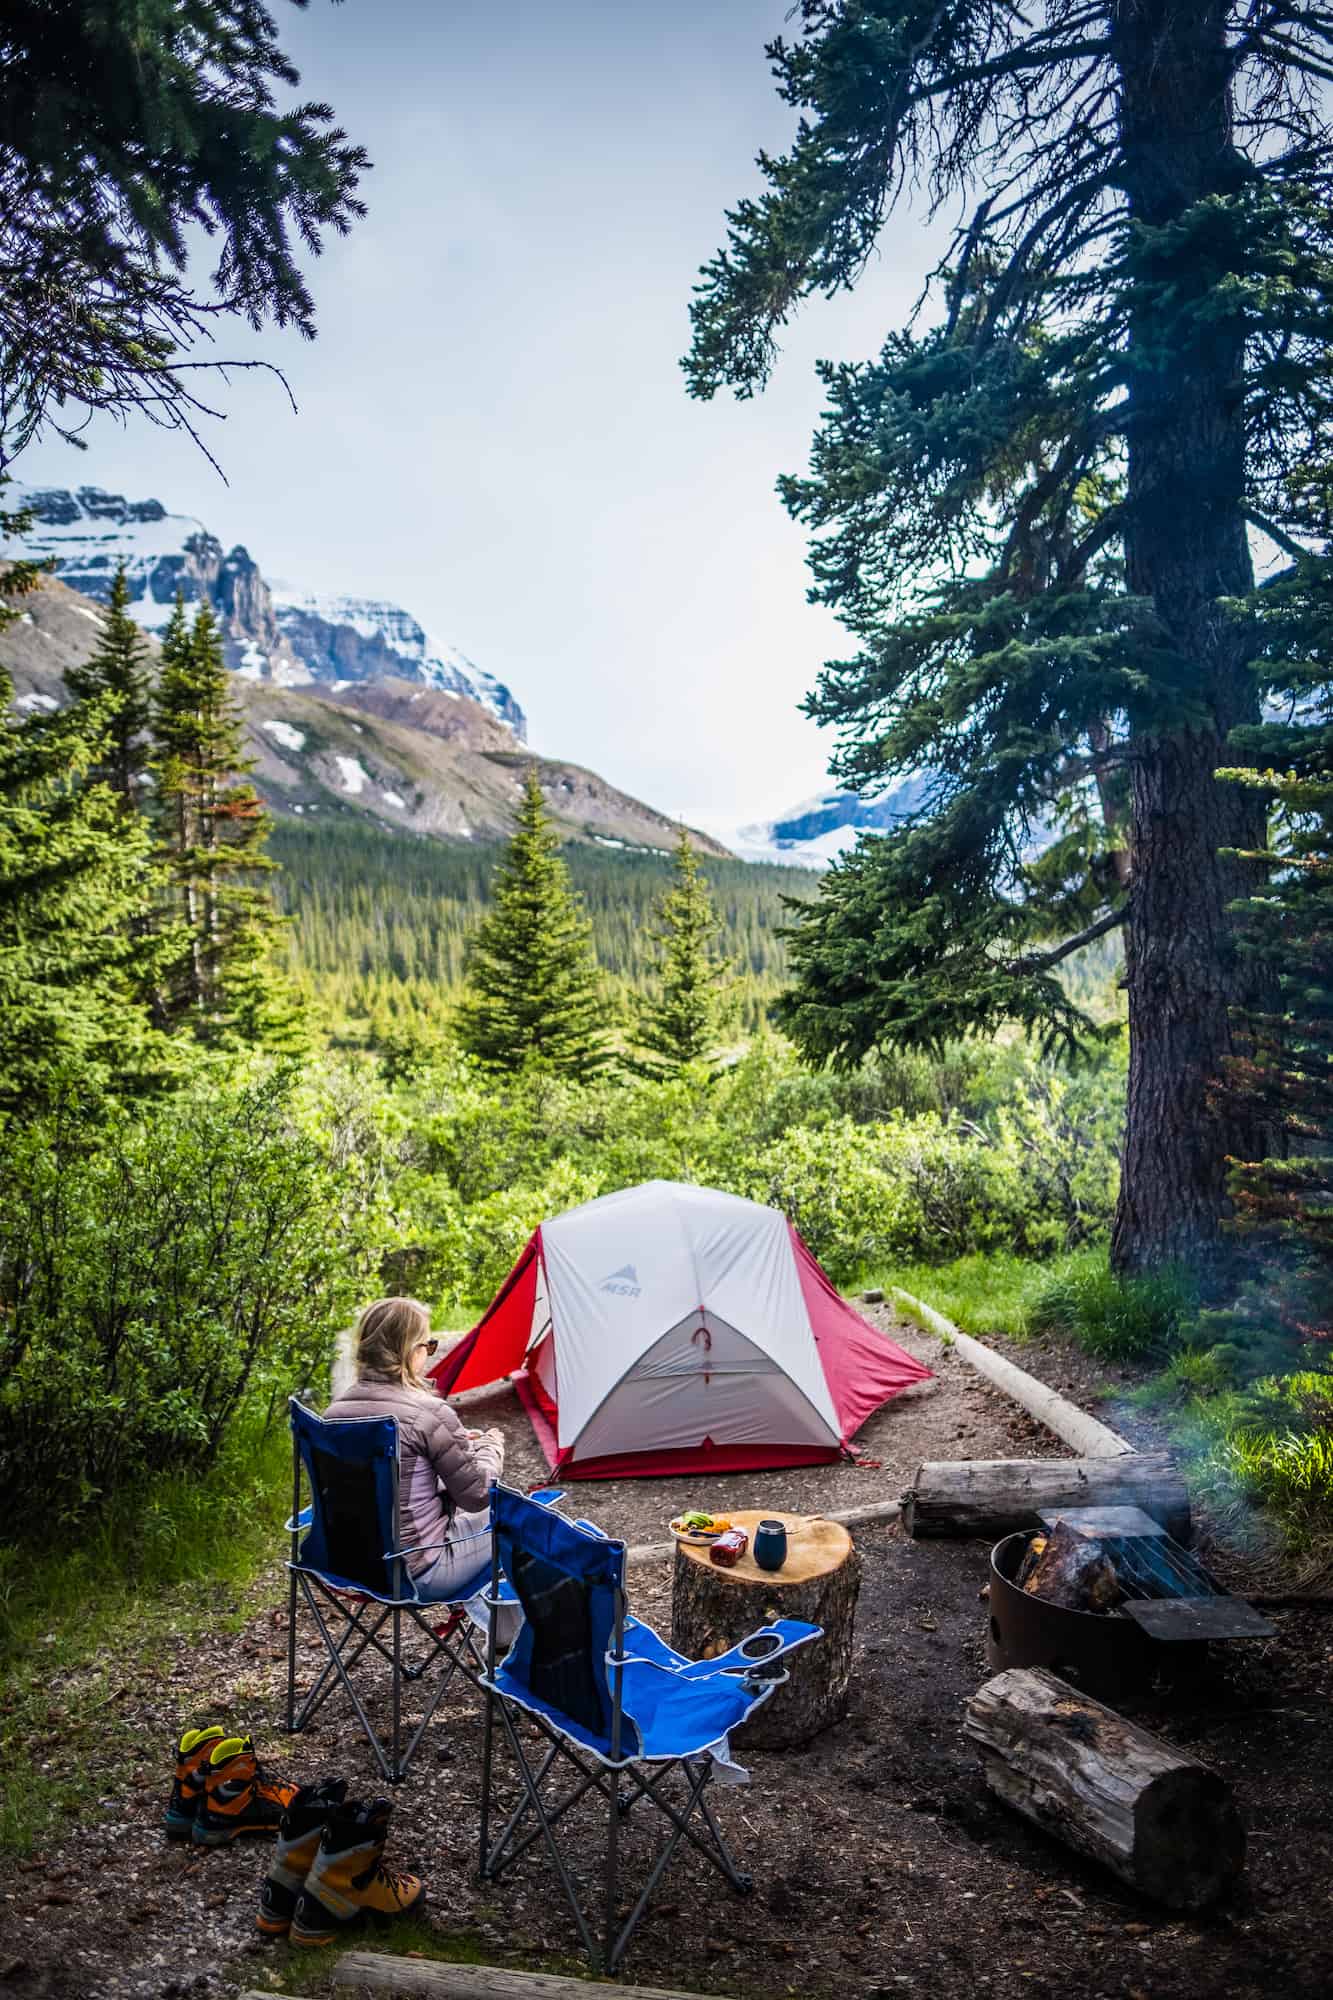
What to expect?
The course takes place over three days and is out of the Icefields Campground. We drove up the first morning then camped two nights in the campground during the course. On the first day, we spent the morning getting acquainted with our gear and learning the basics of ropes and knots. After lunch, we went up to a snow-covered bank to practice movement in snow, travel as a group, and how to self-arrest.
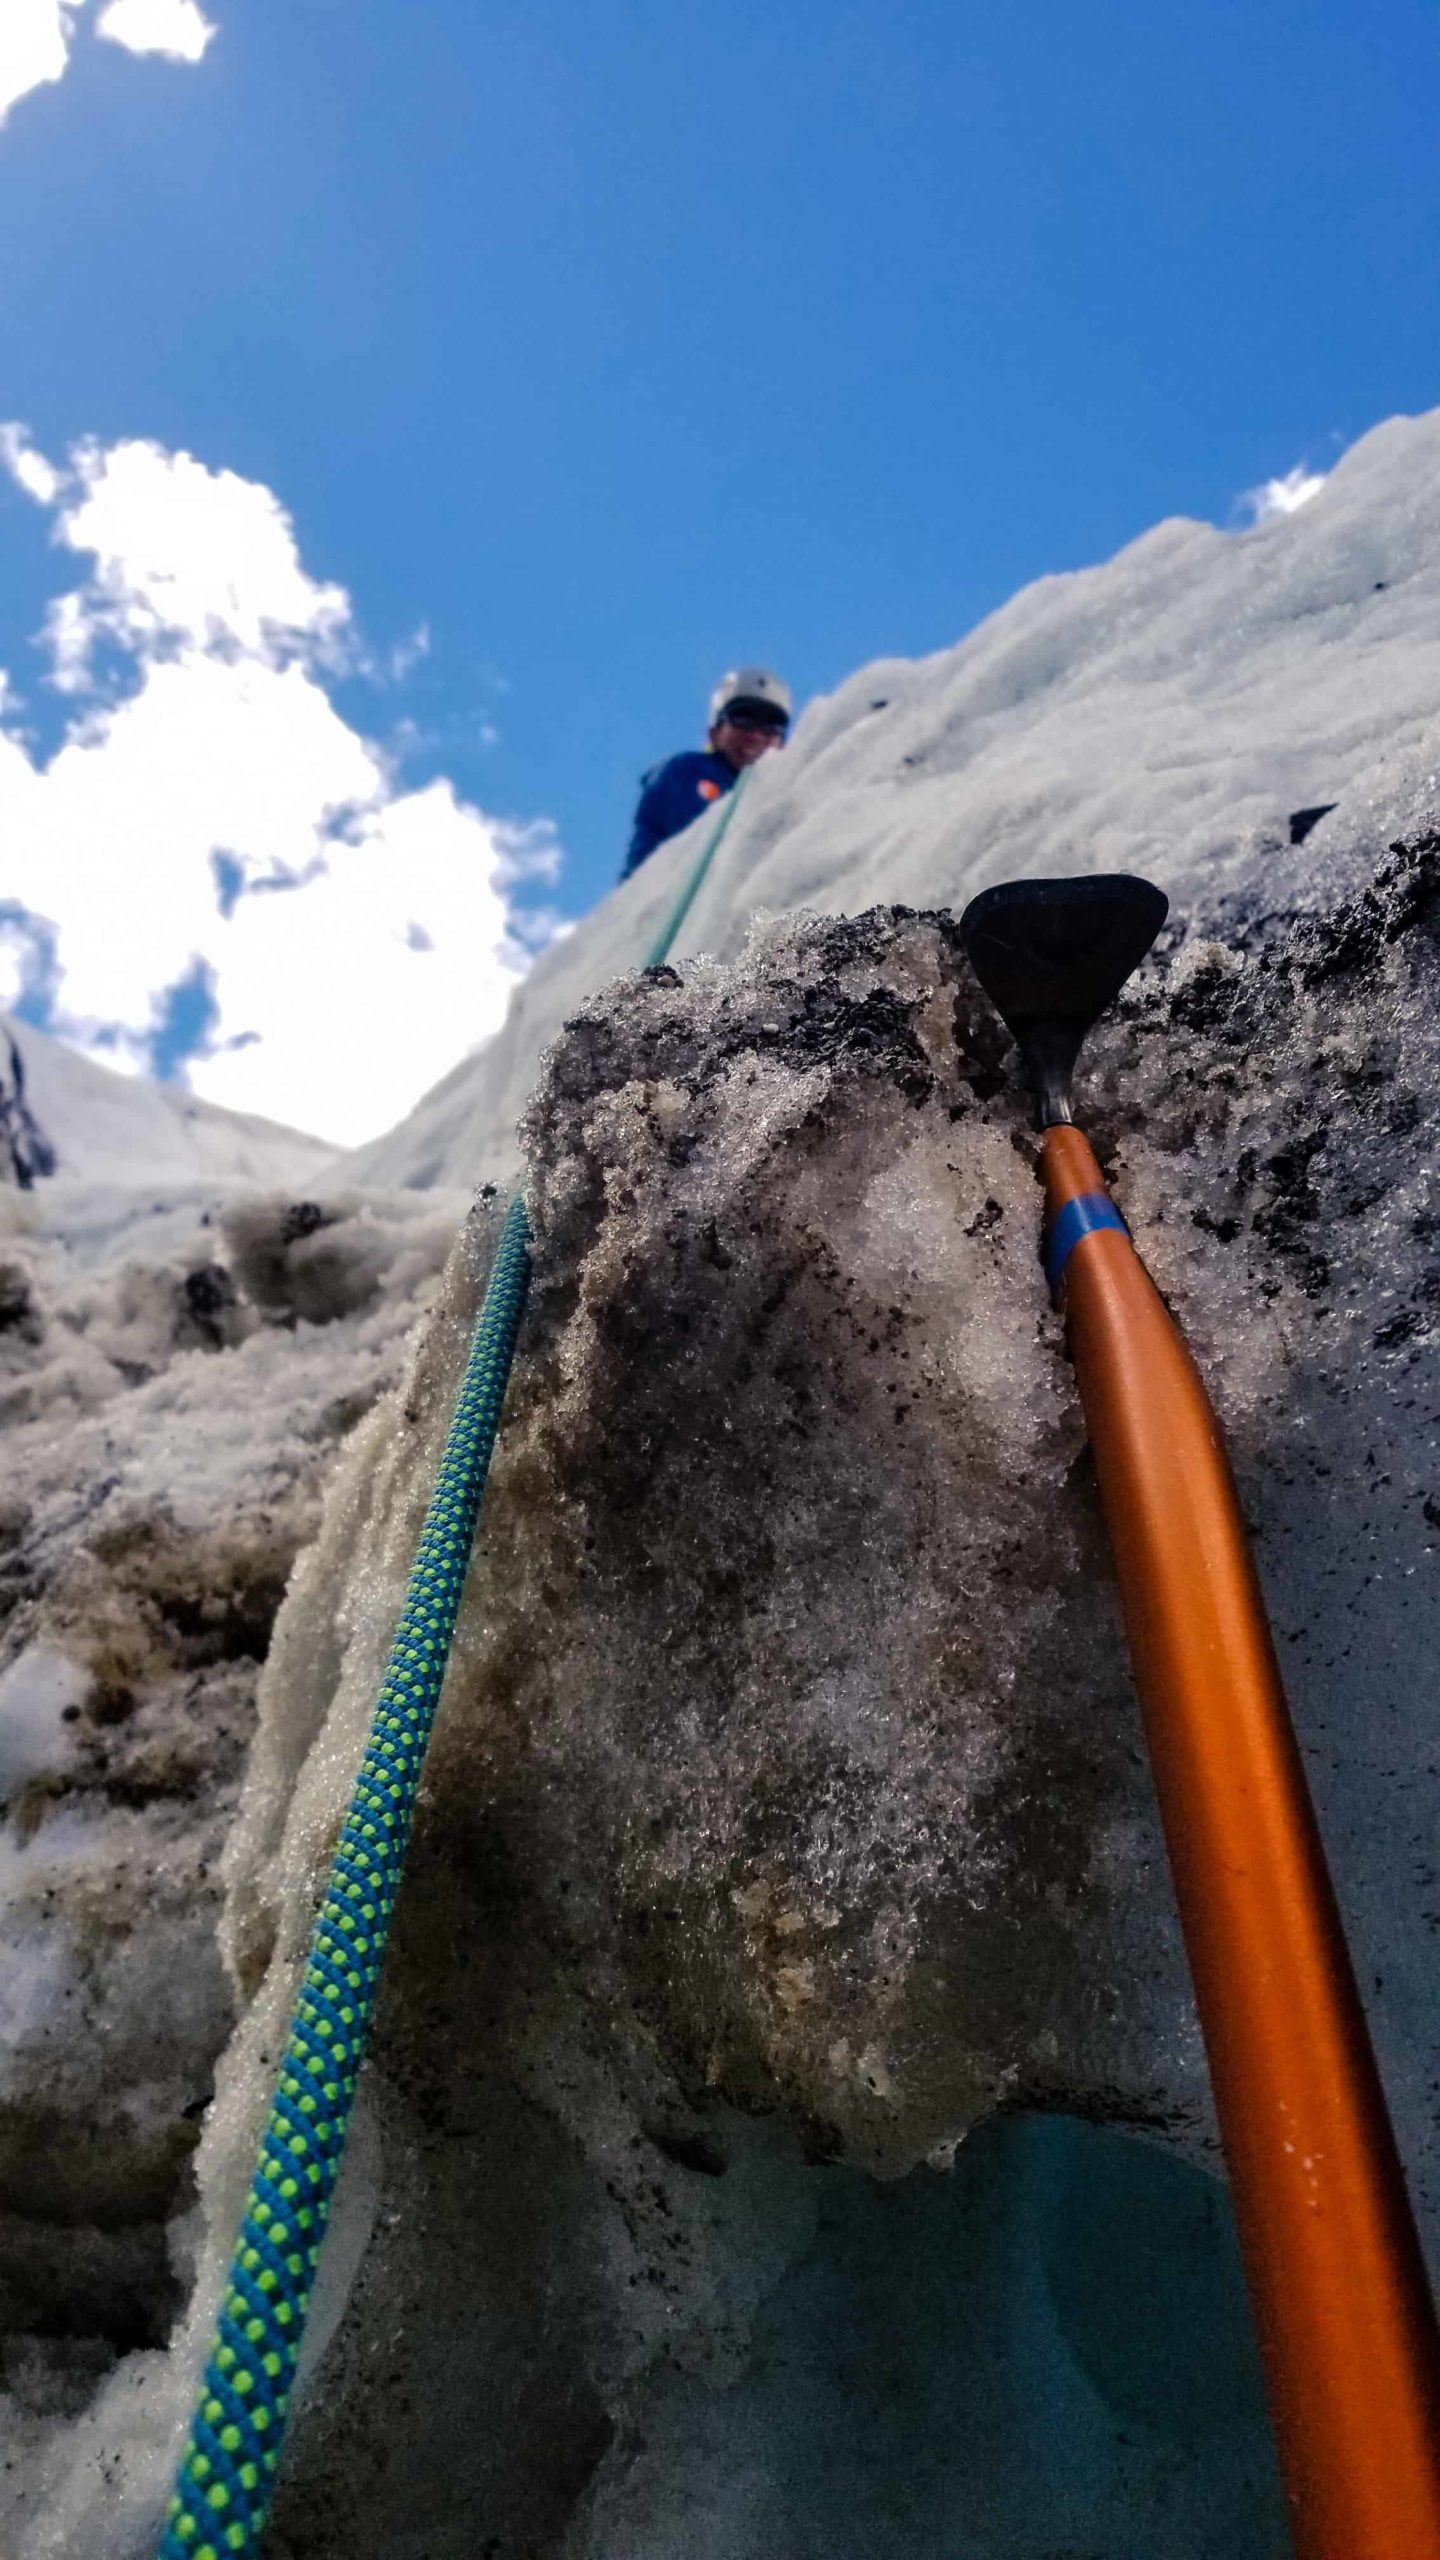
After some well-deserved rest in the campground, we spent the second day on a glacier. Our instructor Tak went over proper movement on ice with crampons and how to use our ice axe.

As the day progressed, we practiced more glacier travel skills. Then moved on to how to set ice screws and v anchors in the glacier. For the final lesson, we practiced how to rescue a downed climber in a crevasse properly. With an early afternoon finished, we set off back to the campground to catch some rest and plan our route up to our objective. With perfect weather on the horizon, the group decided as a whole to go for Mount Athabasca.
Summiting Mount Athabasca
Mount Athabasca Approach
The night before, we had a meeting to discuss the big objective, which was Mount Athabasca. Our course instructor Tak To summit, Athabasca, requires an early morning alpine start. So the day of our summit push involved a start time of 3:00 a.m. With the amount of anticipation, we had it’s hard to say we slept much the night before.
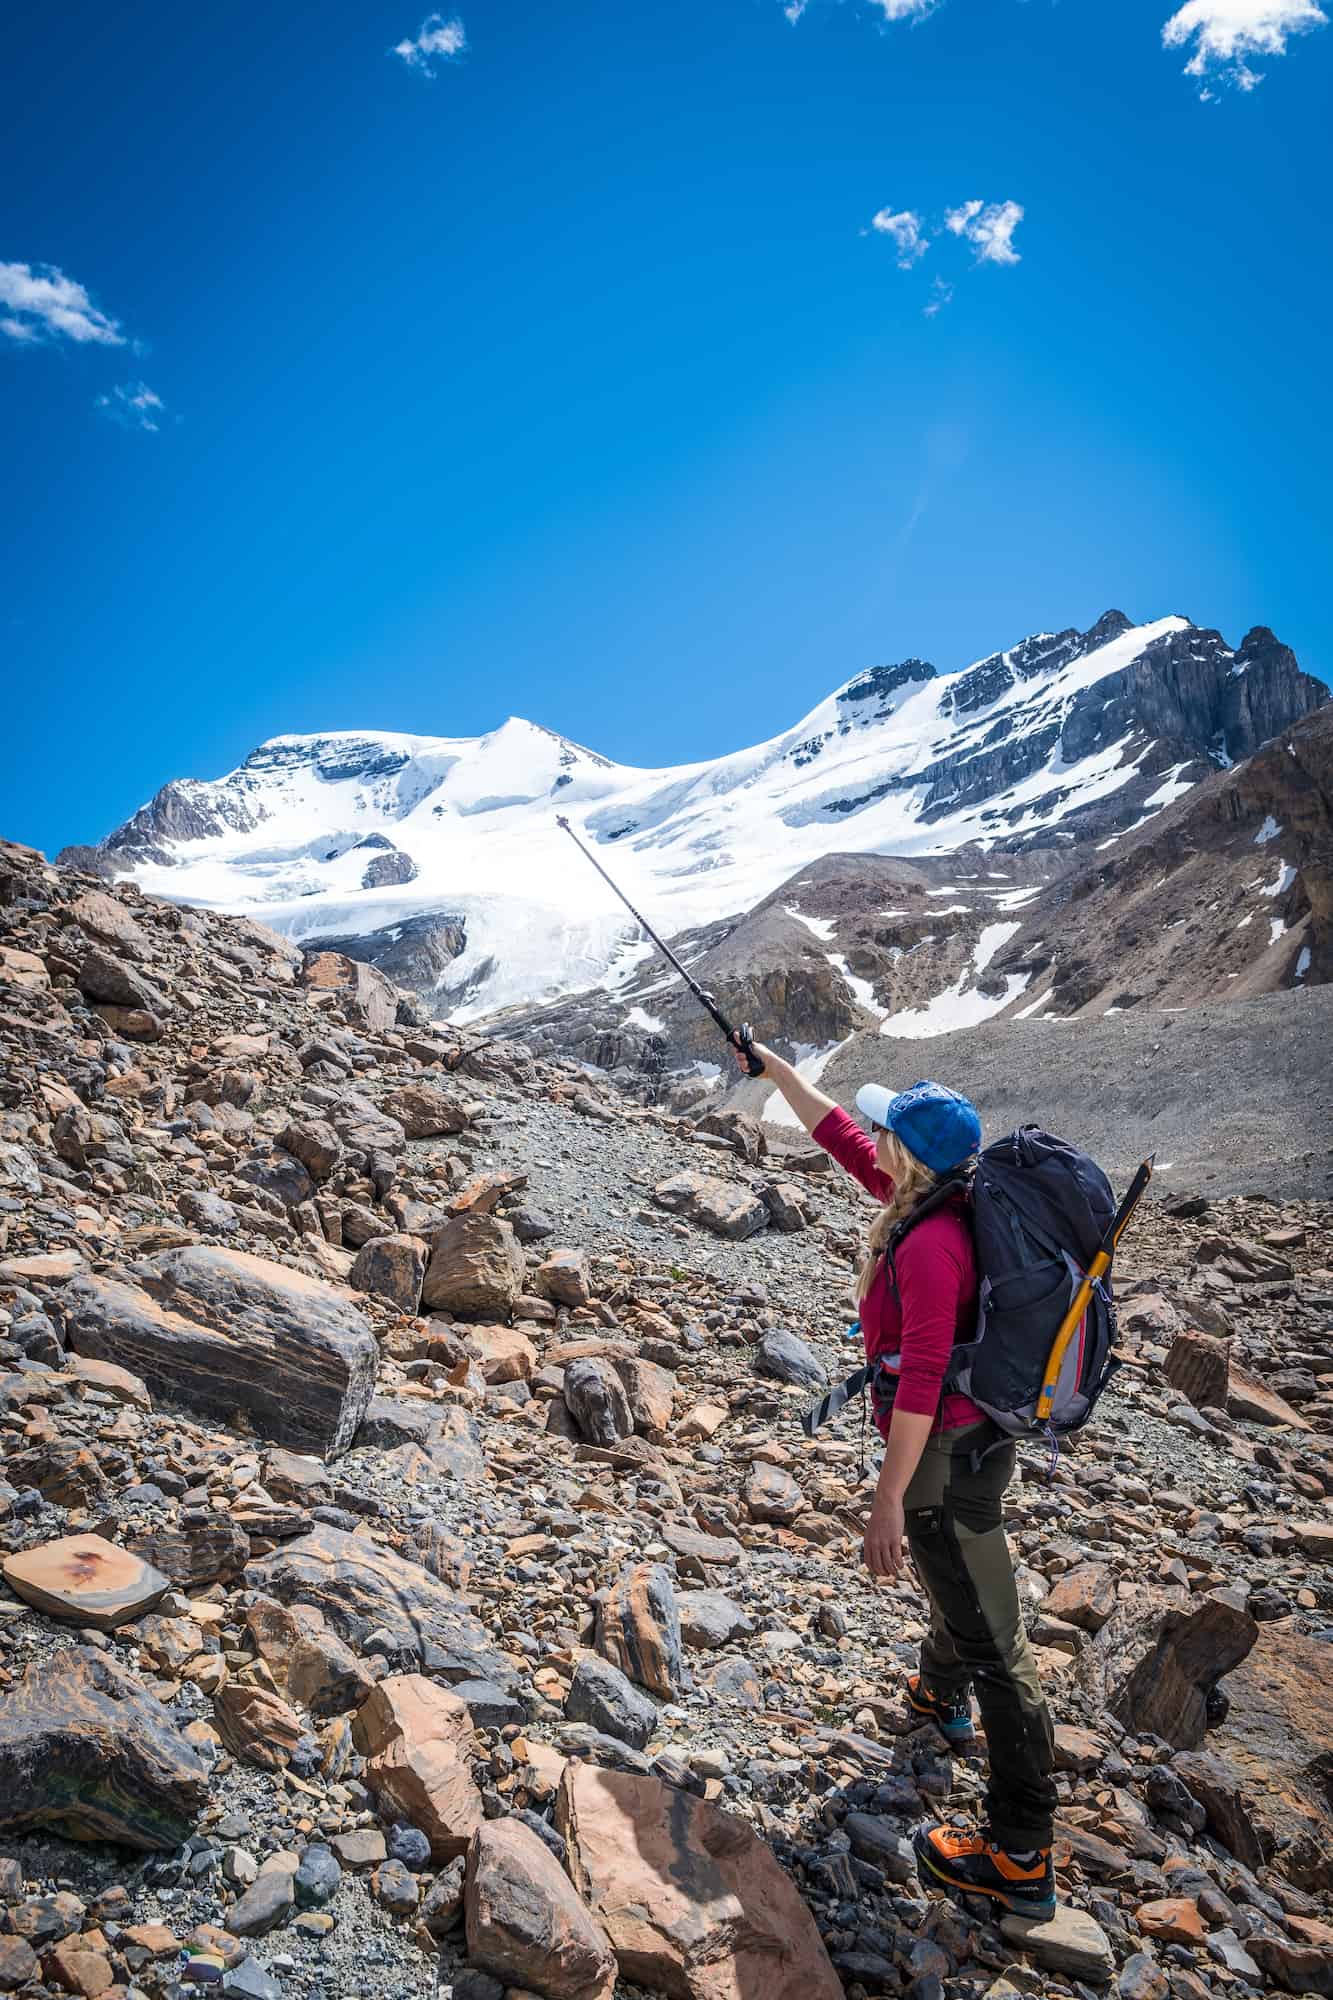
The approach on Athabasca takes place from the parking lot adjacent to the Icefields Discovery Center. The start follows along the road for the massive glacier tourist trucks before turning off and up the lateral moraine.
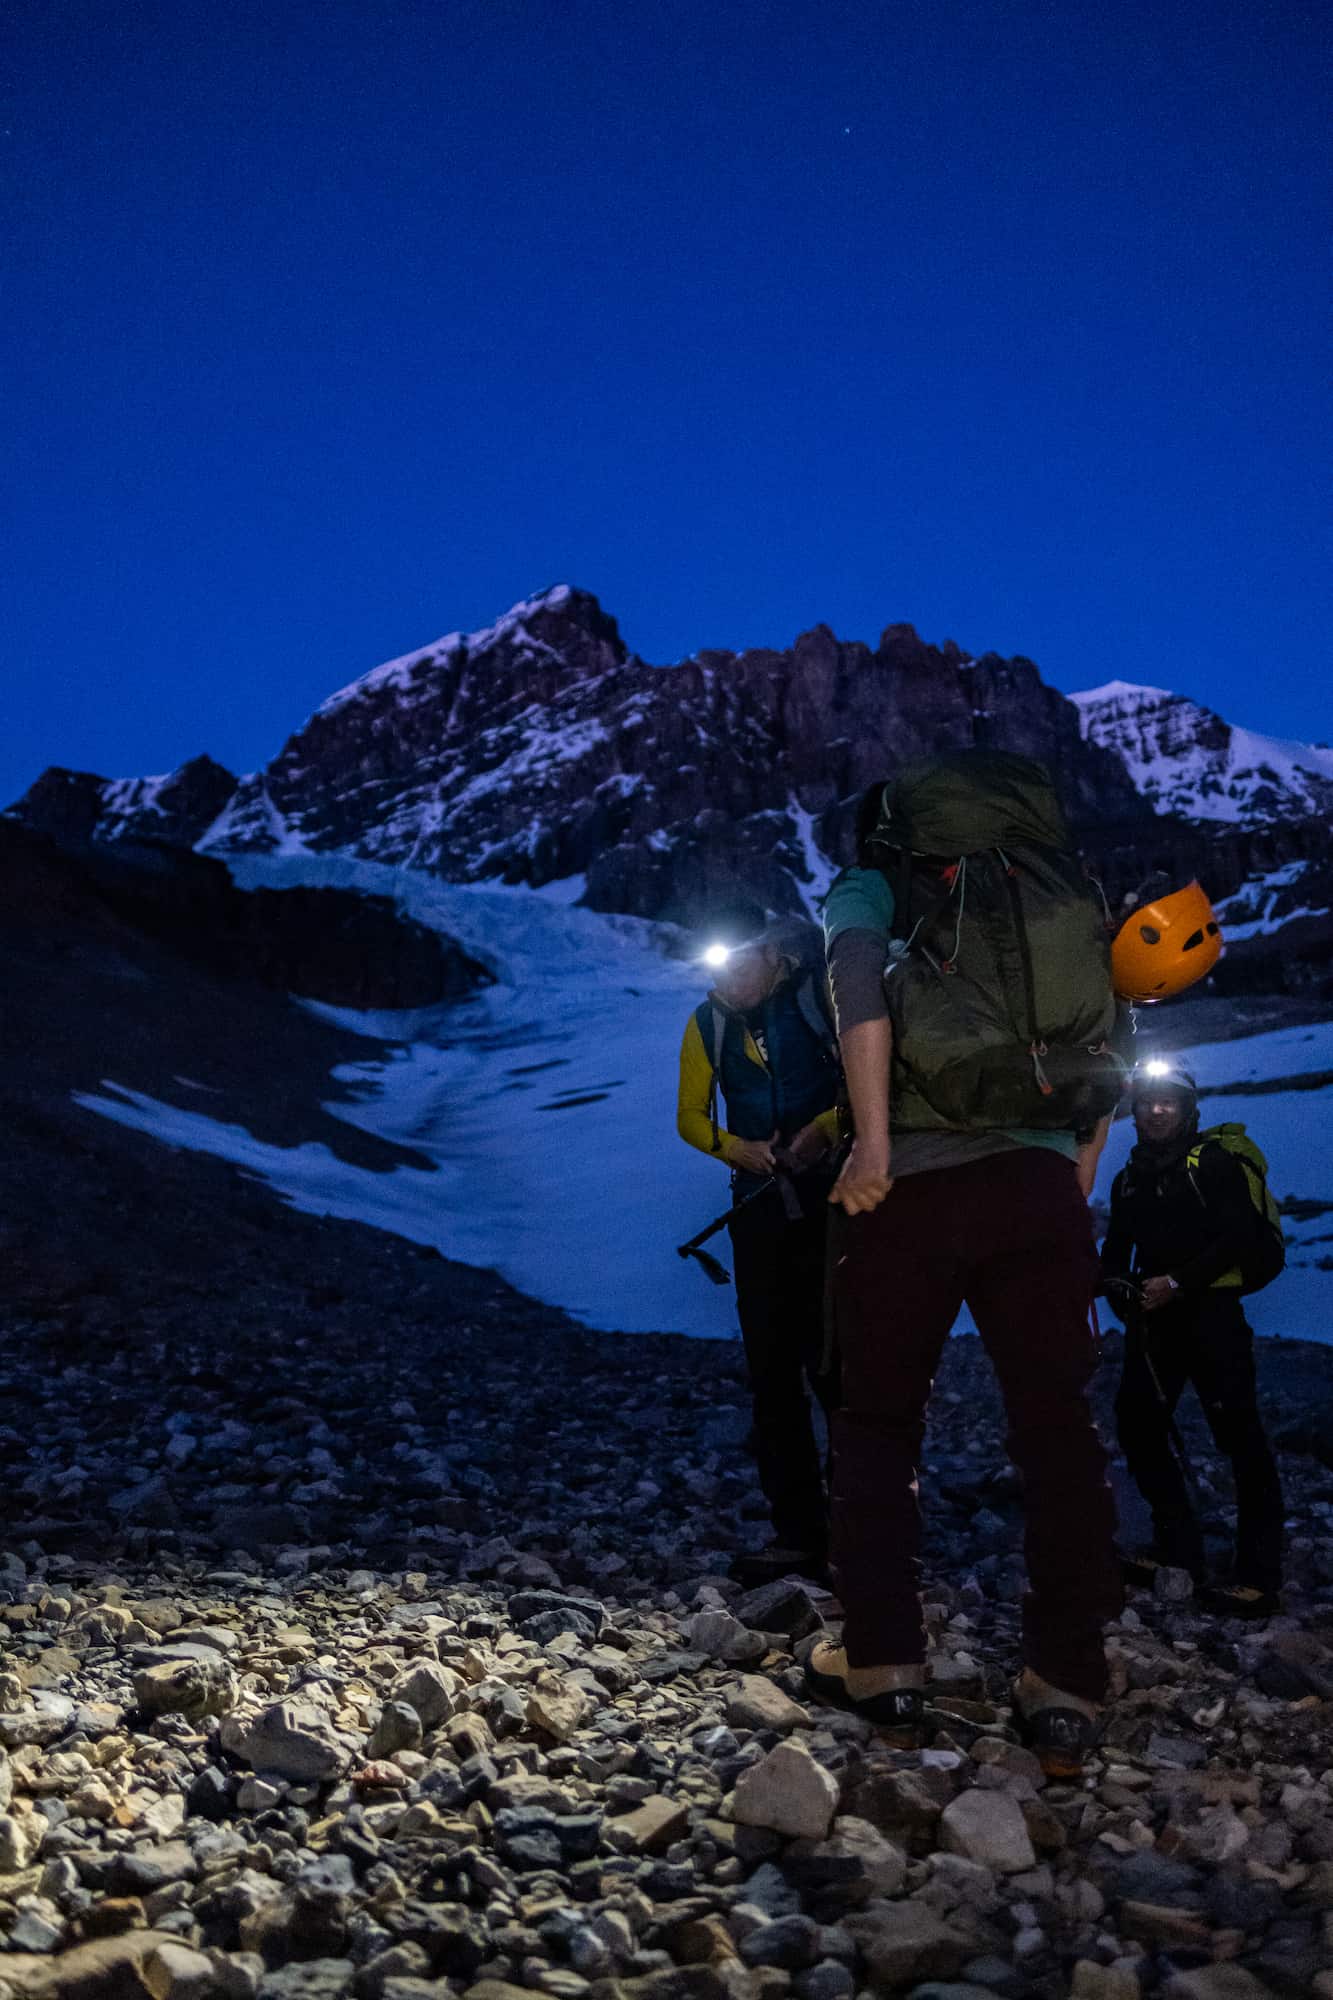

In the dark, we crisscrossed along the loose scree of the moraine following small cairns and the lead of our guides. It’s more of a loose trail and general direction that continues to change each year as the moraine continues to collapse from melting permafrost.
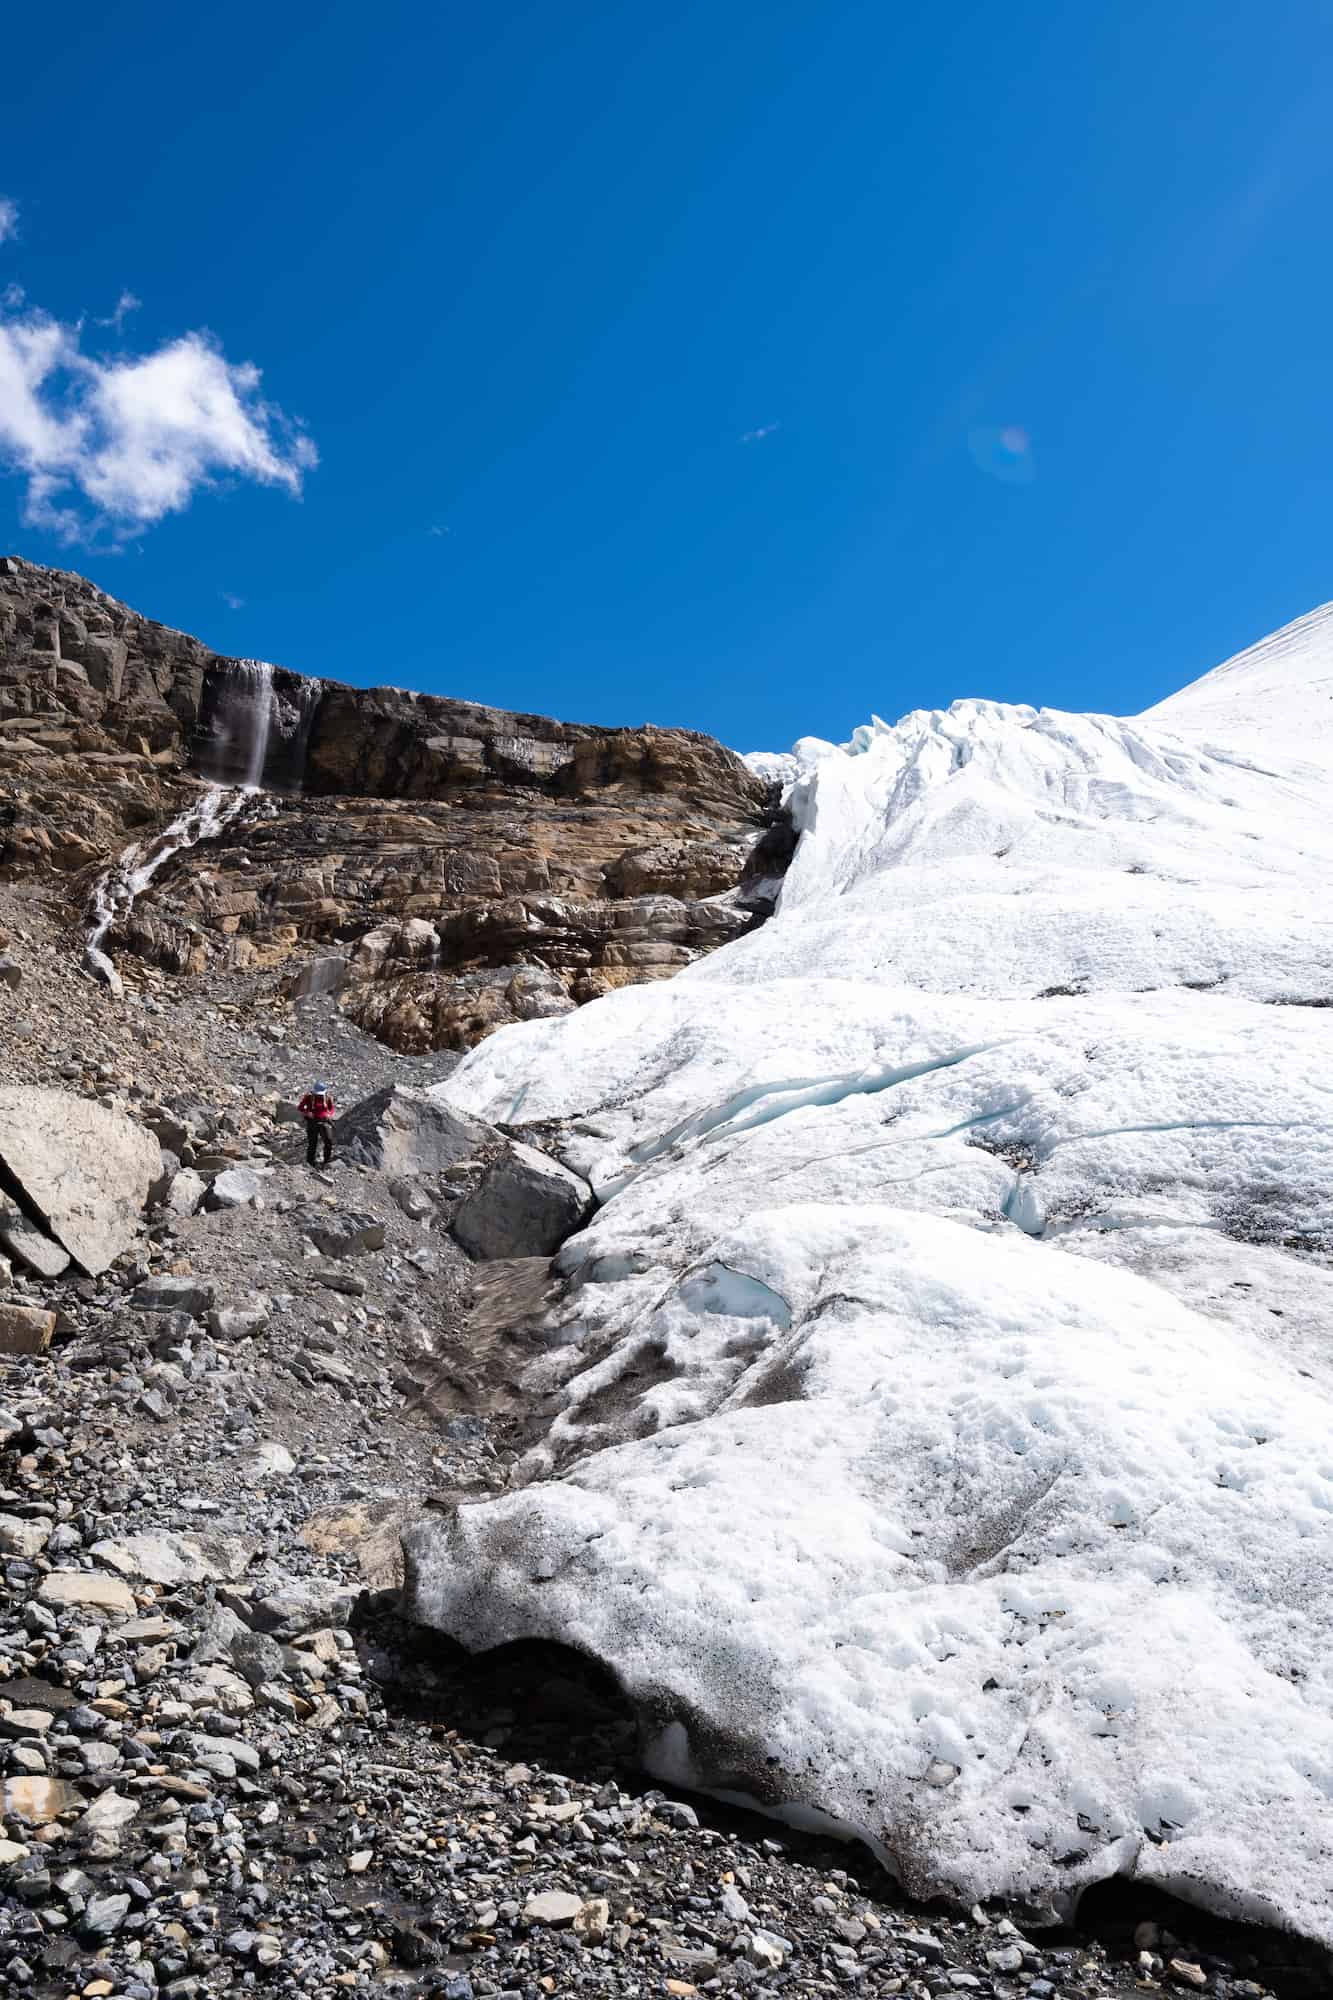
The hike along the road and moraine is a long one and climbs about 500m in elevation before finally reaching the headwall where the glacier and snow begin. The headwall has several scramble moves to reach the top with some loose rock, but nothing too technical (our guide, Gene, really made it easy).
AA Glacier – Mount Athabasca
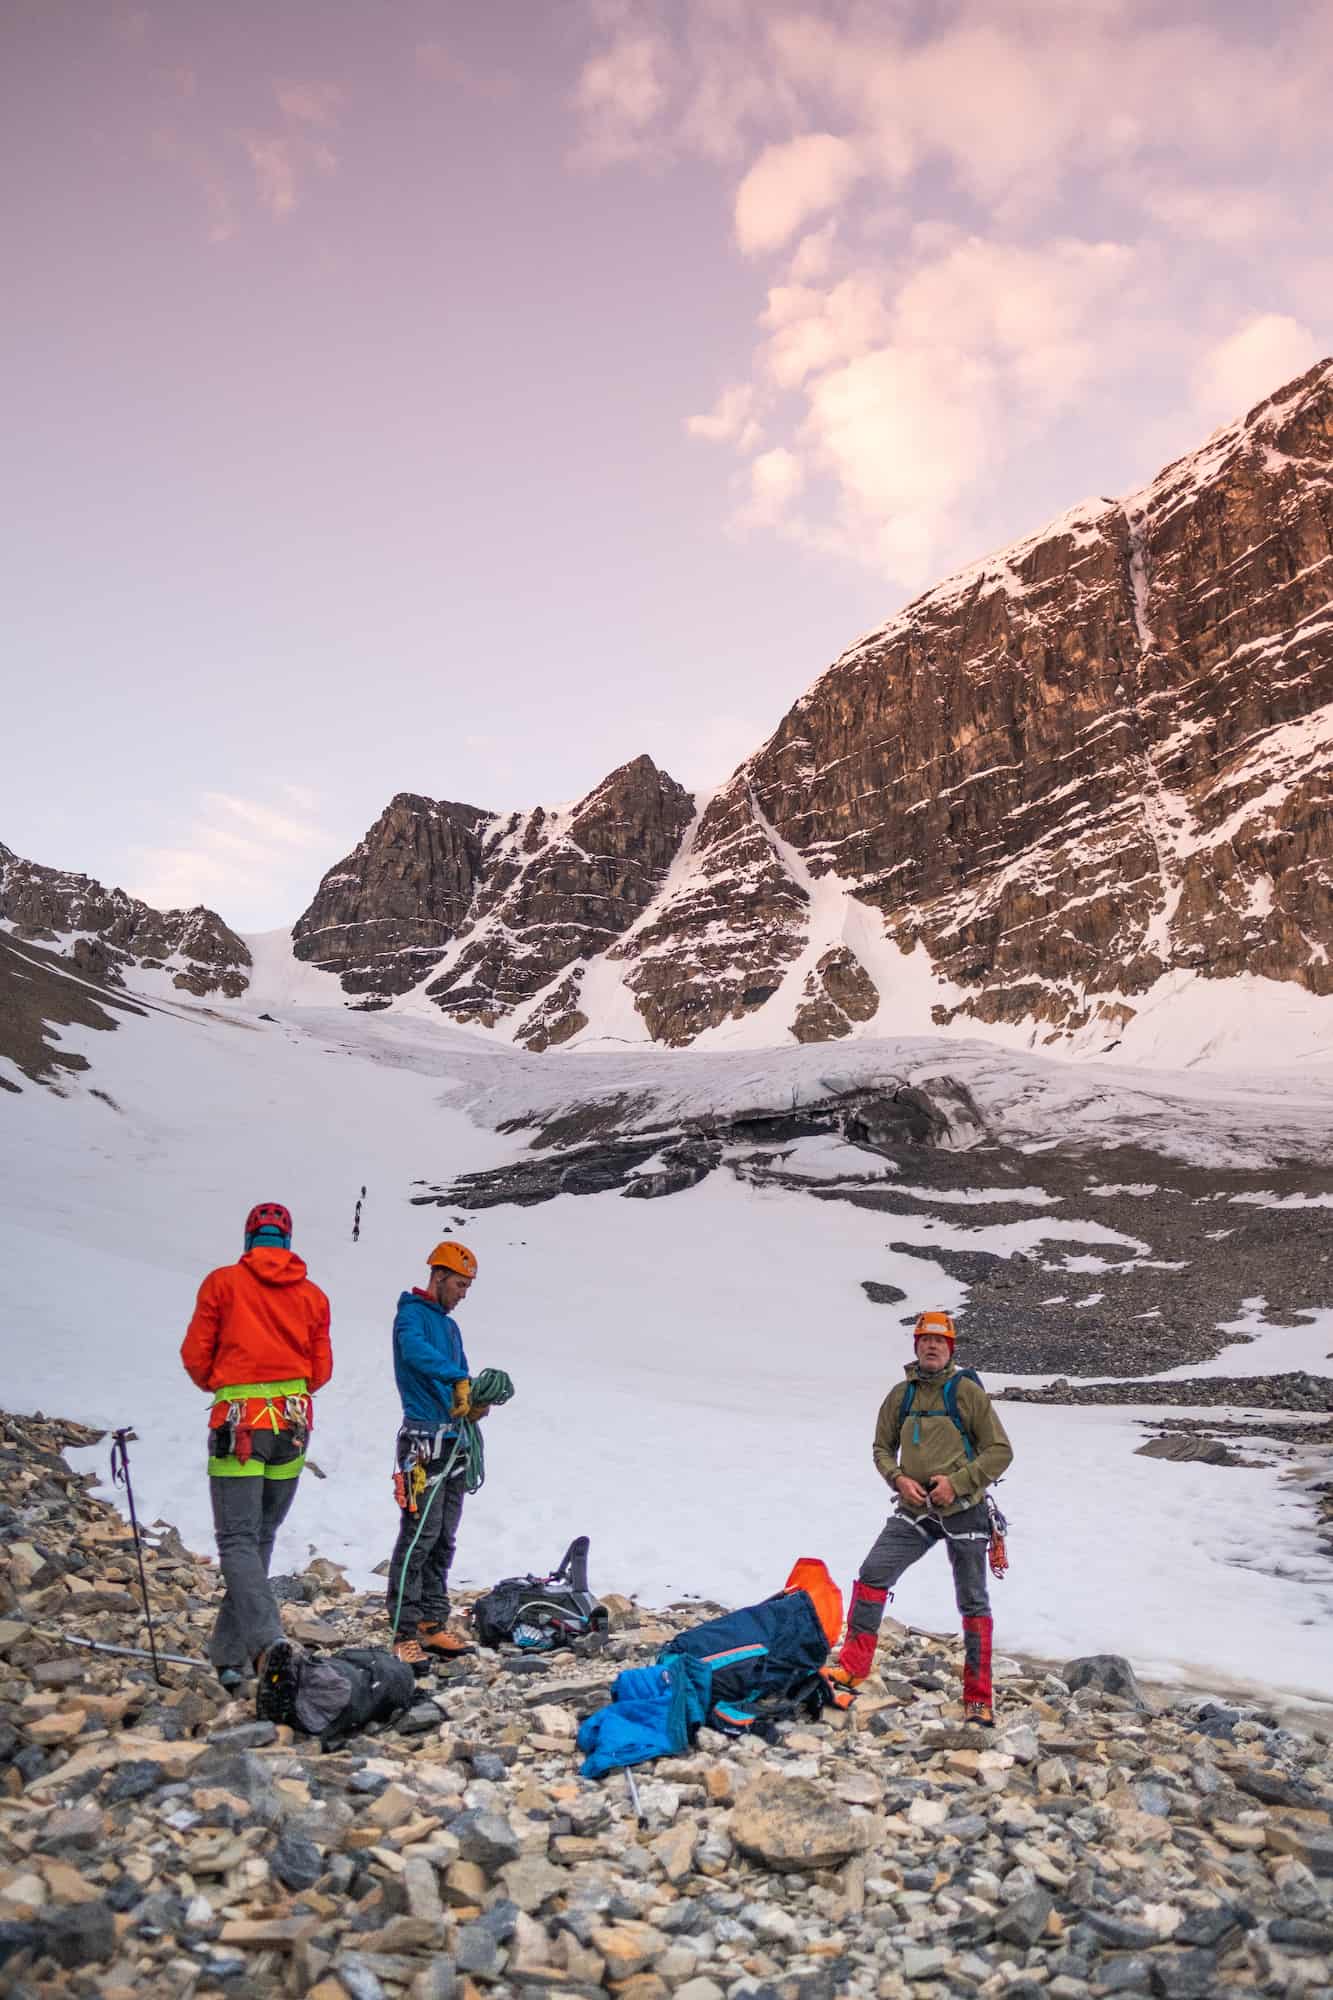
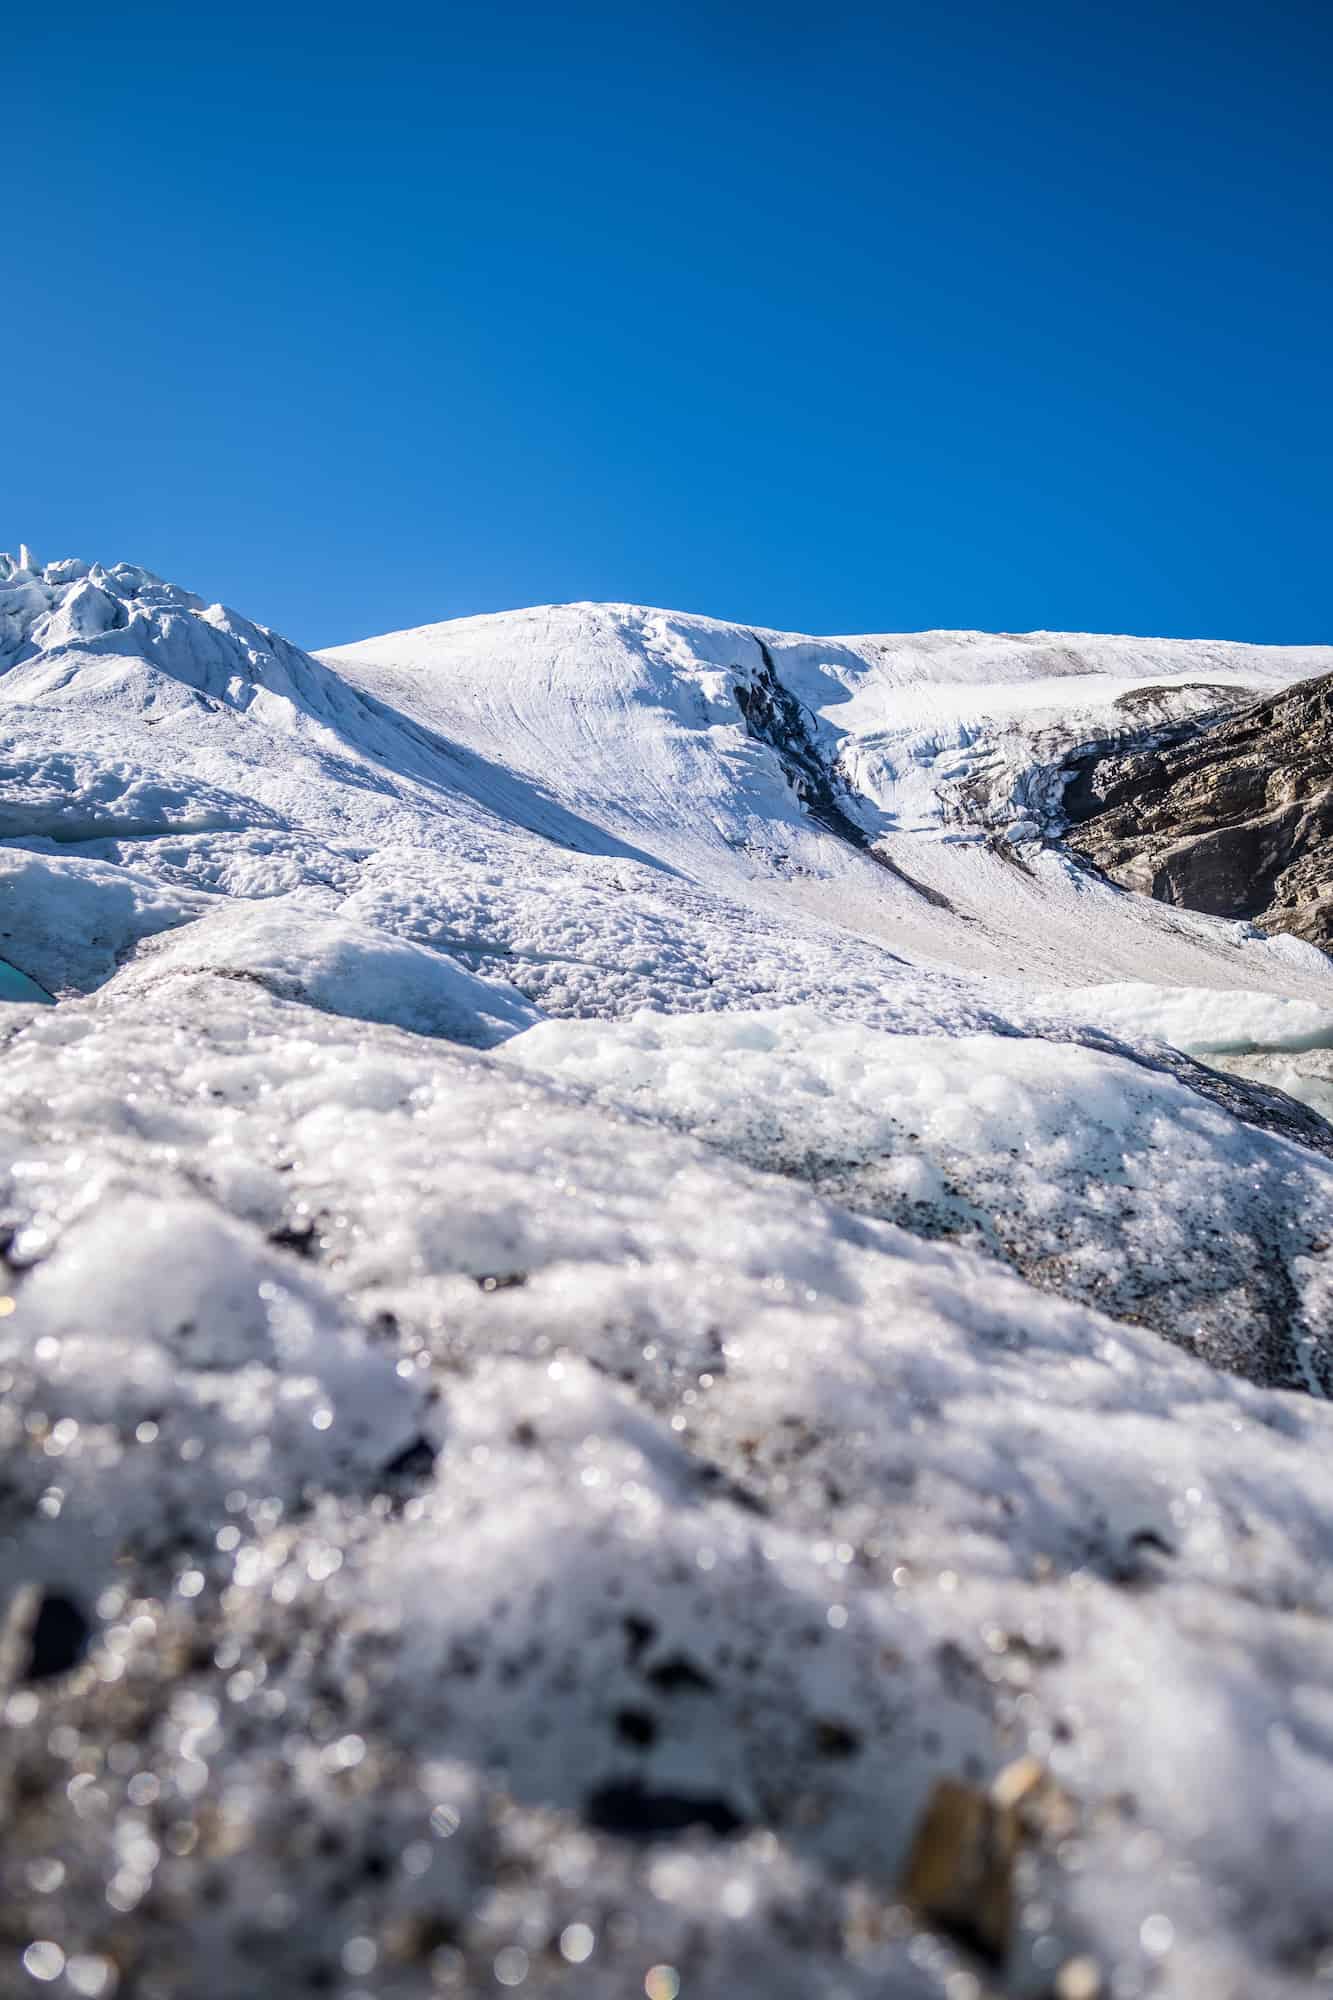
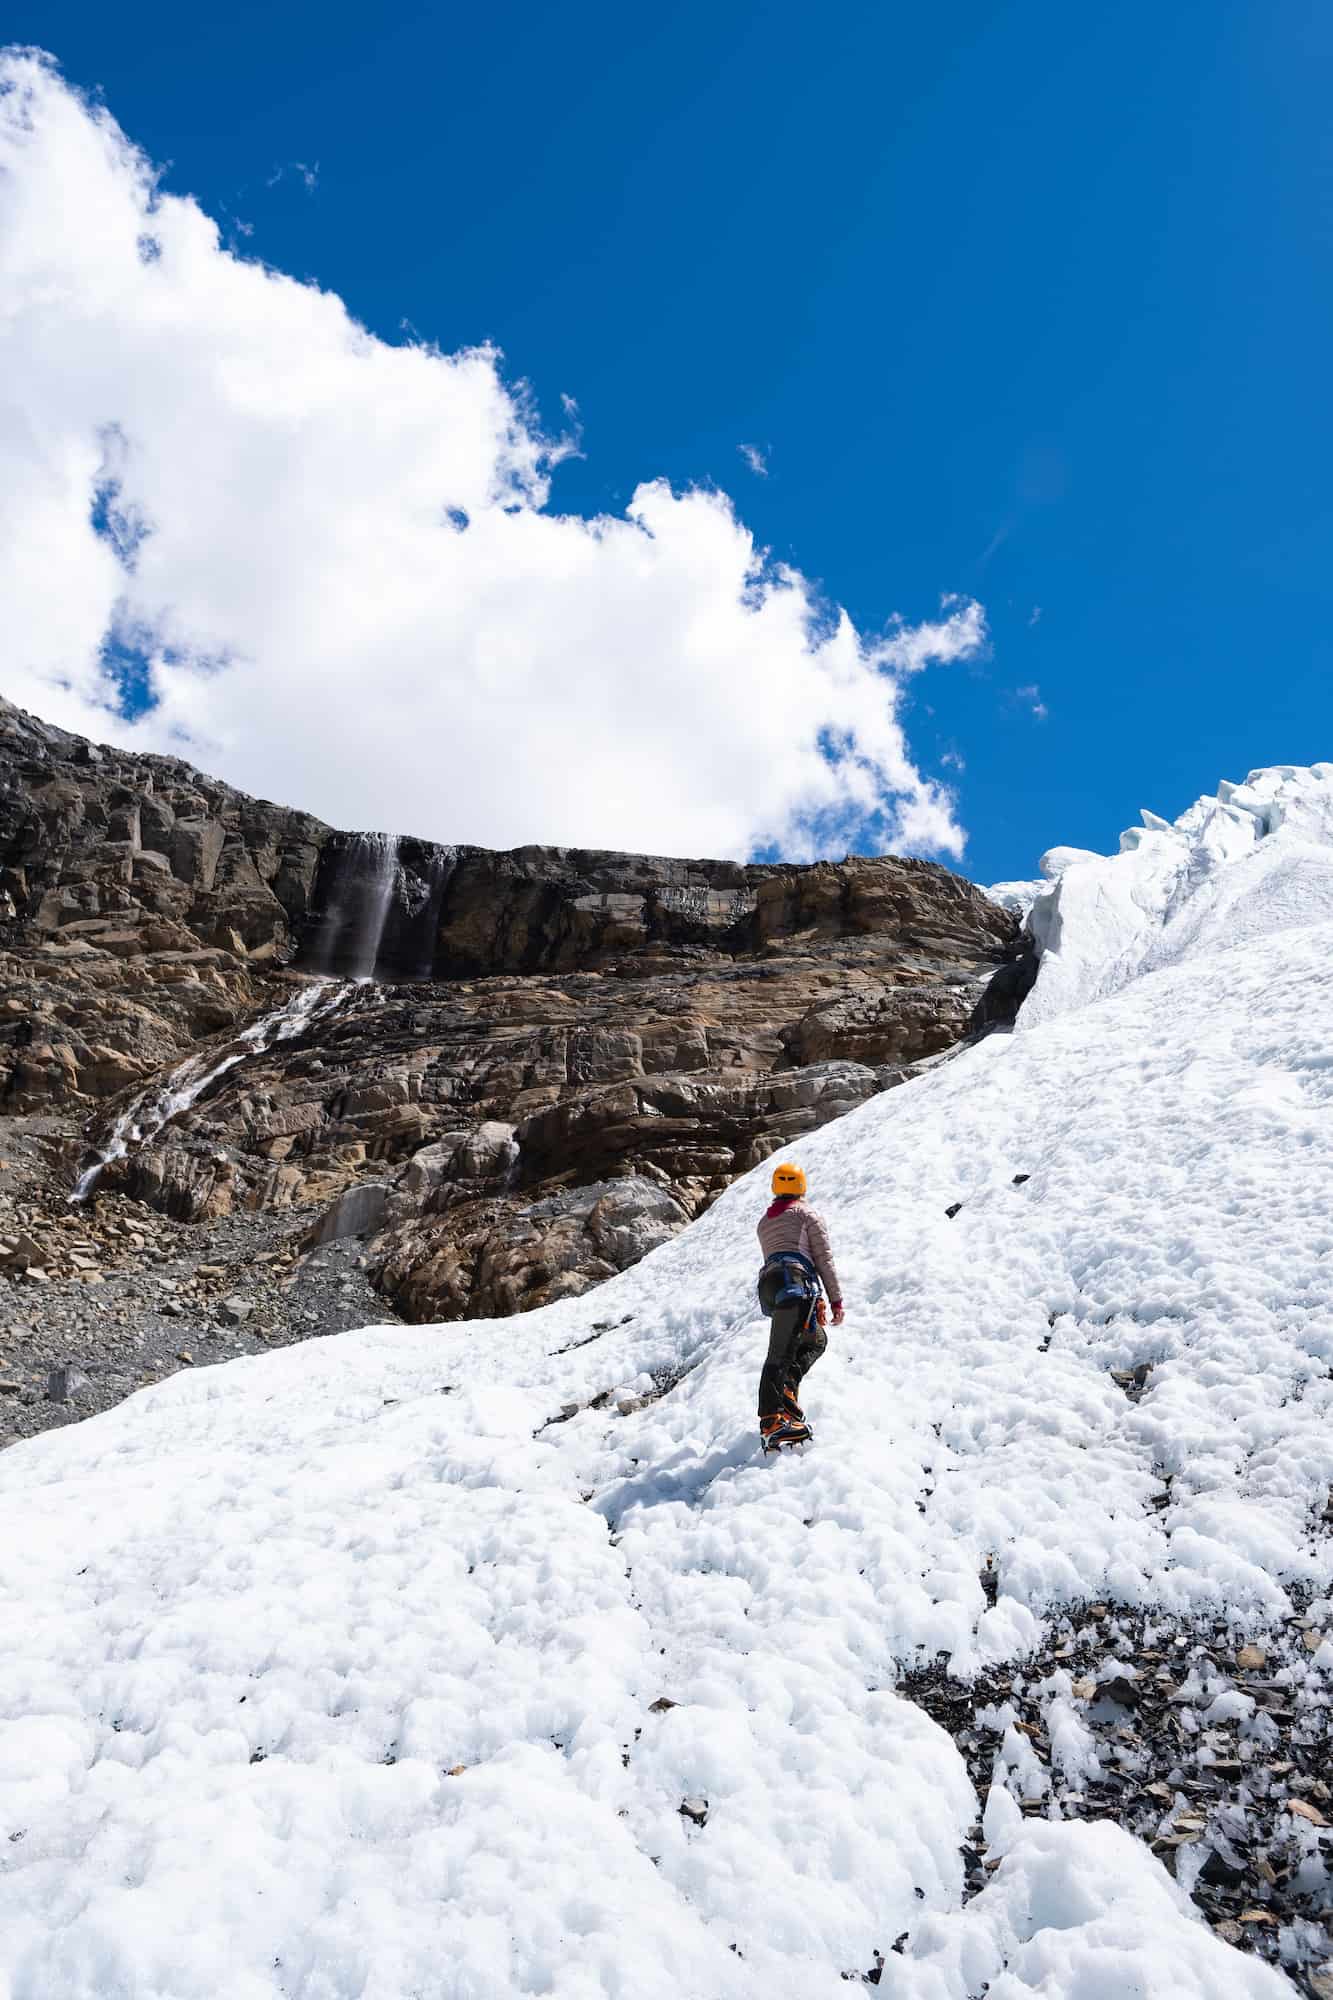
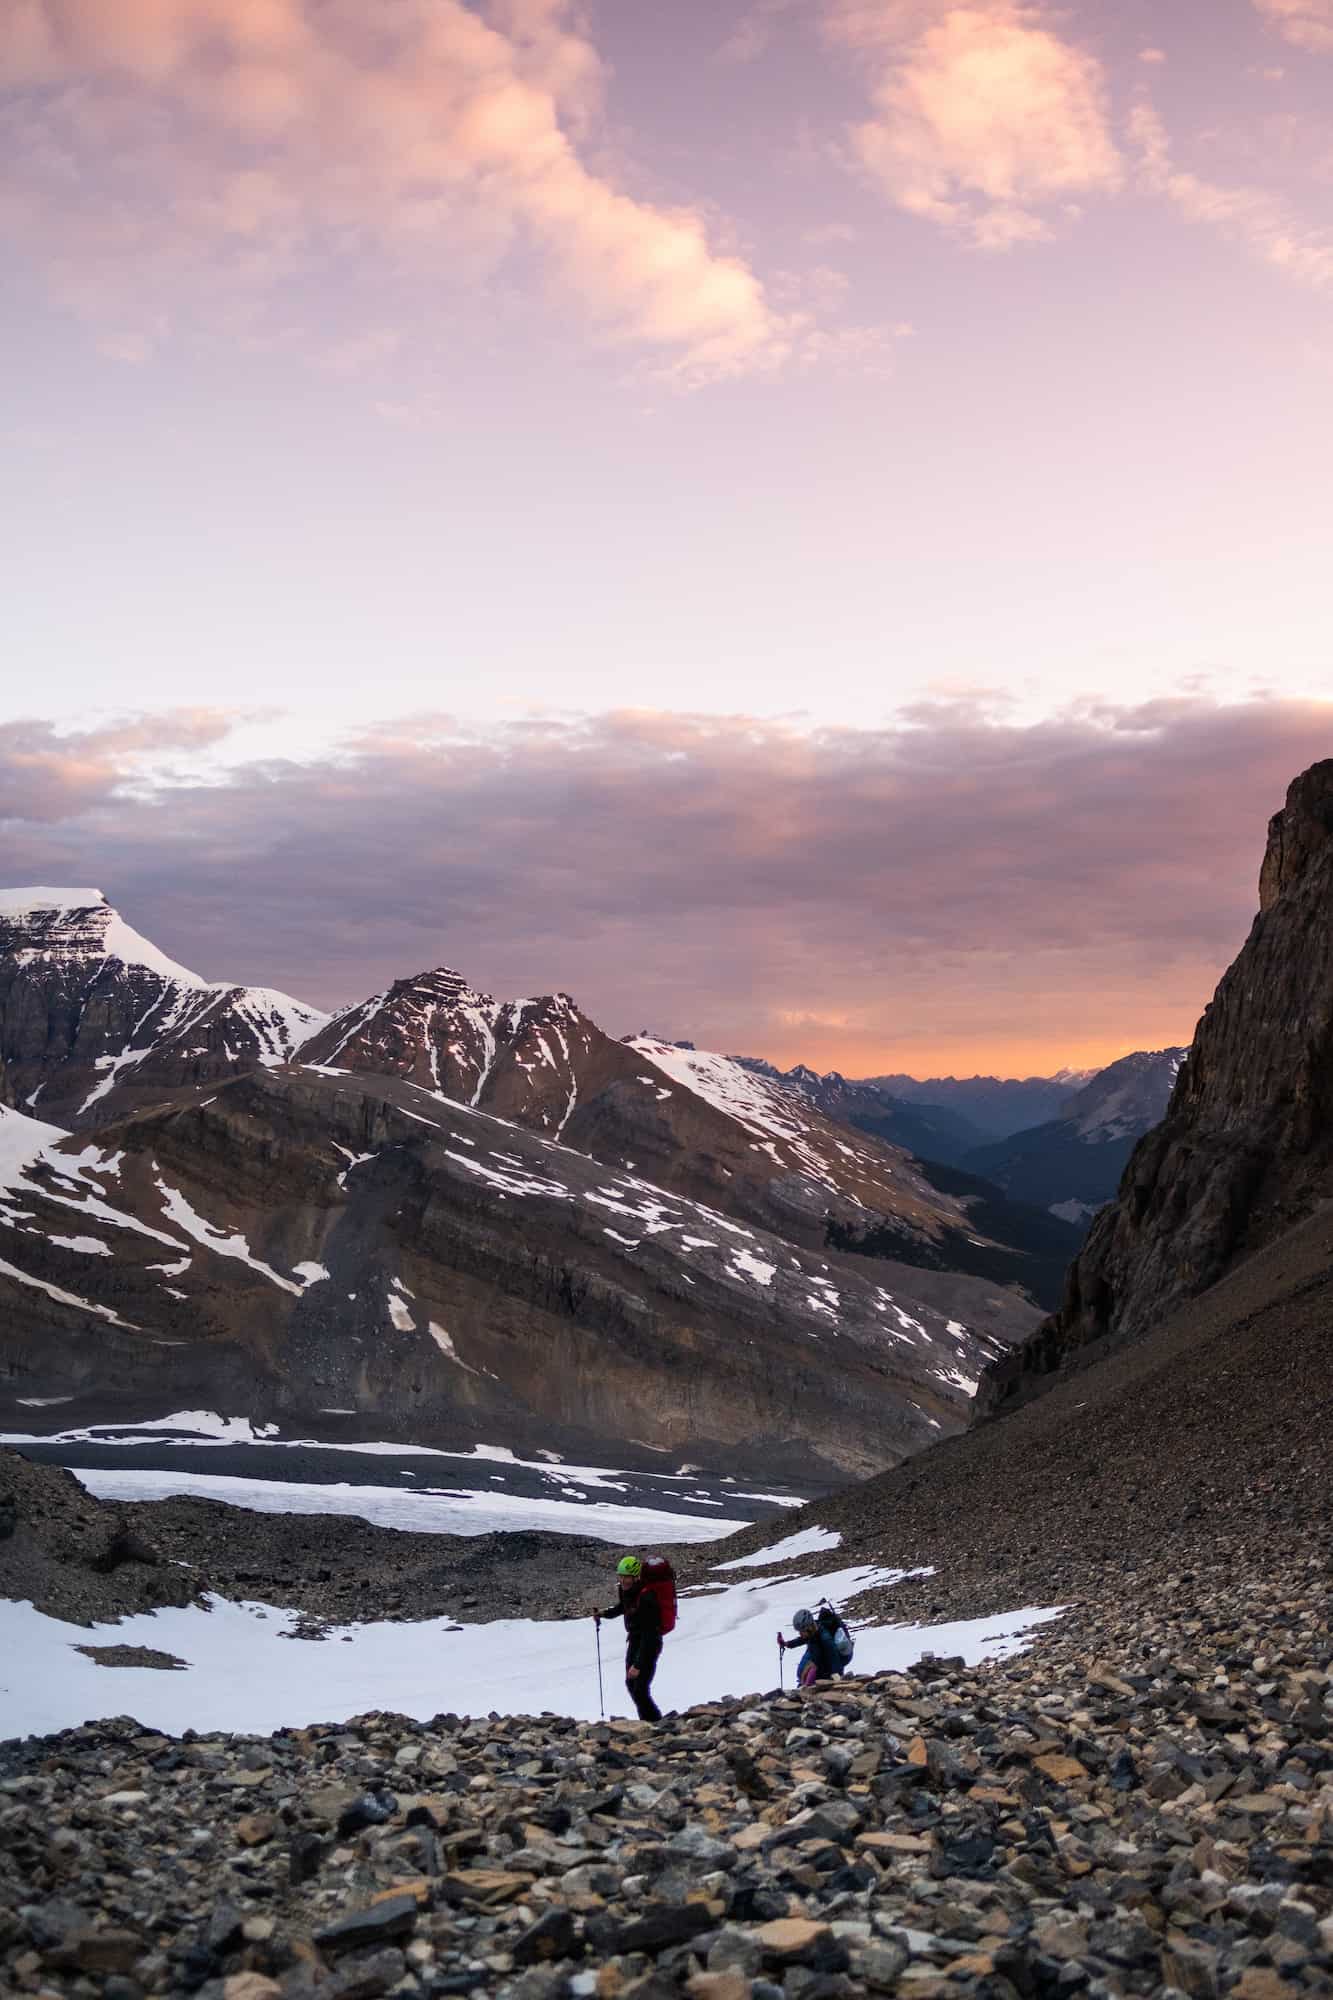
Once over the rock headwall, we came to the AA glacier. The glacier lies in a valley between Mount Andromeda to the West and Mount Athabasca to the East. At the glacier base, we took a small break to put on crampons and rope up for travel. As I walked across the rock-hard glacier, the sun came up over the mountains and cast Mount Andromeda in a gorgeous alpenglow.
It was the first time either of us had witnessed a sunrise like that on the mountain, and it was breathtaking. Travel across the glacier was straightforward early in the morning, with firm conditions and a slight incline.
AA Couloir – Mount Athabasca
The glacier eventually leads up to the AA Couloir and a massive slope. At first glance, the slope does not look that challenging, but with every step, that assessment begins to change. It’s a steep slope prime for avalanches and rockfalls. The slope starts out fairly straightforward with a 30-degree grade slope, steep but manageable.
However, as you move further up the slope, it becomes increasingly steep and over 45 degrees. To climb up the couloir was extraordinarily challenging and, with high-risk terrain, unnerving. Climbing up the couloir was extraordinarily challenging.
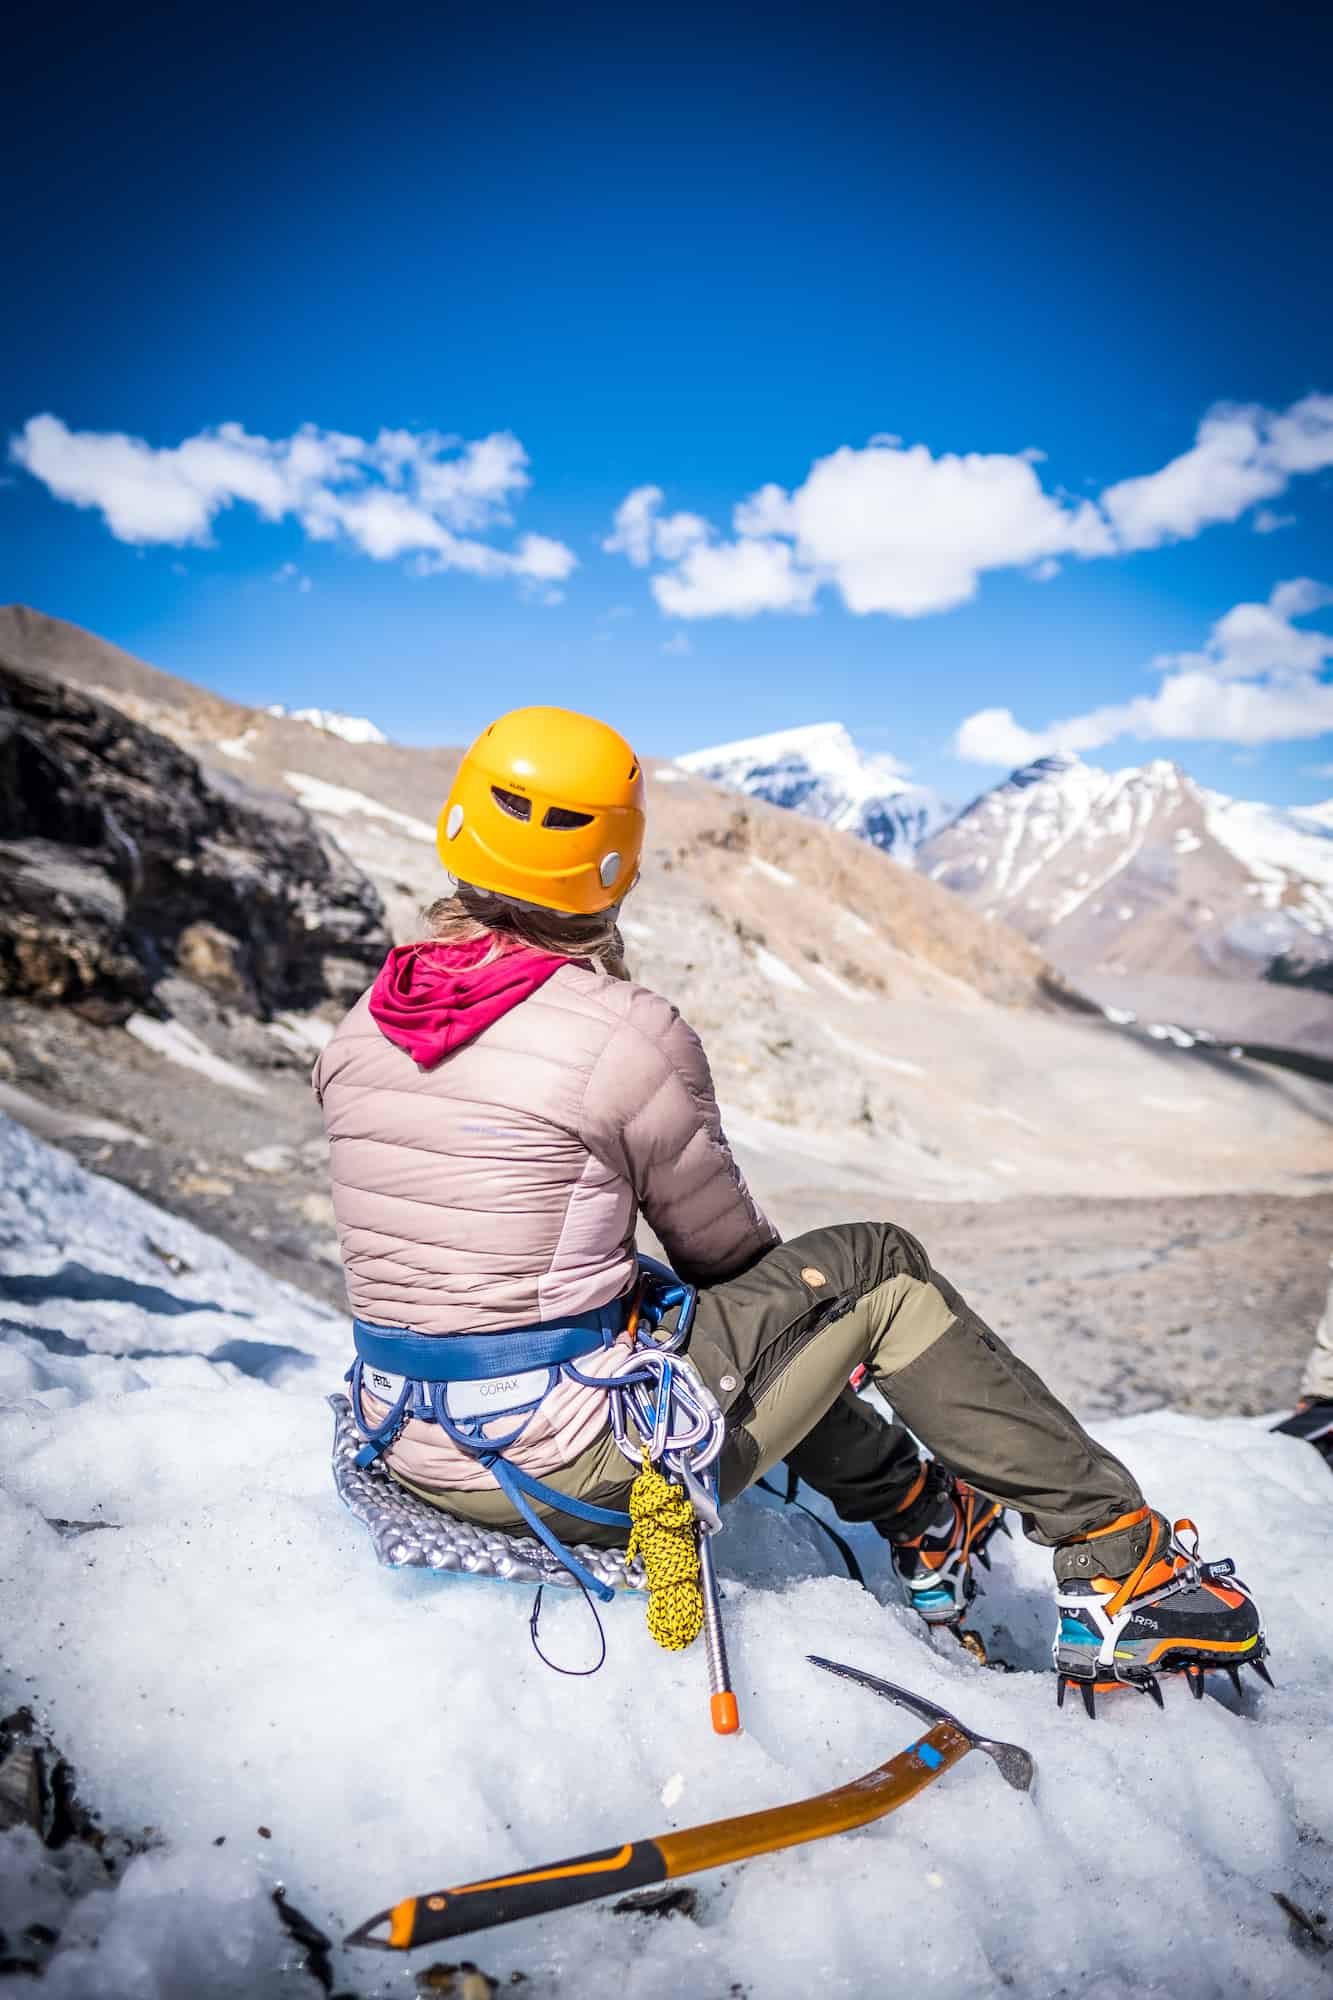
At the top of the couloir and on the stable ground, we were finally able to breathe a sigh of relief after an hour on the slope. The smile on Natasha’s face was priceless, total relief.
Silverhorn & Mount Athabasca Summit
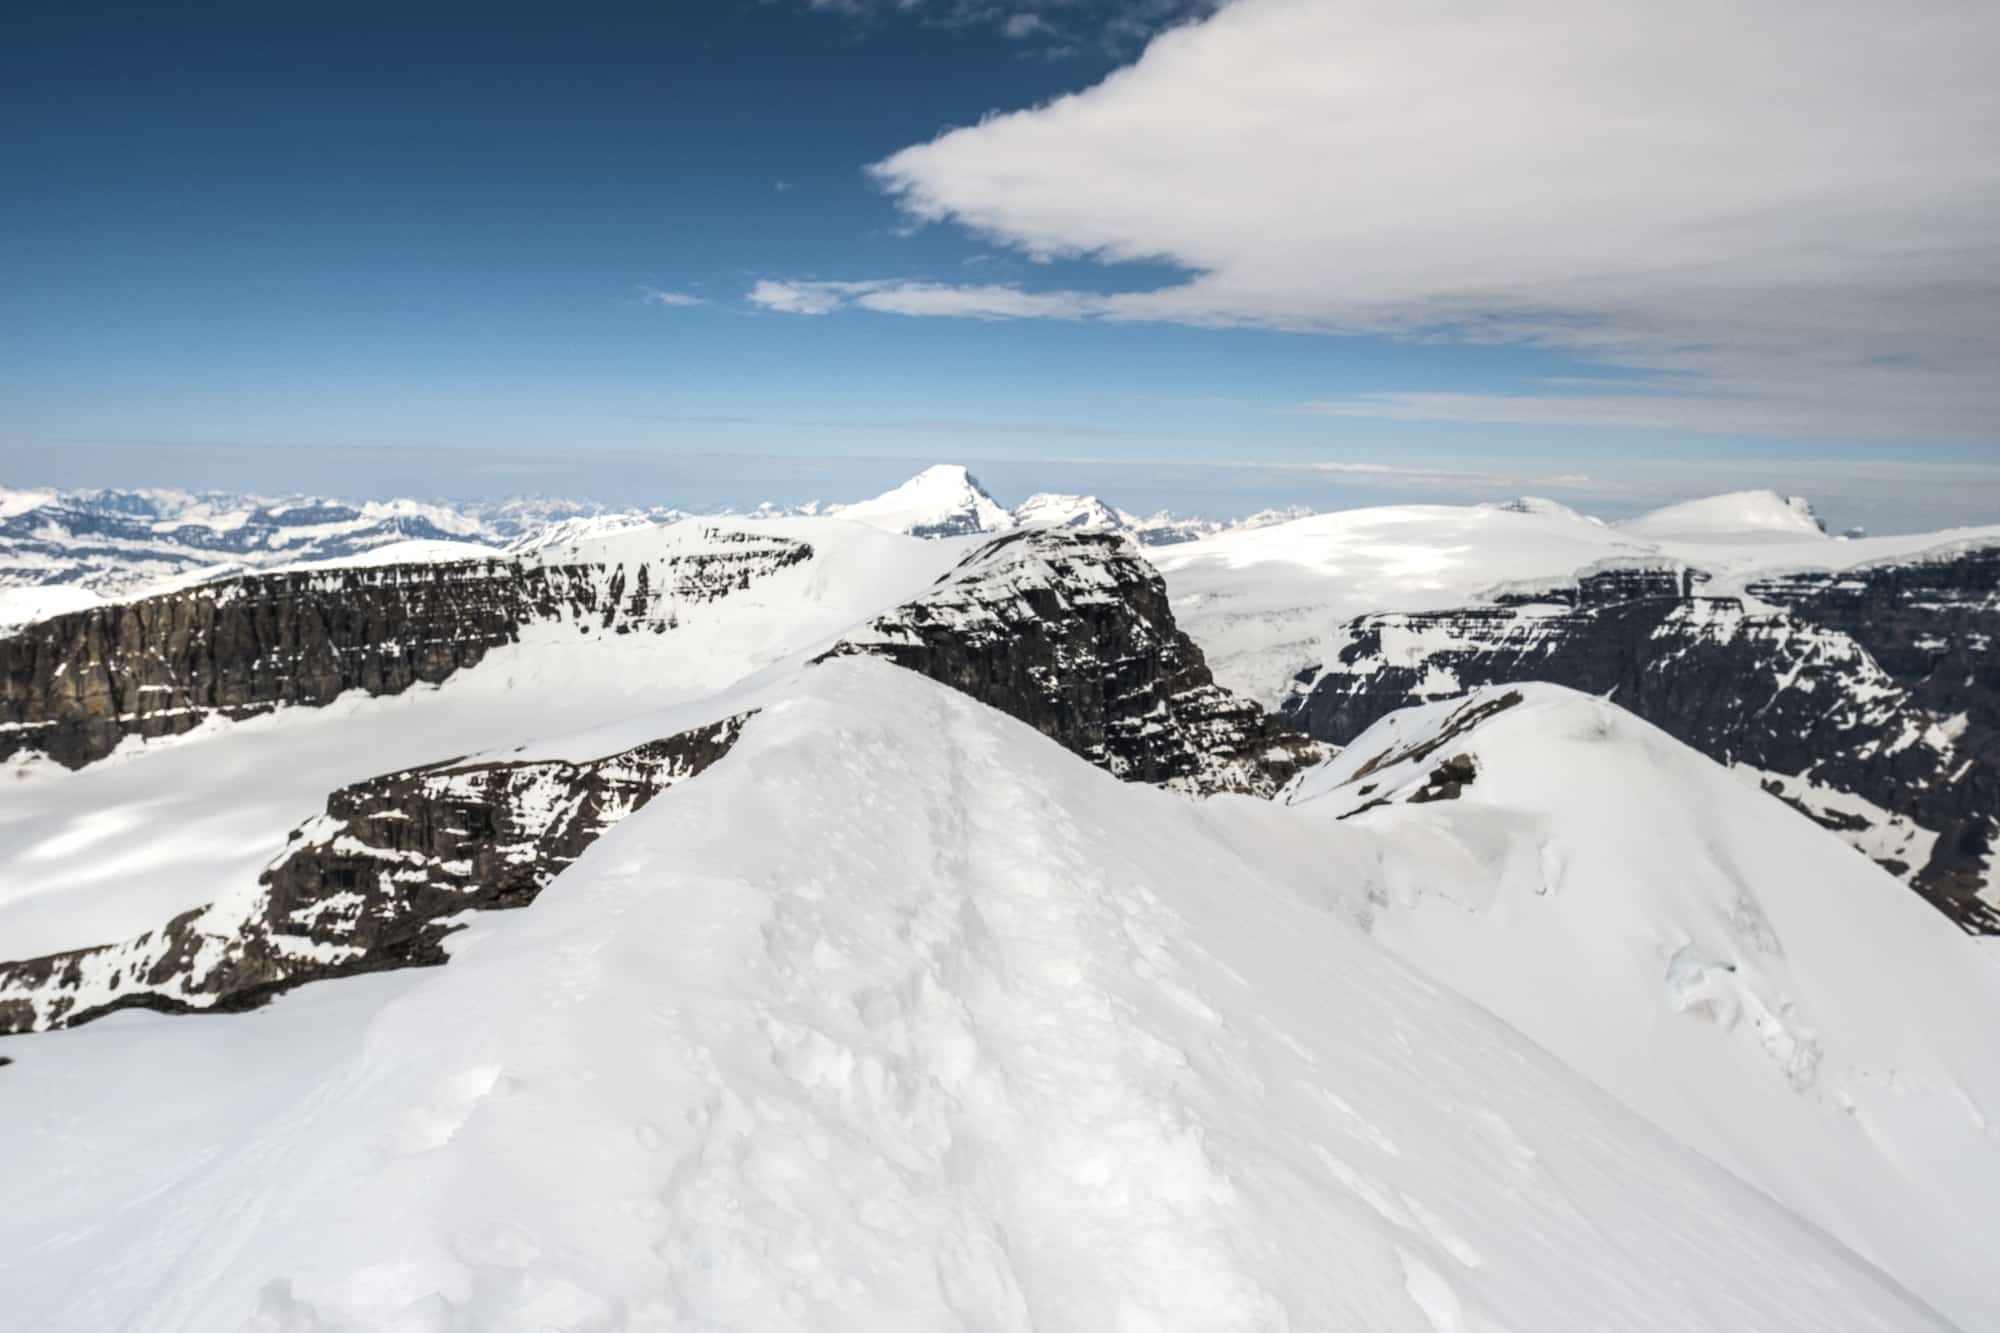
From the top of the couloir, the ascent up the famed Silverhorn peak was straightforward. It moved across several bands of rock and snow and took some work, but with little exposure. It felt like we were still ages away from the peak as we made our way up to Silverhorn, and the idea that we may not summit had begun to set. There was a slight feeling of defeat, but once at the top of Silverhorn, we saw the short distance left to the true peak.
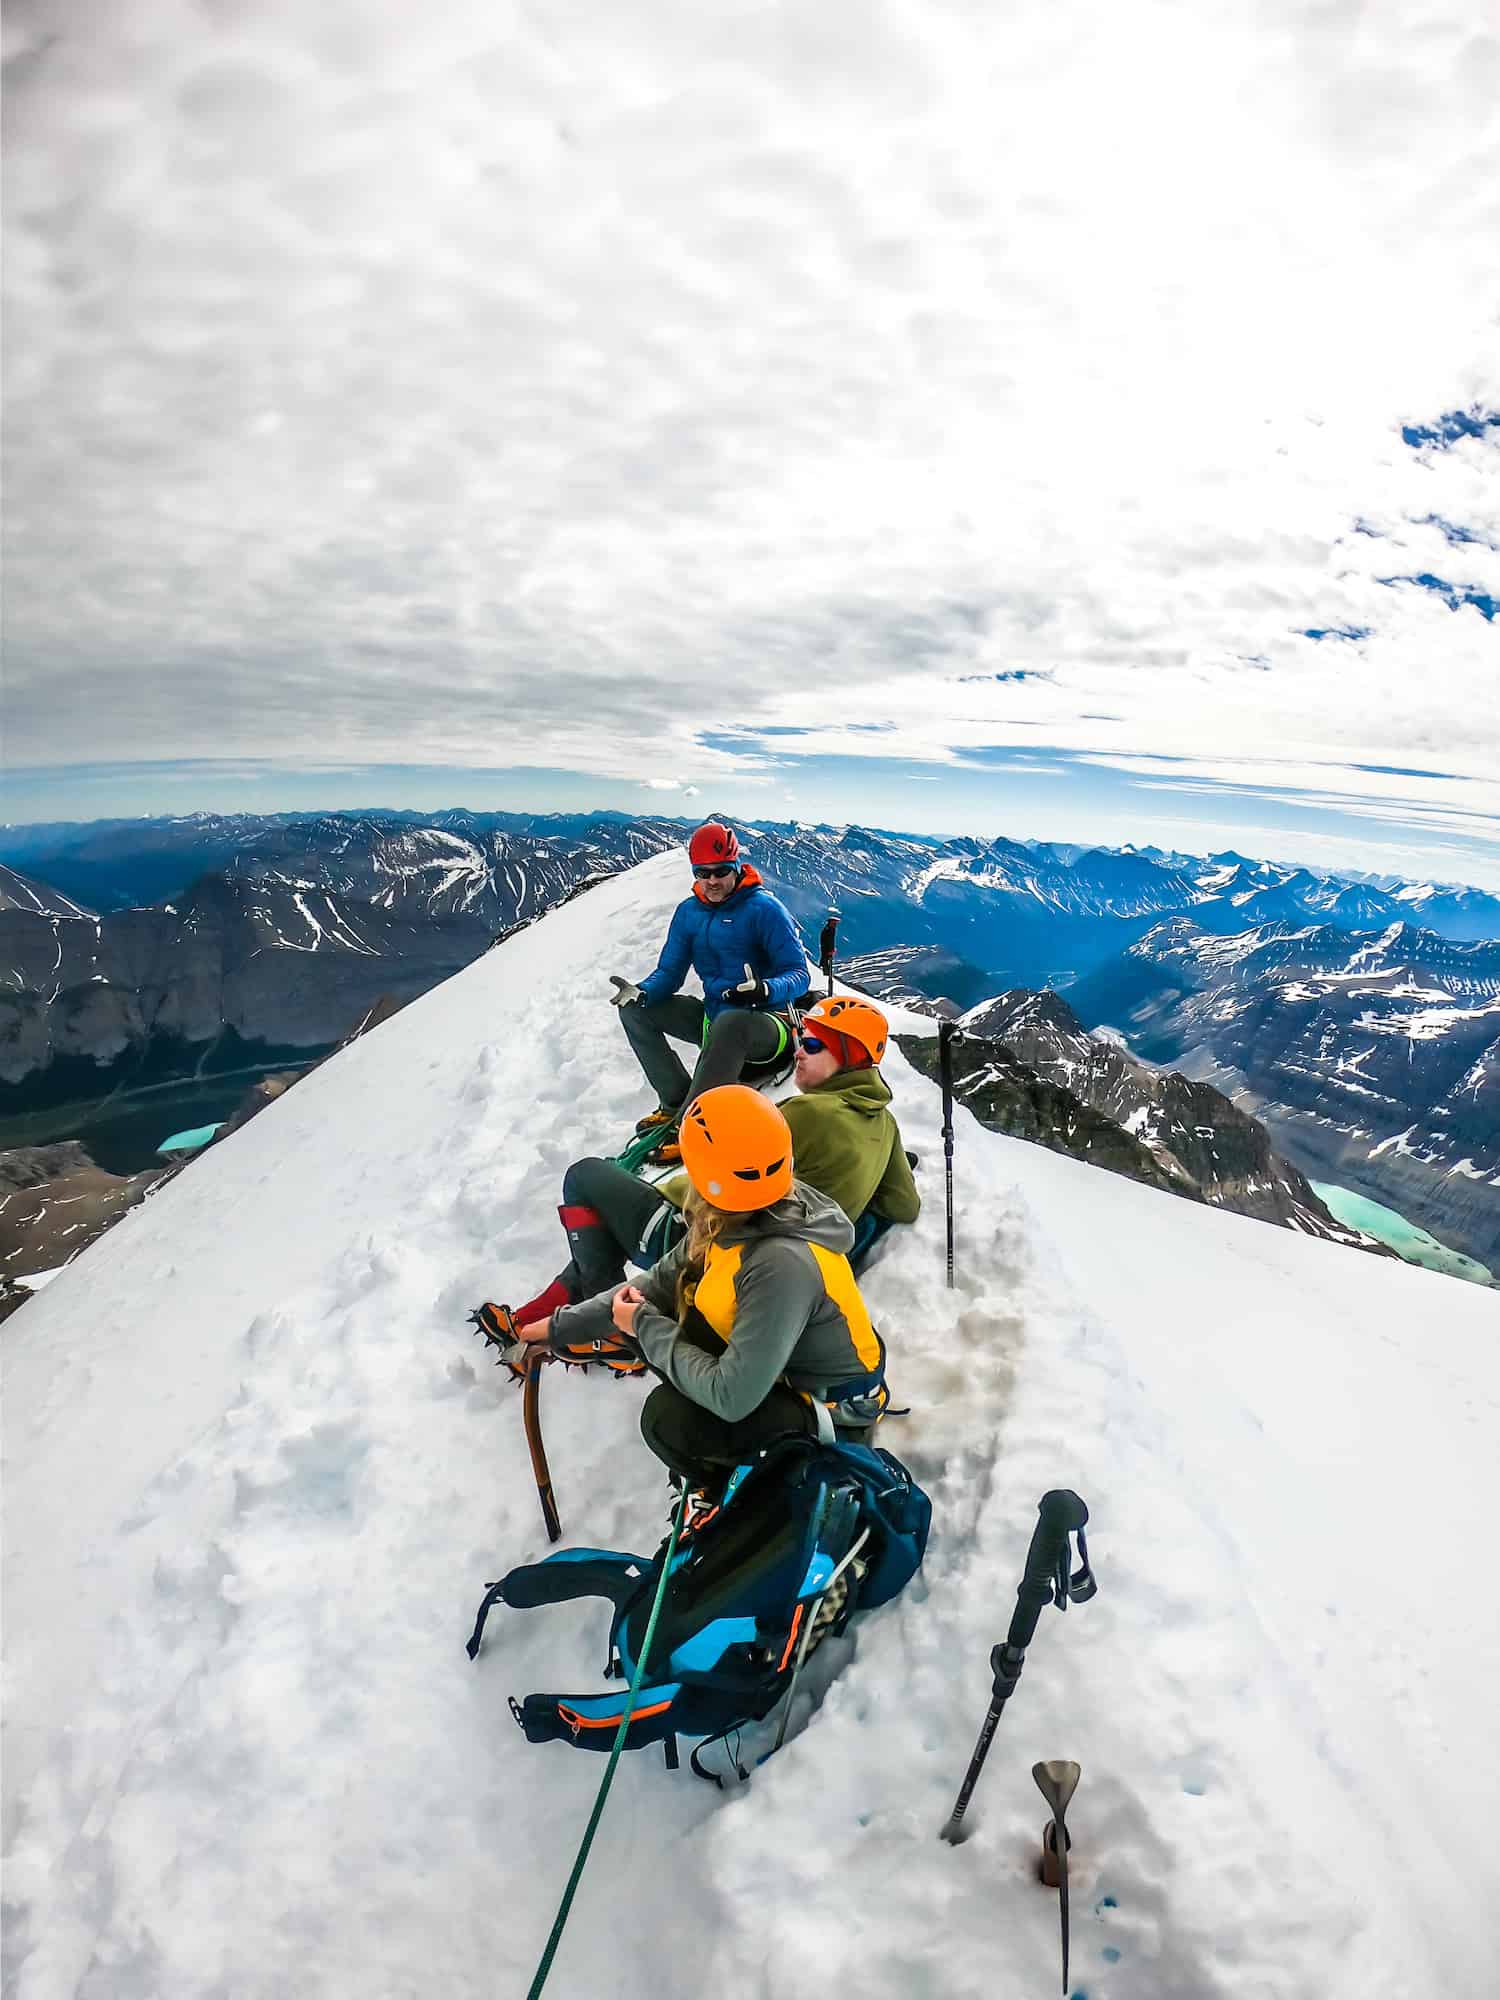
The last section of the climb along the ridge of Silverhorn was the most enjoyable. It’s a narrow ridge covered in snow a few meters wide with massive views in either direction. I could see far across the mountains to distant peaks and glaciers. In all my moments spent in the mountains thus far in life, it was by far my favorite.
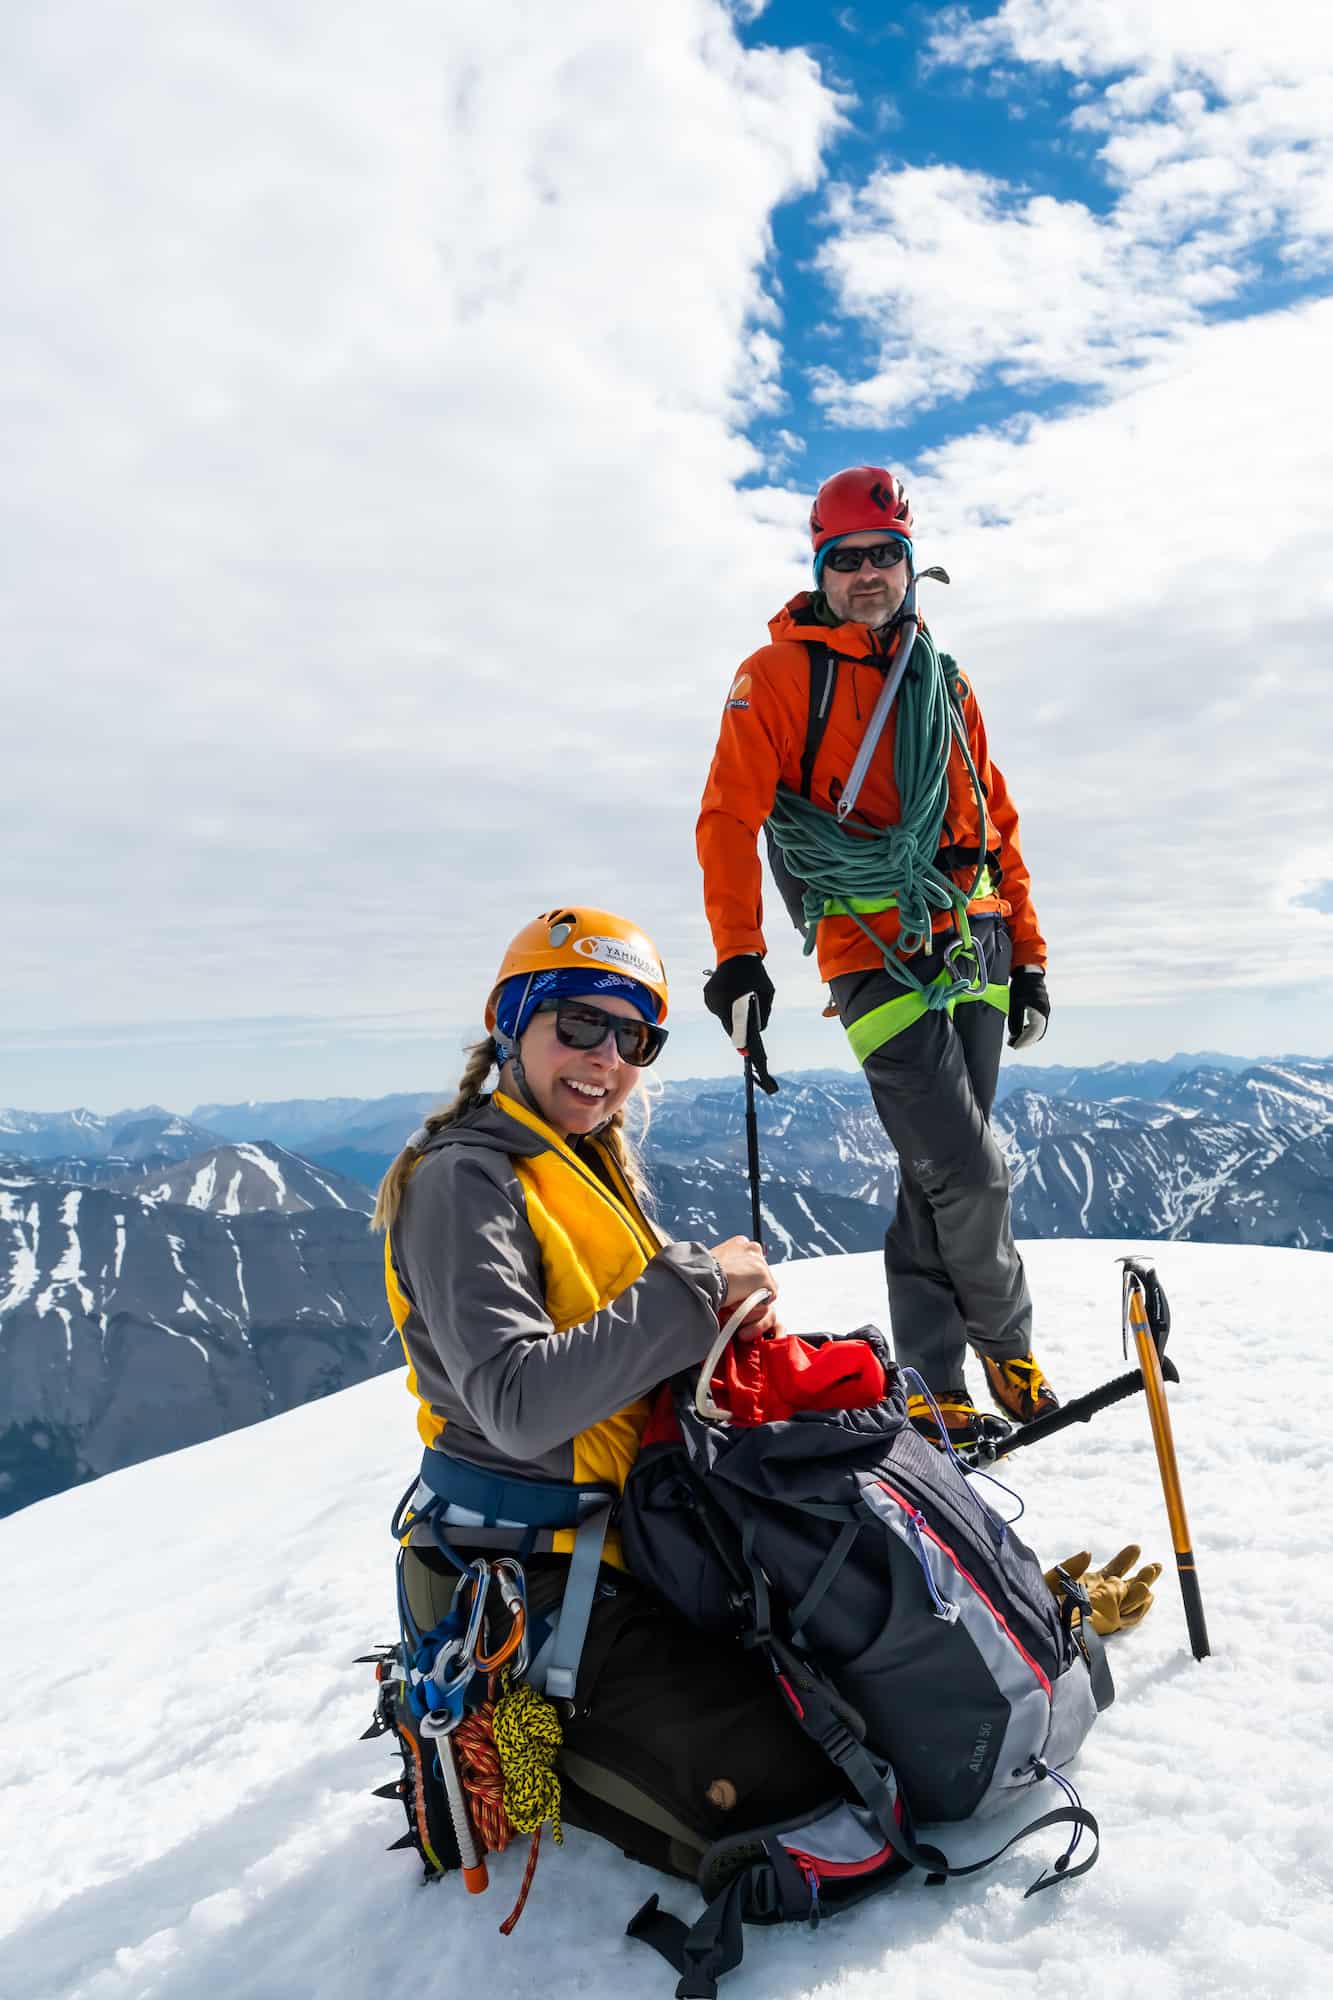
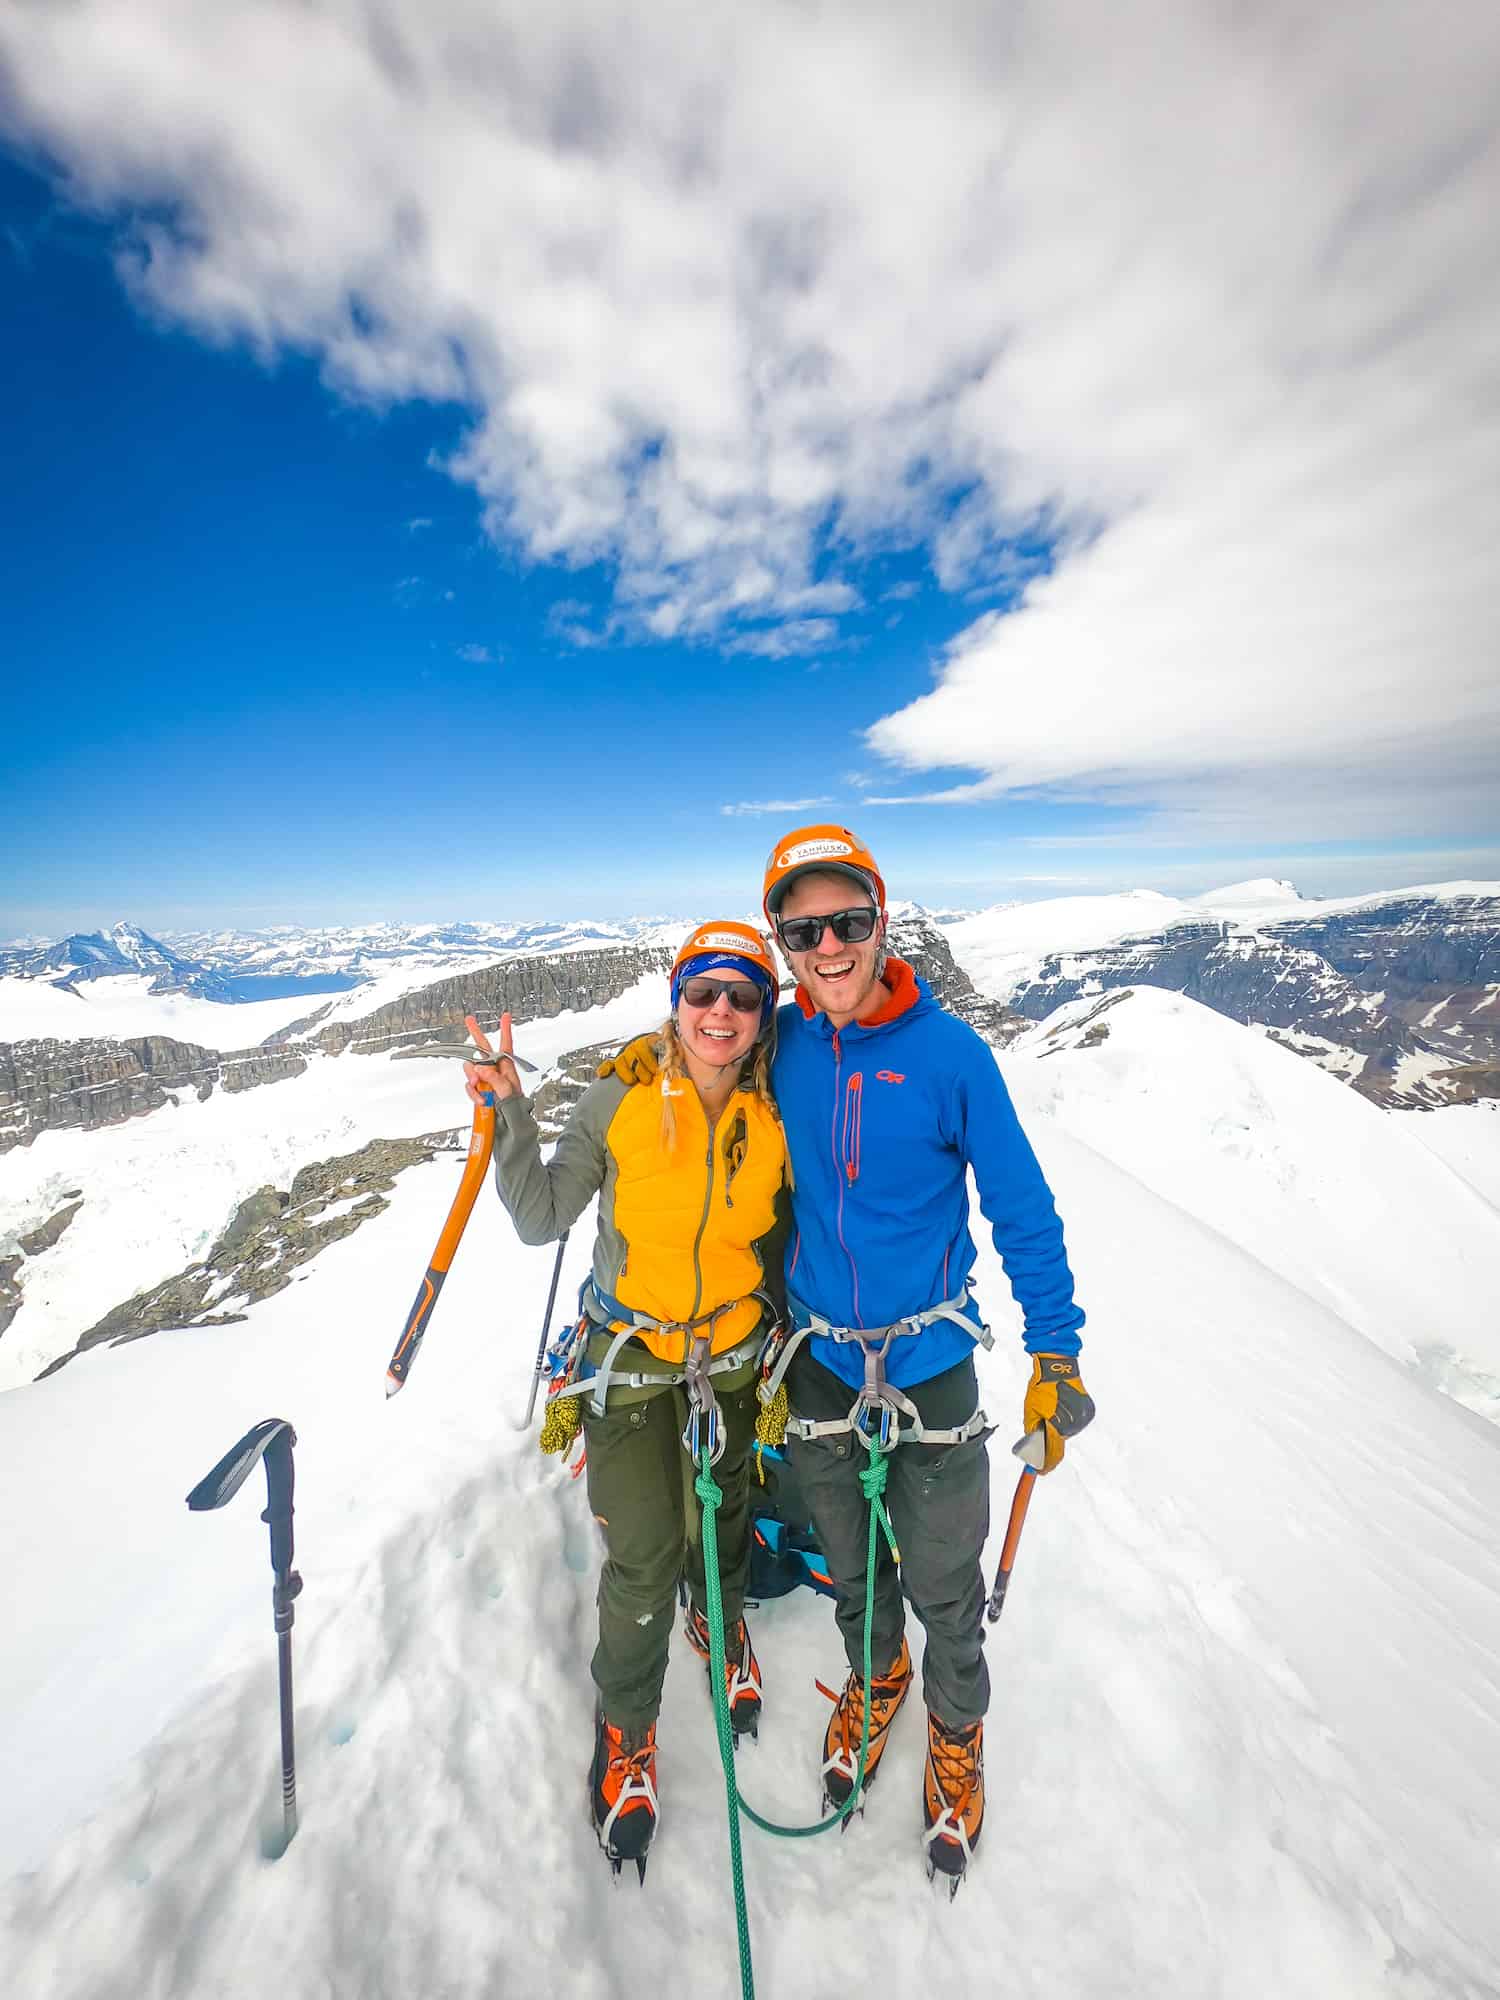
At the peak, we were all ecstatic. In a small group of four, three clients to one guide, we sat down in the warm sunlight. There was low wind with perfect conditions, and we sat on the peak for a well-deserved lunch.
The descent was easy for the most part until reaching the couloir. To descend, we used a straightforward approach. As the strongest in our group, I took the lead down the couloir. Facing outward from the slope is an experience that feels a bit like walking down a cliff (not that extreme).
From there, it was a long slog back to the car park. The total time round trip was around 11 hours, we were by no means a fast-moving group, and the average is closer to nine to ten hours. After reaching our car, we set off for our home in Canmore. We were exhausted and only made it to Saskatchewan River Crossing before needing a nap and an overpriced coffee.
Thoughts on Our Mountaineering Course
We could not have picked a better first for mountaineering. The course was well structured, and we feel ready to tackle our next mountain adventure. The next mountaineering objective is best done with another guide. We still require a lot more experience until we feel comfortable tackling objectives on our own. However, Mount Athabasca was a great first objective. It was challenging without anything too far over our heads.
Our group was six people, and for the first two days, it was the perfect number to get individualized training in a group environment. On summit day, a second guide arrived to maintain a ratio of one guide to three guests, which was reassuring on such a big mountain.
Gear We Recommend

The vast majority of hikes and easy scrambles in the Rockies, you’ll find us in our trusty Salomon Speedcross.

Arc’teryx Cerium is our pick for the best down jacket. It’s incredibly light, and we bring it on almost every hike in the Rockies.

This nifty clip from Peak Design secures a camera to my backpack strap for easy reach. No more digging in the backpack!


20L feels like the ideal size for quick hikes and scrambles. We love the Nano from Gregory with a hydration reservoir.

There is not much cell service in the Canadian Rockies. In case of emergencies, we carry an emergency beacon with GPS.

If you’re heading to Western Canada soon, make sure to check out our interactive map with over 450 spots to help you plan!
- ✅ Hiking trails with links to trails & insider tips you won’t find online
- ✅ Our favorite photo spots, scenic views, waterfalls, must-visit attractions, and even swimming holes
- ✅ Our favorite restaurants, coffee shop & local spots that many skip.
- ✅ We add as we explore ourselves. That means we add new points every month!
- ✅ Map works with Google Maps!
- ✅ Pre-built itineraries you can replicate.
- ✅ Discover spots via an ad-free interactive map and a grid, full of original content and videos
- ✅ Use on the go, mobile-first, offline-friendly, and made for the road.
- ✅ Local insights you won’t find on Google or AI – all in one place!


