13 BEST Hikes in Yoho National Park

Looking for the best hikes in Yoho National Park? We share some of our favourite Yoho National Park hikes and details in this guide. On these hikes in Yoho, you’ll find high alpine passes lined with wildflowers, jagged peaks topped by glaciers, and a healthy dose of turquoise blue lakes.
If you’re visiting neighboring Banff National Park, Yoho is well worth a visit for some variety. As it lies on the opposite of the continental divide Yoho receives more precipitation, resulting in a greater variety of vegetation and some fantastic waterfalls. Heading here is the perfect addition to any Banff itinerary.
Best Yoho National Park Hikes
All Souls Route at Lake O’Hara

- Length: 12 km
- Duration: 5- 7 hours
- Elevation Gain: 794 meters
- Difficulty: Difficult
- Best Time To Go: July – September
- Parking: Lake O’Hara Bus Parking Lot
Few Canadian Rockies lakes are as photogenic or head-turning as the Lake O’Hara region in Yoho National Park. It’s probably one of the most spectacular areas in the world, but due to high demand for camping reservations and a bus system that limits capacity, only a lucky few get to visit this part of the park.

The All Souls Alpine Route goes along the base of Yukness Mountain and opens up to a jaw-dropping vantage point back out over the valley, Lake O’Hara, and Mount Odaray. It is a full look around all the best sights, including Lake Oesa and Opabin Plateau. A true highlight is to witness this area in September during the larch season.

Keep in mind that Lake O Hara requires special advance planning to access. If you aren’t lucky enough to score a camping reservation or bus ticket through the permit and lottery system, which sell out months in advance, you’re left with walking an 11km service road (one way) that the buses drive down. Adding 20 km to your hike is enough to deter all but the most dedicated.
Psst – There are so many amazing hikes around Lake O Hara, so please check out our full guide to see more.
Lake McArthur

- Length: 7.1 km (from Lake O’Hara)
- Duration: 3-4 hours (from Lake O’Hara)
- Elevation Gain: 369 m (from Lake O’Hara)
- Difficulty: Moderate
- Best Time To Go: July – September
- Parking: Lake O’Hara Bus Lost
Lake McArthur is a beautiful lake in Yoho’s Lake O Hara area. If you are already spending a few days hiking around Lake O’Hara, we highly recommend spending a day hiking McArthur Pass to this lake. Once back here, it’s unlikely you’ll see other people. This hike is a 7 km round trip from Lake O’Hara and is well worth the effort.
Iceline Trail


- Length: 20.8 km
- Duration: 6 – 8 hours
- Elevation Gain: 710 meters
- Difficulty: Difficult
- Best Time To Go: July – September
- Parking: Takakkaw Falls
The Iceline Trail is one of the great hiking trails in Yoho National Park. The 14.2 km trail is simply stunning, offering waterfalls, glacier views, glacier lakes, and beautiful wildflowers if you hit it in the right season.
This trail is rated as difficult, but we found it very easy, as there isn’t much elevation gain and no scrambling to overcome. It is long, though. Expect the Iceline to take you anywhere from 6 to 8+ hours.
Alternatively, if you don’t want to rush, there are campsites along the trail, though they’ll need to be booked in advance during the summer season.
Wapta Falls

- Length: 4.7 km
- Duration: 1 – 2 hours
- Elevation Gain: 126 meters
- Difficulty: Easy
- Best Time To Go: Year-Round
- Parking: Wapta Falls Parking Lot
Yoho is blessed with some of the best waterfalls in the Canadian Rockies, and it is tough to pick the most impressive. However, we’ll have to give it to Wapta Falls for the sheer width and amount of water. The waterfall is the full width of the Kicking Horse River, and the rushing water often produces rainbows when the sun is shining.
To reach the waterfall is an easy walk through the woods with only a small amount of elevation gain, so it should be appropriate for most hikers. It’s one of our favorite Yoho hikes if we want to add a bit of scenery when we’re in the park. After a morning hike, it’s also a great spot to relax in the afternoon/evening. If you are staying near the town of Golden, it’s one of the best hikes and things to do in Golden!
Emerald Basin

- Length: 9.2 km
- Duration: 2 -4 hours
- Elevation Gain: 242 meters
- Difficulty: Moderate
- Best Time To Go: June – October
- Parking: Emerald Lake Parking Lot
This is a popular hike as it’s easily accessible and has little elevation gain, so it’s suitable for beginner to intermediate hikers. We found the trail a little boring, and I enjoyed Takakkaw Falls and Wapta Falls more.
The trail’s highlight is toward the end as you reach the alpine meadow flanked by massive craggy cliffs, rushing waterfalls, and glaciers. It’s a quiet wilderness area away from the crowds often found around Emerald Lake.
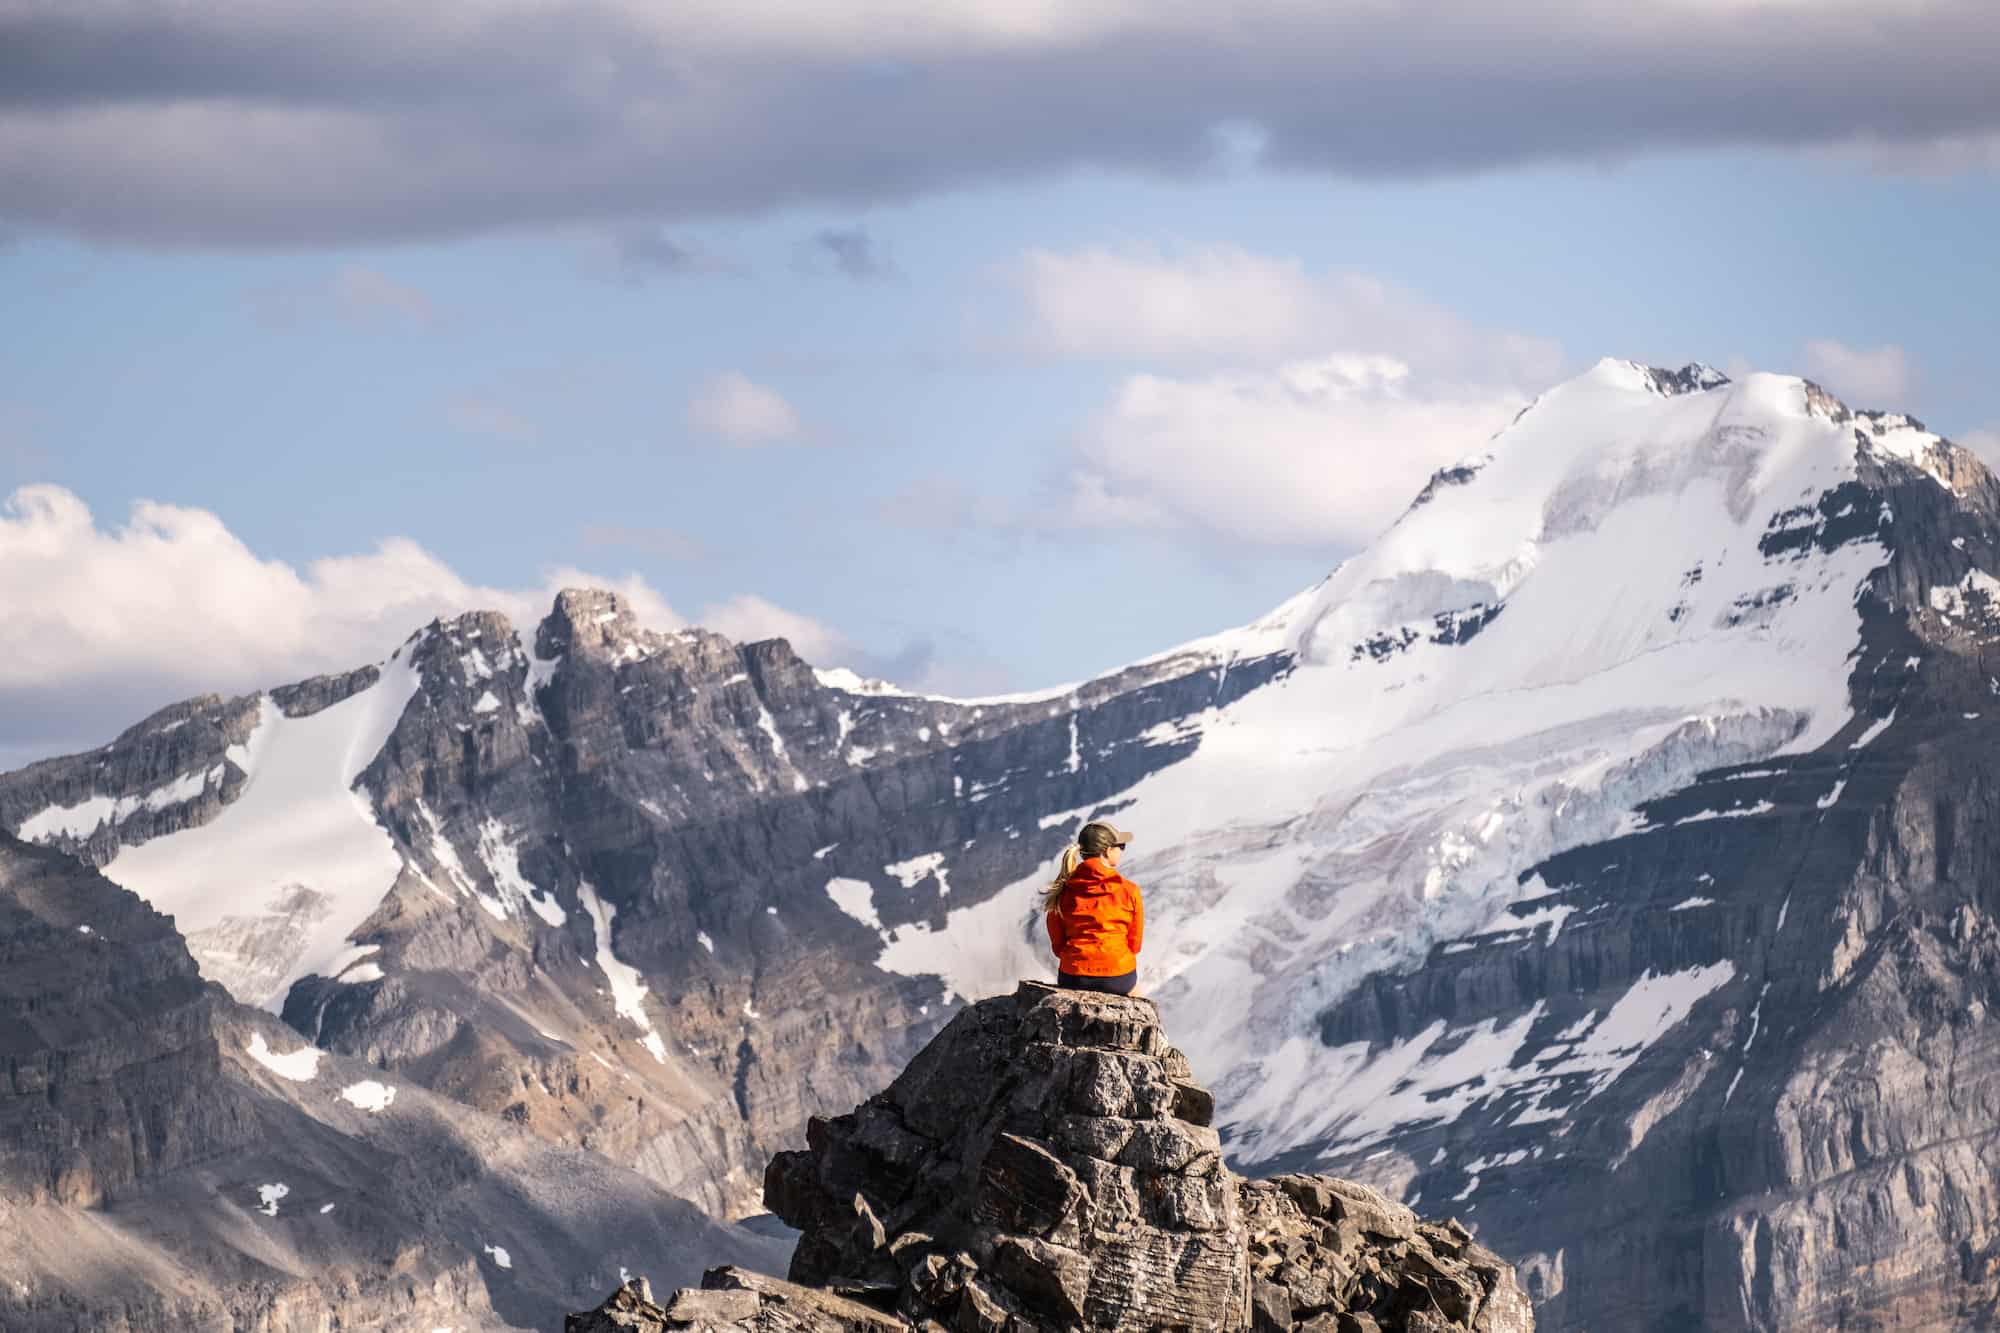
Paget Peak


- Length: 9.5 km
- Duration: 4 – 6 hours
- Elevation Gain: 1000 metes
- Difficulty: Easy Scramble / Difficult Hike
- Best Time To Go: June – September
- Parking: Wapta Lake Picnic Area
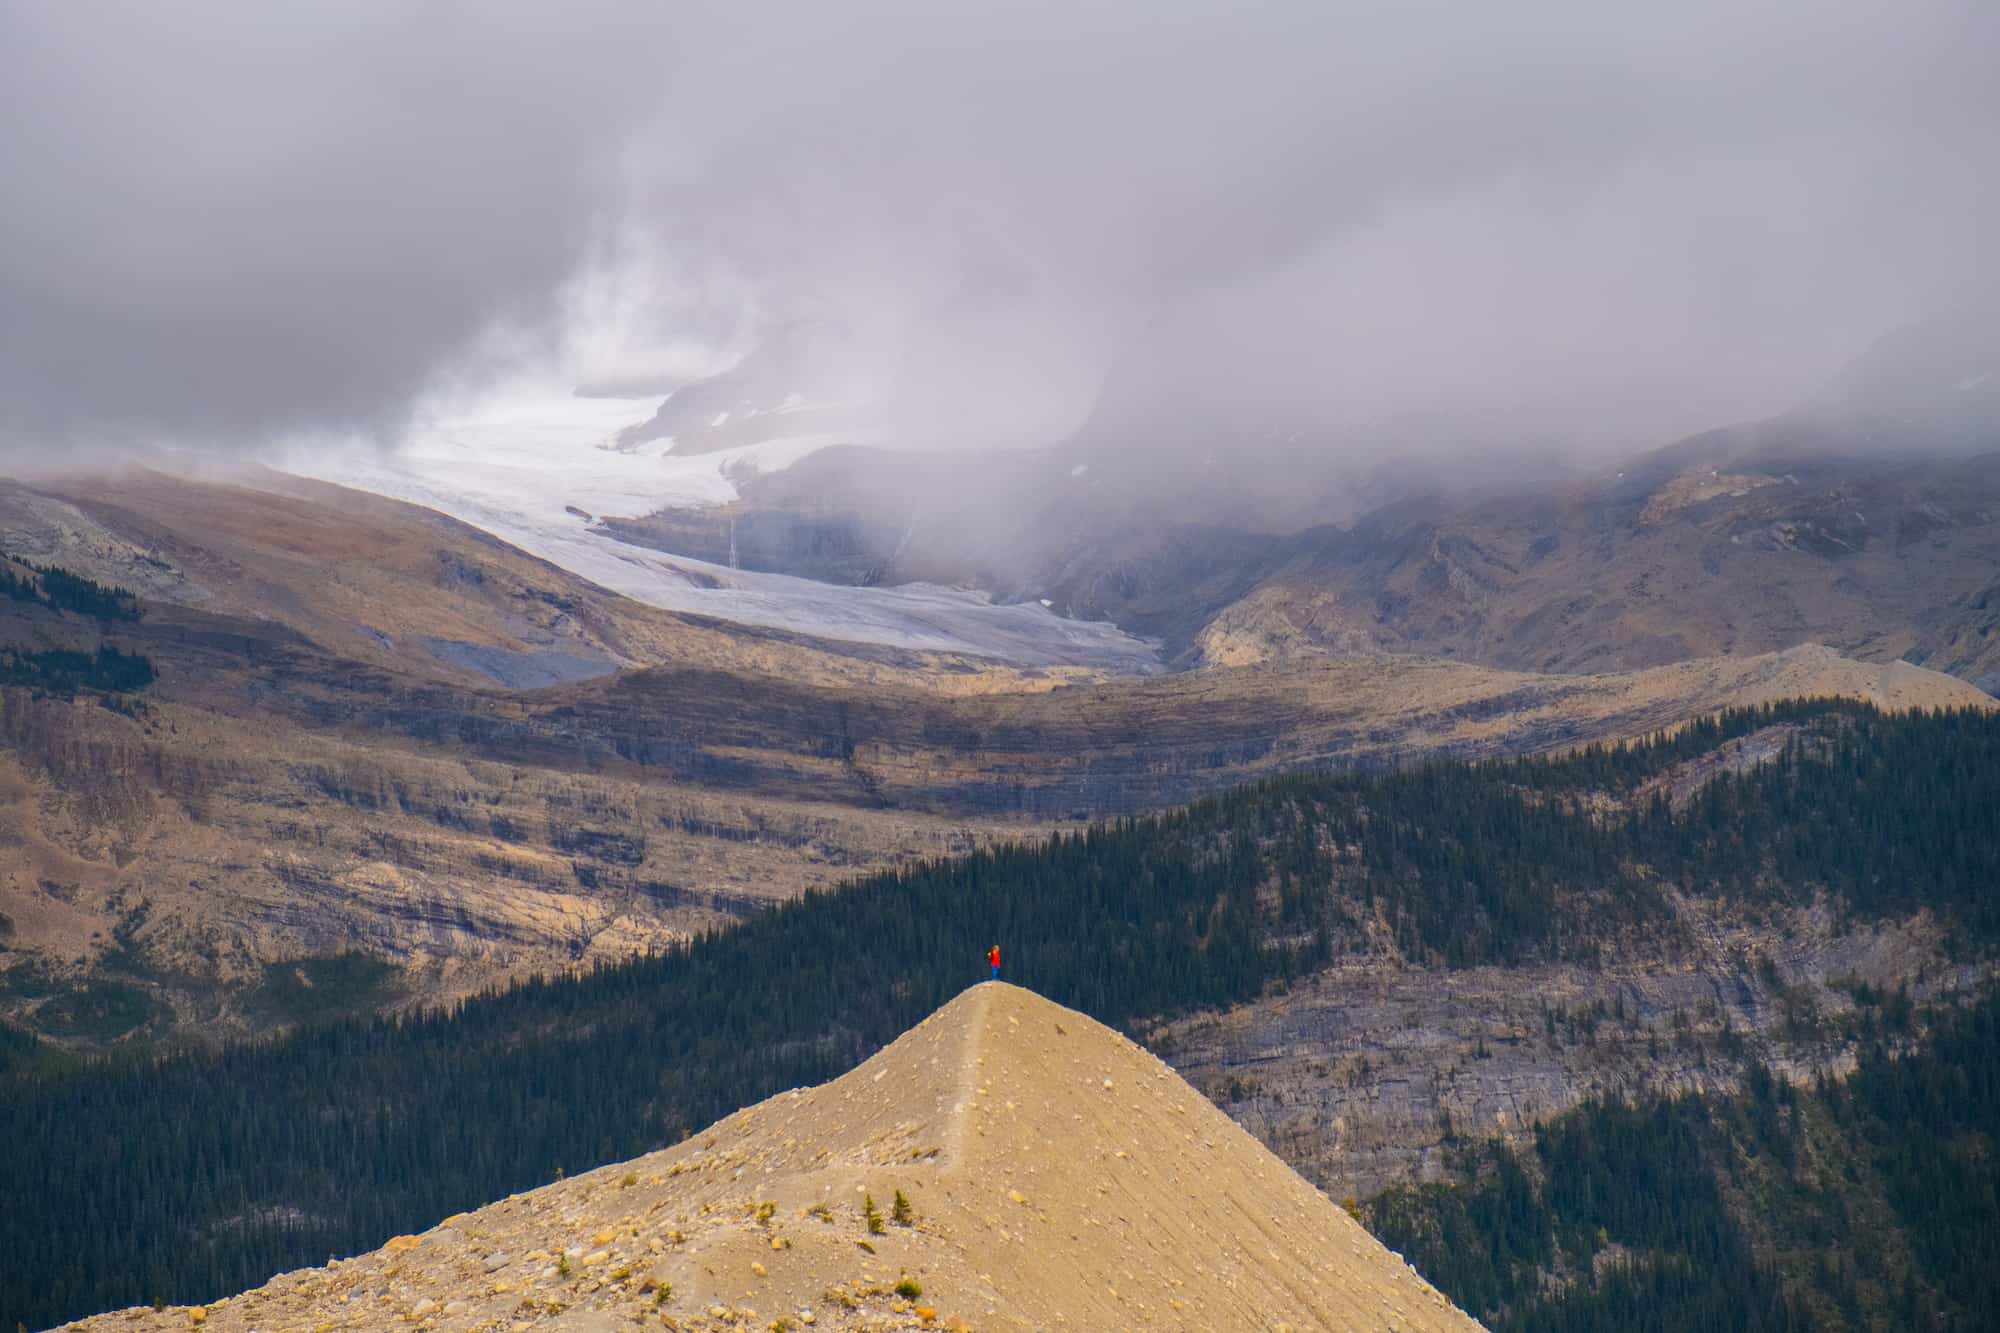
Paget Peak is often recommended to those who want to start scrambling in the Canadian Rockies. It’s an easy scramble, with nothing technical involved. It’s also one of the shorter scrambles you can complete in the Canadian Rockies, making it an excellent option for those who want to get out but don’t have an entire day.
Once at the summit, scramblers are provided incredible views of Kicking Horse Pass and the Great Divide Glacier. Most notable is the hanging glacier on Cathedral Mountain across the valley. It’s a phenomenal Yoho hike and one of our favorite bang-for-your-buck hikes in the Rockies.
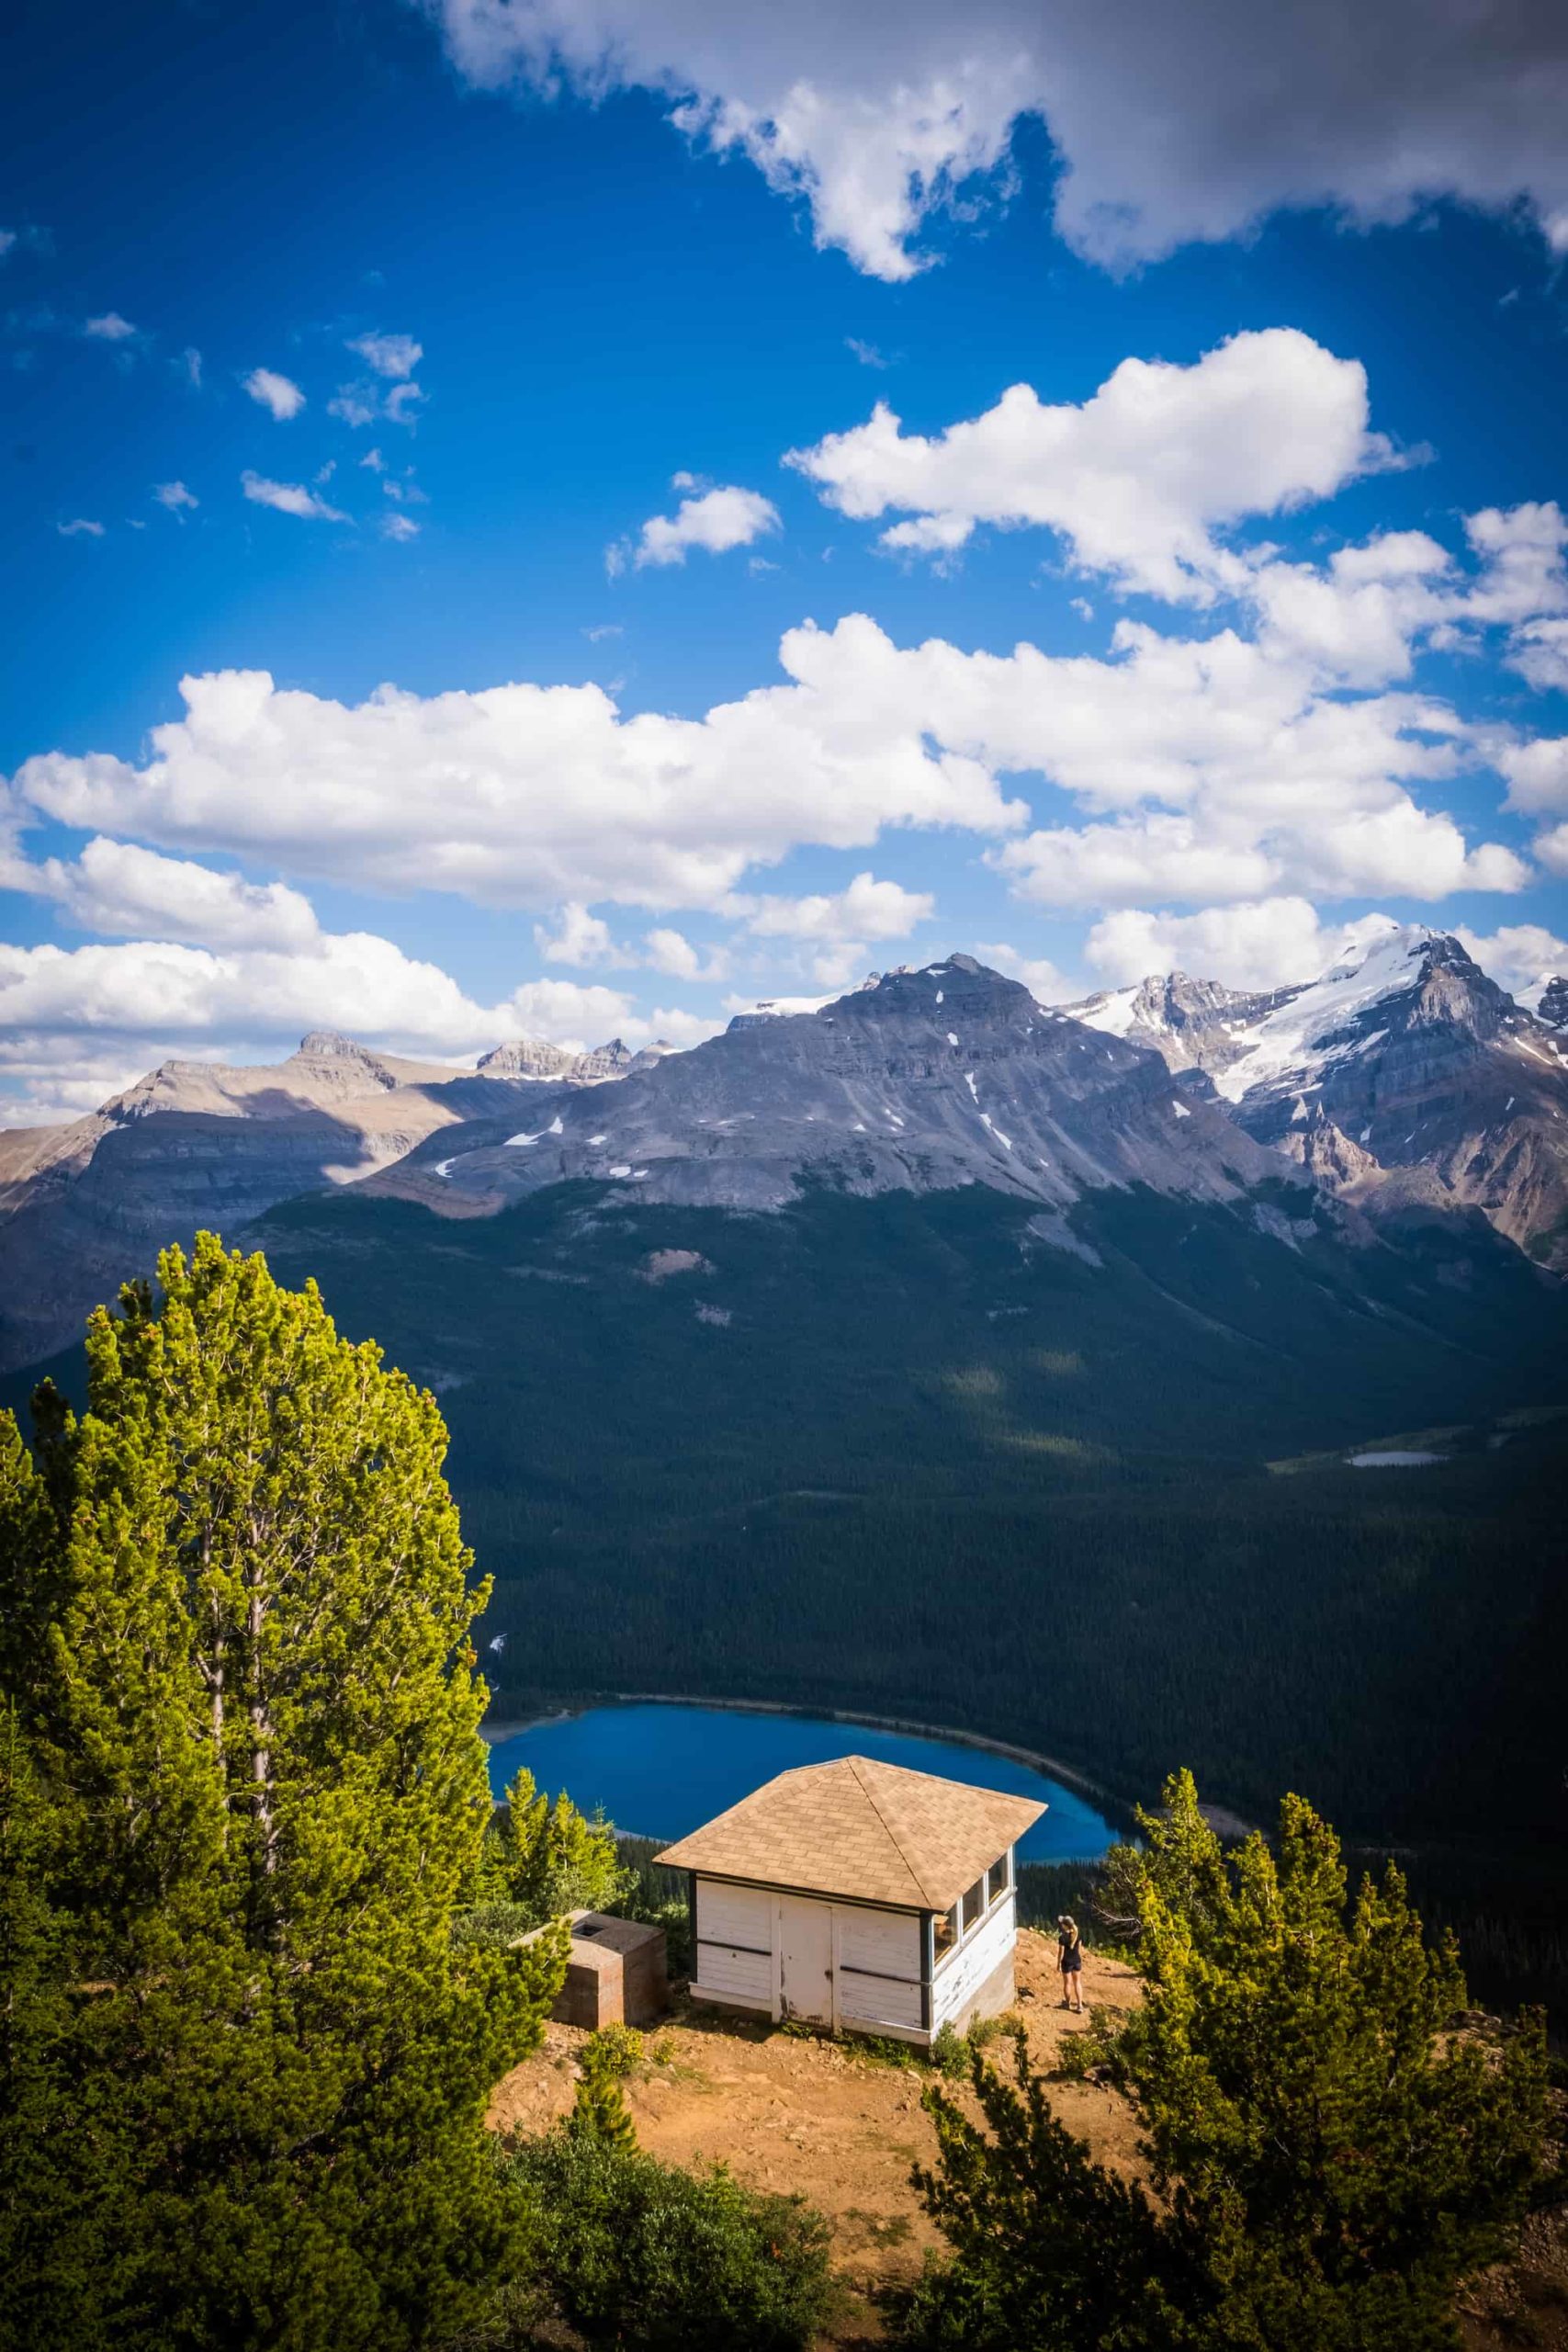
If you don’t want to climb Paget Peak full-on, you can always stop at the Paget Lookout. This is much shorter—3.6 km one way, with almost 400 meters of gain—and the hike is on an easy and well-maintained switchback trail.
Sherbrooke Lake

- Length: 6.2 km
- Duration: 1.5 – 3 hours
- Elevation Gain: 165 meters
- Difficulty: Easy
- Best Time To Go: May – September
- Parking: Wapta Falls Picnic Spot
Sherbrooke Lake is a stunner which sees fewer visitors than Lake Louise or Emerald Lake. This is for any hikers looking for some relaxation in the mountains. The trail moves through the woods for several kilometers until it reaches the lakeshore, and views open up to views of Mount Ogden and Mount Niles. Add Paget Peak or the Paget Lookout mentioned above for a more extended day from Sherbrooke Lake.
Emerald Lake Circuit

- Length: 5.1 km
- Duration: 1 -2 hours
- Elevation Gain: 50 meters
- Difficulty: Easy
- Best Time To Go: May – October
- Parking: Emerald Lake Parking
Emerald Lake is a stunning lake in Yoho and makes for a great family-friendly hike. It’s the largest lake in Yoho National Park, and when you see the color of the water, it’s easy to see where the lake received its name. The sparkling emerald color lake is a stunning sight and one of the premier attractions in Yoho National Park.
A walk around the lake is fantastic as you view the lake from different angles with a background of various mountains. The trail follows the lakeshore and moves in and out of the forest.
Yoho Valley Circuit

- Length: 28.5 km
- Duration: 8 – 11 hours
- Elevation Gain: 1,395 meters
- Difficulty: Difficult
- Best Time To Go: June – September
- Parking: Takakkaw Falls
This is our kind of hike, and the route we took when we checked off many of the Yoho hikes on this list in the Yoho Valley in one go! The massive circuit is a long day and requires an early start as you’ll cover over 28km and a lot of elevation gain. However, you can easily shorten your distance by planning and choosing your trail and route.
It follows along the Iceline trail at its onset, then continues to the Twin, Whaleback, and Laughing Falls, and crosses by the Stanley Mitchell Hut. Of course, if you don’t have the legs to cover this kind of ground, the hut and nearby campground are great places to get into the wilderness for some camping.
The most challenging part of this is the scree slog up Whaleback Mountain. This is one of the easier scrambles in the area, but its long approach means it’s not as easy as you may expect, and if you want to shorten your hike through the Yoho Valley, you can omit Whaleback Mountain and enjoy the Iceline, Little Yoho Valley and Yoho Valley Trail Loop at 21.7 kilometers.
Laughing Falls and Twin Falls

- Length: 15 km
- Duration: 3-6 hours
- Elevation Gain: 750 meters
- Difficulty: Moderate – Difficult
- Best Time To Go: June – September
- Parking: Takakkaw Falls Campground
Laughing Falls is a popular moderate hike in Yoho and takes you through some pleasant forests and meadows before reaching Twin Falls(depending on which way you tackle this trail). Most impressive is the trail leads close to the top of the falls for a wild view.
The hike to Laughing Falls is easy and starts at the same parking area as Tak Falls. The trail to Laughing Falls is a 7.8km round trip trail with only 128 meters of elevation gain. The trail ends at the base of Laughing Falls, an impressive sight. There’s also a Yoho backcountry campground here. If you want more of a day, then continue to…
Twin Falls! The trail to Twin Falls via Laughing Falls is gorgeous. If you like big impressive waterfalls, you’ll want to continue hiking. You’ll have to continue around 6.5 km from Laughing Falls to Twin Falls on simple terrain.

As you may have guessed, Twin Falls are two rushing 80-meter waterfalls – side-by-side twins, as you can say! If you get to see both, consider yourself lucky. When we visited in mid-September, only the right fall was flowing (see photo). If you want to see both falls, it’s best to do this hike as a loop so you can also stop at Marpole Lake. However, if you do the loop, be prepared for a moderate boulder field to hike.
If you feel extra adventurous, you can continue to summit Whaleback Mountain, an easy scramble and the easiest summit in Little Yoho Valley. (Big day that requires experience hiking in the Rockies)
Takakkaw Falls

- Length: 1.4 km
- Duration: 30 minutes
- Elevation Gain: 36 meters
- Difficulty: Easy
- Best Time To Go: May – June
- Parking: Takakkaw Falls Parking Lot
Any visitor to the park needs to add this waterfall to their Yoho itinerary. Takakkaw Falls is not much of a hike for most, but it hits the spot if you want something short and sweet. Many of the best hikes in Yoho also leave from the parking lot and provide views of the falls. This Canadian Rockies waterfall is spectacular, and at a height of 373 meters, it’s the second tallest waterfall in Canada.
The name Takakkaw Falls even comes from the Cree word meaning “wonderful.” It’s a dizzying sight that can be seen throughout the valley, and it reaches its peak in the early spring/summer when the heavy snow begins to melt. Though it’s important to note that Tak Falls is only accessible when the Yoho Valley Road opens in Mid June.
Burgess Shale Fossil Hike

- Length: Varies
- Duration: Varies
- Elevation Gain: Varies
- Difficulty: Moderate to Difficult
- Best Time To Go: June – September
- Parking: Varies
High in the mountains of Yoho, the Burgess Shale fossils are some of the oldest evidence of complex life on Earth. These fossils are over 500 million years old! Several hike options include the Stanley Glacier, Walcott Quarry, and Mount Stephen. You must go on a guided hike to see the fossils, which must be paid for. See more information here.
Hiking Gear We Recommend

It’s tough to beat the comfort and stability of the Speedgoat. A more technical shoe would be the Salomon X Ultra.

It’s always jacket season in the Rockies. We always carry a down jacket on every adventure.

This nifty clip from Peak Design secures a camera to my backpack strap for easy reach. No more digging in the backpack!


A lightweight backpack is perfect for most hikes in the Rockies. We suggest keeping it simple and carrying the basics.

In case of emergencies, we carry a GPS-enabled emergency beacon. Solid for regular backcountry users.
Do You Need a Parks Pass for Yoho National Park?

You need a National Parks Pass to visit Yoho National Park. You can purchase a Parks Canada pass at any park gate. Yes, Parks Canada employees check, and you can get a ticket if you don’t have one. You’ll hit a Parks Canada gate right after Canmore along the Trans-Canada Highway if coming from Calgary before entering Banff.
Parks Canada Day Pass Rates
| Pass Type | Rate |
|---|---|
| Adult | $12.25 |
| Senior | $10.75 |
| Youth (up to 17) | Free |
| Family/Group (7 Persons) | $24.50 |
Or you can buy them from Parks Canada in advance online. If you’re staying in the Rockies for more than a few days, I highly recommend a Discovery Pass. A Parks Canada Discovery Pass, which gets you entrance to all Parks Canada destinations for the year, is only $151.25 for a family.
Again, day passes are $11.00 per person, so depending on how many days you are staying and whether you plan to go elsewhere, like Banff, Waterton, or Jasper, you may want to consider the Discovery Pass.
Parks Canada Discovery Pass Fees (Yearly Pass)
| Pass Type (Yearly Pass) | Rate |
|---|---|
| Adult | $83.50 |
| Senior | $71.50 |
| Youth (up to 17) | Free |
| Family/Group (up to 7 Persons) | $167.50 |
Wildlife Awareness in Yoho National Park
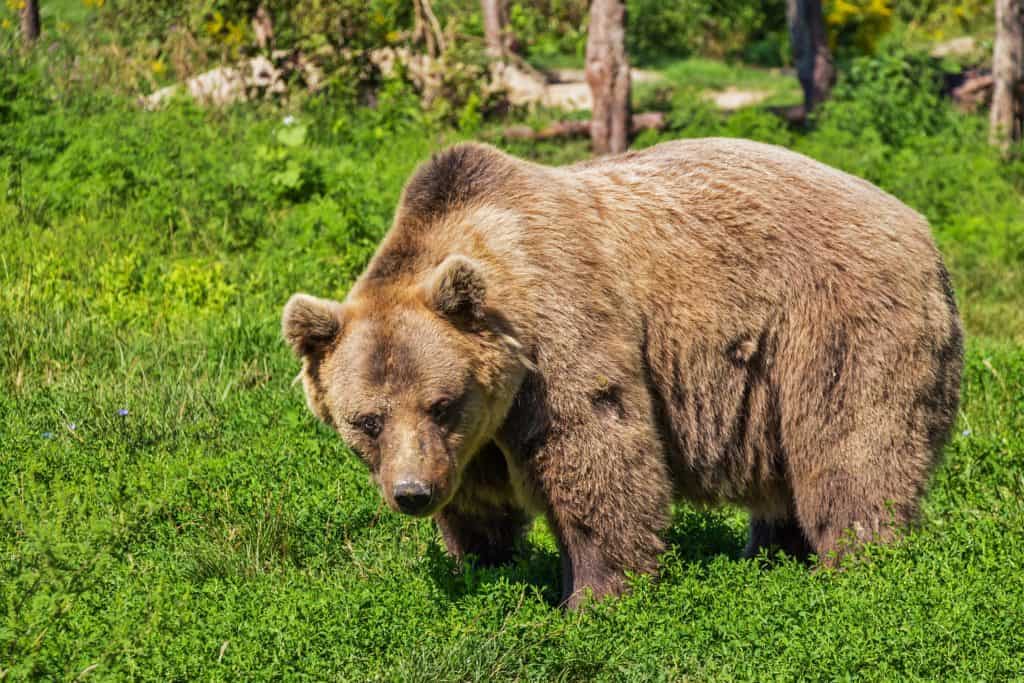
You should practice proper wildlife awareness on any hikes in the Canadian Rockies. The region frequently sees black bears, grizzly, moose, coyotes, and cougars. They are all a potential threat to humans, and we should reduce our impact on their natural lives.
You must have bear spray before hiking or walking in the Canadian Rockies. Remember that the bear spray is worthless if it’s in your pack. You’ll need to be able to grab this in two seconds or less in an emergency. We wear our bear sprays on our hips. Always check the park websites for wildlife information (Parks Canada) and check again for notices at the trailhead.
When on the trail, make noise by banging hiking poles, talking, whistling, clapping, or singing. This is particularly important around blind bends and corners. You’re through the deep woods during these times, and it’s prime time to sneak up on a bear.
Once you’re at any summit, you’re safer as you can see wildlife from afar, but still, don’t let your guard down, and keep the bear spray on you just in case. If you’d like to learn more, see below.
Advice on Hiking in Yoho

- If this is your first time hiking in the Rockies, take a conservative approach – read our post for beginner hikers in Banff too. Pick an adequate hike for your fitness, plan for plenty of time, pack water and food, and don’t be afraid to turn around.
- For long Yoho hikes, set a turnaround time at the departure. Any time we set out for an objective, I determine a time at which we need to turn around to arrive at the parking lot or campsite by dark. I recommend not hiking in the dark as it’s easy to get lost, and it’s not fun in bear country.
- Always carry bear spray if you plan to hike in the park. We carry ours in the neighborhood, and bears have been known to stroll through town and busy parking lots. Always practice wildlife awareness when you’re on a trail, and please give animals space.
- In regards to times, keep in mind your mountain fitness — it’s much different than the gym. The low end of the times in this post is a constant fast pace uphill with little to no breaks and a brisk pace downhill. Most hikers should plan for a middle-of-the-road time with the estimated duration.
- A Garmin In-Reach can save your life as most of these hikes are in areas with no cell service. We’ve thankfully never had to use ours, but having it on a hike gives us peace of mind in case something ever goes wrong, and we have to call Search and Rescue.
What to Wear On a Hike?

The most basic principle of what to wear hiking is layering. Anyone that has spent time in the wilderness or mountains can speak to the fact your temperature can fluctuate a lot on a hike. You can quickly start off cool at the mountain base and get hot as soon as you begin moving.
Nearby Hikes

Of course, there are so many more hikes in nearby Banff and tons of exploring to be had. We rank our favorite hikes around the park and share all of the details in this guide to experience the best of the best. You’ll find on these hikes high alpine passes lined with wildflowers, jagged peaks topped by glaciers, and a healthy dose of turquoise blue lakes.
Hopefully, this helped you determine which Yoho National Park hikes to check out! If you have any other questions, leave a comment or see our Canadian Rockies travel guide for more articles about photography spots, lakes, hikes, and everything else.

If you’re heading to Western Canada soon make sure to check out our interactive map with over 450 spots to help you plan!
- ✅ Hiking trails with links to trails & insider tips you won’t find online
- ✅ Our favorite photo spots, scenic views, waterfalls, must-visit attractions, and even swimming holes
- ✅ Our favorite restaurants, coffee shop & local spots that many skip.
- ✅ We add as we explore ourselves. That means we add new points every month!
- ✅ Map works with Google Maps!
- ✅ Pre built itineraries you can replicate,
- ✅ Discover spots via an ad-free interactive map and a grid, full of original content and videos
- ✅ Use on the go, mobile-first, offline-friendly, and made for the road.
- ✅ Local insights you won’t find on Google or AI – all in one place!


